Making your own plant food from bits and pieces you'd normally throw away is one of the most satisfying parts of gardening. It's a simple, surprisingly effective way to nourish your plants, improve your soil, and cut down on waste. Think of it as giving your garden a proper, healthy, chemical-free boost using things you already have in your kitchen.
Why Bother with Homemade Plant Food?
More and more gardeners are ditching the shop-bought fertilisers and looking to their kitchens instead. This isn't just about saving a few quid; it's a fundamental shift towards creating a healthier, more vibrant garden. When you make your own plant food, you know exactly what’s going into your soil, nourishing your vegetables, flowers, and houseplants without any synthetic surprises.
You’re essentially getting back to basics, creating a natural partnership with your garden. By using nature's own cycles, you build rich, fertile soil that supports strong, resilient plants.
What’s in It for Your Garden?
Opting for homemade fertilisers brings a whole host of benefits that go well beyond just feeding your plants. You're not just gardening; you're cultivating a more mindful and rewarding space.
- Serious Cost Savings: Let's face it, commercial fertilisers can really add up, especially if you've got a decent-sized plot. Using kitchen scraps and other household bits and bobs can slash your gardening budget.
- Less Kitchen Waste: All those banana peels, eggshells, and used coffee grounds are packed with nutrients. Instead of sending them to landfill, you can turn them into gold for your garden. It’s a practical, no-fuss way to live a little greener.
- Better Soil in the Long Run: Synthetic fertilisers can often harm the soil over time. Natural concoctions like compost tea, on the other hand, are teeming with beneficial microbes. These tiny powerhouses improve soil structure, helping it hold water and air, which is exactly what plant roots need to thrive.
The real magic of homemade plant food is that it feeds the soil, not just the plant. Healthy soil is the absolute cornerstone of a thriving garden, and natural fertilisers build that health season after season.
A Greener Choice for Today's Gardener
Making your own plant food is a perfect fit for a more sustainable lifestyle. Here in the UK, using kitchen scraps and garden clippings to make things like nettle tea or banana peel fertiliser is a brilliant, eco-friendly alternative to buying plastic bottles of feed. It's all part of a bigger movement towards sustainable horticulture, where we’re recycling nutrients and cutting back on synthetic chemicals. It's a return to traditional, time-tested methods, driven by both environmental awareness and the simple economics of it all.
This small change can make a huge difference, especially when you're just getting started. If you're keen to create a flourishing veg patch from the ground up, understanding how to start a vegetable garden with natural inputs is the best way to set yourself up for success.
What Are Your Plants Actually Hungry For?
Before you start raiding the kitchen cupboards, it's a good idea to understand what your plants are trying to tell you they need. Think of yourself as a chef for your garden; you can't create a balanced meal without knowing the basic food groups.
For plants, it all boils down to three primary macronutrients. You've probably seen them listed as N-P-K on commercial fertiliser bags. These are the absolute cornerstones of healthy plant life.
Getting to grips with what they do is the first step in becoming a bit of a plant detective. It lets you spot what's missing and whip up the perfect homemade plant food to fix the problem.
The Big Three Nutrients Explained
Each of these core elements plays a distinct and vital role. Once you know their functions, you can start tailoring your homemade recipes to meet specific needs, whether that's encouraging more flowers or helping your houseplants develop lush, green leaves.
Nitrogen (N) is all about leafy growth. It’s the key ingredient for producing chlorophyll, the compound that makes leaves green and drives photosynthesis. A nitrogen-rich feed is fantastic for plants where the foliage is the main event—think spinach, lettuce, and your lawn.
Phosphorus (P) is the powerhouse. It’s absolutely essential for developing strong, healthy root systems, which are the foundation for everything else. It also plays a massive part in encouraging flowering, fruiting, and seed production.
Potassium (K) acts like the plant's personal trainer and immune system rolled into one. It helps regulate water, withstand stress from drought or disease, and ensures all internal processes run smoothly. It’s crucial for overall sturdiness and health.
Understanding the roles of N, P, and K completely changes your approach. Instead of just "feeding" your plants, you start nourishing them with purpose, responding directly to what they need at each stage of their growth.
To make this even clearer, here’s a quick reference table showing where you can find these nutrients right in your own home.
Key Nutrients and Their Homemade Sources
This table is a great starting point for matching common household waste with your garden's needs.
Supplying Nitrogen Naturally
Nitrogen is often the nutrient plants need most, especially during the peak growing season. Luckily, it’s one of the easiest to supply using ingredients from around the house and garden.
Simple solutions like a comfrey or nettle 'tea' are brilliant sources of nitrogen, providing between 1-3% nitrogen content by volume. This makes them incredibly useful for home gardeners and reduces the need for synthetic chemicals.
Of course, beyond the big three, plants also need a supporting cast of micronutrients like calcium and magnesium, but in much smaller quantities. Things like crushed eggshells or a sprinkle of Epsom salts can easily provide these.
Even if you're just starting out, grasping these basics is key. For those new to the world of indoor gardening, our guide on indoor plants for beginners can help you pick the right green companions for your home.
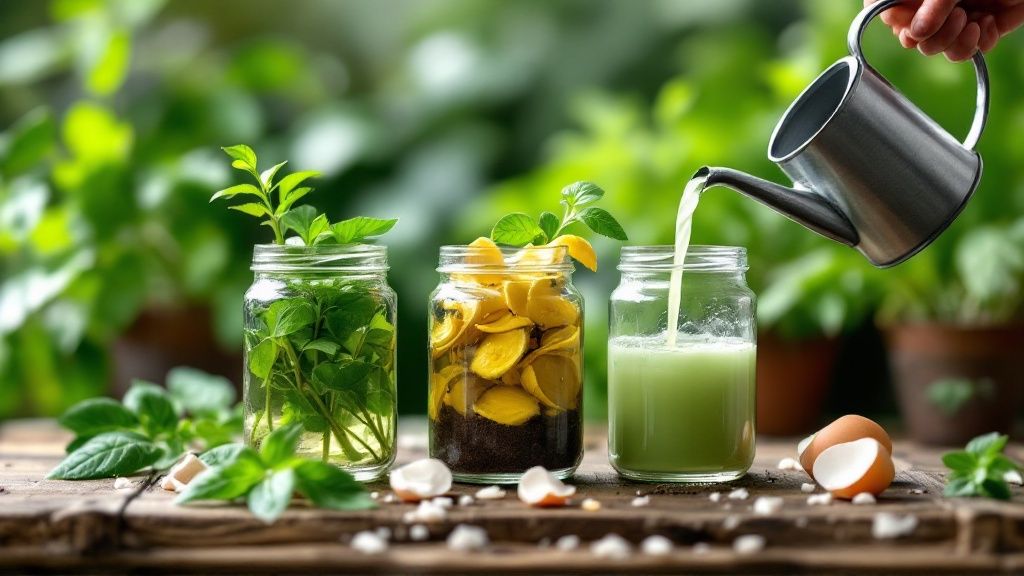
Easy Liquid Fertilisers You Can Make Today
Right, this is where we get our hands dirty and have some real fun. Creating your own liquid feeds is one of the most satisfying jobs in the garden. You're essentially turning everyday waste into a powerful, fast-acting tonic for your plants. Because they're in liquid form, the nutrients are absorbed almost instantly, giving your garden a quick pick-me-up right when it needs it most.
I'm going to walk you through three of my all-time favourite recipes. Each one is incredibly simple and designed for a specific job, whether you're trying to grow lush, leafy greens or get more flowers and fruit. The best part? You probably have everything you need already lying around the garden or in your kitchen.
These are the liquid homemade plant food recipes I turn to again and again throughout the season to keep everything thriving.
The Nitrogen Powerhouse: Nettle Tea
Stinging nettles might be a gardener's nemesis, but they're also a goldmine of nitrogen. This makes them the perfect ingredient for a potent liquid feed that leafy greens and brassicas go absolutely mad for. Think of it as a superfood smoothie for your kale, spinach, and lettuces.
Making it is a doddle. First, get your gloves on and grab a bucket. Find a good patch of nettles and chop up a big bunch—it’s best to do this before they set seed—and stuff them into the bucket. Top it up with water, give it a quick stir, and pop a lid on loosely.
Now, you just have to be patient. Let the mixture steep for around two to four weeks. I’ll warn you now, it will get incredibly smelly, but that’s just a sign that all the good stuff is brewing.
Once it’s ready, simply strain the liquid to get rid of the plant bits (which can go straight onto the compost heap). You’ll be left with a dark, rich liquid that needs to be diluted at a ratio of about 1 part nettle tea to 10 parts water. Use this to water the base of your nitrogen-hungry plants every two or three weeks during their main growing spell.
Don't let the pong put you off; it's a tiny price to pay for the incredible results. After just a couple of feeds, you'll notice your leafy greens taking on a deep, healthy colour and growing with real vigour.
This powerful tea is fantastic for encouraging strong, leafy growth, especially for veg where the foliage is the prize. It’s also brilliant for giving young plants a robust start in life.
Banana Peel Tea for Flowers and Fruit
If you're dreaming of bigger rose blooms or a bumper crop of tomatoes, banana peel tea is the trick you need up your sleeve. Banana peels are absolutely loaded with potassium, which is the key nutrient plants use for flowering and developing fruit. It’s a beautifully simple way to give them exactly what they’re craving.
The process couldn't be easier. Every time you finish a banana, just toss the peel into a large jar and cover it with water. Keep adding peels and topping up the water for a few days until the jar is full.
Let it all sit and steep for about a week. You’ll see the water turn a brownish colour as all that lovely potassium and other minerals leach out from the peels. When you're ready to use it, strain out the solids and dilute the liquid with an equal amount of fresh water.
I use this potassium-rich drink on my flowering plants and fruiting vegetables every couple of weeks, applying it directly to the soil. It’s a game-changer for heavy feeders. It's also a wonderfully gentle option if you're just learning how to grow herbs indoors and don't want to hit them with anything too strong.
Balanced and Beneficial Compost Tea
Think of compost tea as a probiotic drink for your garden’s soil. It’s less about delivering a massive hit of one particular nutrient and more about introducing a whole army of beneficial microorganisms. These tiny microbes are the unsung heroes of the garden; they improve soil structure, help plants unlock existing nutrients, and can even help keep diseases at bay.
To brew your own, you just need a bucket and a cloth sack—an old hessian bag or even a pillowcase works perfectly.
- Start by filling your sack with a few generous shovels of good, mature compost from your heap.
- Tie the top of the "tea bag" securely and pop it into your bucket.
- Fill the bucket with water, making sure the compost bag is completely submerged.
Let it steep for 24 to 48 hours. It’s a good idea to give it a stir every now and then to get some air into the mix. The water will turn a light brown, a bit like weak tea. This brew is perfect to use as is, with no need for dilution. Just water it around the base of everything—veg, flowers, shrubs—to give your entire garden a healthy, microbial boost.
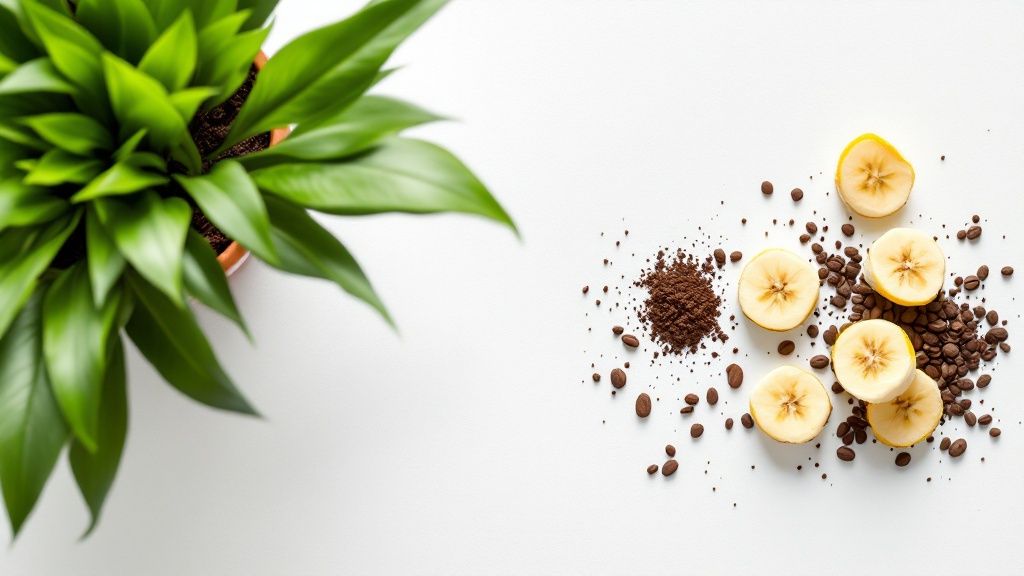
Turning Kitchen Scraps into Solid Plant Food

While liquid feeds give your plants a quick hit of nutrients, some of the best homemade plant food comes from solid kitchen scraps. Think of these as slow-release fertilisers. They break down gradually, enriching your garden soil over the long haul.
This is what no-waste gardening is all about: turning everyday rubbish into a valuable resource for your plants. You’re not just giving them a temporary boost; you're building a foundation of fertility that will pay dividends for seasons to come.
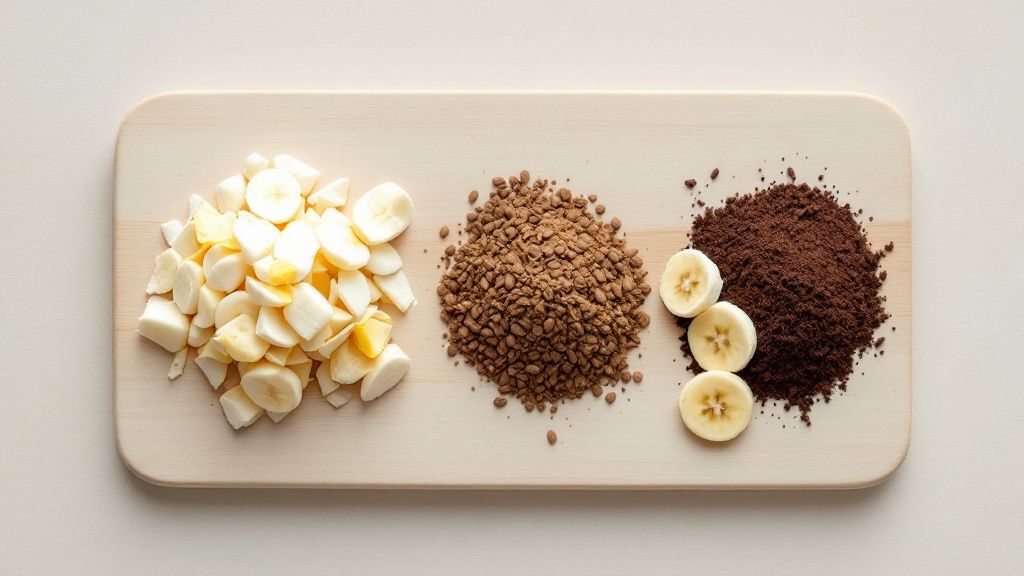
Let's look at two of my favourite kitchen-scrap fertilisers you can start using right away.
The Eggshell Trick
Crushed eggshells are a gardener's secret weapon, particularly if you’ve ever battled the dreaded blossom-end rot on your tomatoes or peppers. That frustrating black, mushy spot at the bottom of the fruit is a clear sign of a calcium deficiency.
Luckily, eggshells are full of calcium carbonate, the very mineral plants need to build strong cell walls. Adding them to your soil provides a slow, steady supply of this crucial nutrient exactly where the plants can access it.
Getting them ready is simple. Just give your used eggshells a quick rinse and let them air dry until they’re completely brittle. Then, crush them into a fine powder. A pestle and mortar is ideal, but a rolling pin or even a coffee grinder gets the job done. The finer you can get the powder, the faster the calcium will be available to your plants.
When you're planting out your tomatoes, just mix a good handful of the crushed shells into the planting hole. For plants already in the ground, you can sprinkle the powder around the base and gently scratch it into the soil surface.
This isn't just an old wives' tale; it's a practical, zero-cost way to solve a specific problem. You're using something you'd normally bin to deliver targeted nutrition right to the root.
Putting Coffee Grounds to Work
Used coffee grounds are another fantastic resource from the kitchen, but you need to know how to use them properly. They’re a great source of nitrogen, which, as we’ve learned, is essential for promoting lush, green foliage.
The key thing to remember is that coffee grounds are acidic. This makes them absolutely perfect for acid-loving (ericaceous) plants that thrive in soil with a lower pH. I'm talking about blueberries, rhododendrons, azaleas, and hydrangeas—a light sprinkle of coffee grounds can really help them flourish.
A word of caution: don't go overboard. A thick, wet layer of fresh grounds can clump together and form a barrier that stops water from getting through to the soil. The best approach is to work a thin layer into the top inch or so of soil around the base of your plants.
An even better method, in my opinion, is to add the grounds straight to your compost bin. Mixing them into your compost pile helps balance the carbon-to-nitrogen ratio and enriches the final product with valuable nutrients. This way, the goodness is distributed in a more balanced form that all your plants can benefit from. If you're keen to explore more ways of dealing with garden waste, especially if you're short on space, learning about composting for small gardens is a great place to start.
How to Get the Best Results From Your Homemade Feeds
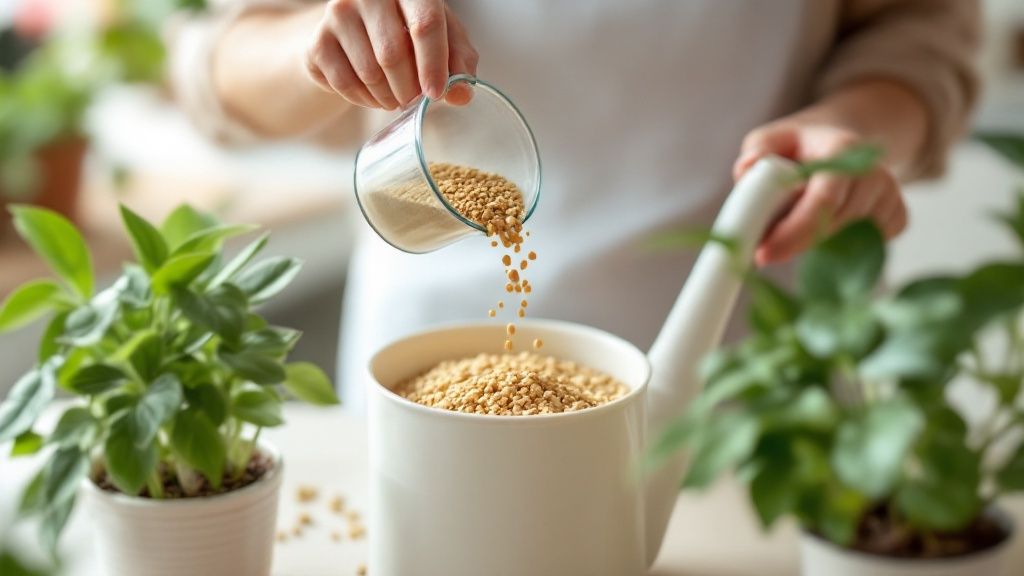
Whipping up your own potent plant food is one of the most rewarding parts of gardening, but the real magic happens when you apply it. Knowing just how and when to use these natural fertilisers is the key to unlocking their full potential, ensuring your plants get every last drop of goodness without any stress.
The best piece of advice I ever received was to feed the soil, not just the plant. Think of it this way: a thriving soil ecosystem, buzzing with microbial life, is what truly makes nutrients available to your plant's roots. This approach builds fertility for the long haul, rather than just giving a quick, temporary boost.
Timing and Technique Are Everything
Believe it or not, the time of day you apply your liquid feeds can make a massive difference. I always recommend doing it either early in the morning or later in the evening. If you try to feed your plants in the midday sun, the heat can cause the liquid to evaporate before it sinks in, and you risk scorching the leaves if any splashes on them.
I make a point of watering the soil around the base of the plant, avoiding the foliage as much as possible. This gets the nutrients straight to the root zone where they’re needed most and helps keep fungal diseases at bay. For solid fertilisers like crushed eggshells, I find it’s best to gently scratch them into the top few centimetres of soil to kick-start the decomposition process.
A little and often is the mantra here. Regular, small feeds during the growing season are far better for your plants than a single, massive dose that can shock their system.
Learning to Read Your Plant's Signals
Your plants are always telling you what they need; you just need to learn their language. Keeping a close eye on their leaves and how they're growing is the most reliable way to tell if your feeding routine is hitting the mark. A good gardening calendar is also brilliant for getting ahead of the game and knowing when certain plants are about to have a growth spurt.
Here are a few tell-tale signs to look out for:
- Underfeeding: Yellowing leaves (chlorosis), especially on the older, lower parts of the plant, are a classic sign. Stunted growth and a disappointing lack of flowers or fruit are also big clues.
- Overfeeding: Yes, you can have too much of a good thing! Look for weak, leggy growth, burnt-looking leaf tips, and sometimes a crusty white salt build-up on the soil surface.
By spotting these signals early, you can adjust what you're doing and give your plants exactly what they're crying out for.
A Greener Way to Build Soil Health
Embracing homemade plant food is about more than just nurturing your own patch; it’s about fostering a more sustainable garden ecosystem. The impact can be huge. Consider regions in England like the East, where nitrogen application has historically been as high as 112 kg/ha. Using natural alternatives like compost tea helps bring that number down, improving soil structure and cutting the risk of environmental issues like nitrate run-off.
With the UK's chemical fertiliser market hitting £411.5 million in 2023, the shift towards these DIY solutions shows a real appetite for greener, more hands-on gardening. You can read more about these UK fertiliser market trends on Statista.
Got Questions About Homemade Plant Food? You're Not Alone.
Getting started with homemade plant food is a fantastic step, but it’s completely normal to have a few questions pop up. After all, you’re becoming your garden's personal chef! Let's clear up some of the most common queries I hear from fellow gardeners.
Will Homemade Plant Food Attract Pests?
This is probably the number one concern, and a fair one at that. The thought of tipping food scraps onto your garden can sound like you’re putting out a welcome mat for rats and other critters. The good news is, if you do it right, it's rarely an issue.
Liquid feeds, like a good compost tea or nettle brew, are soaked up by the soil and plant roots so quickly they don’t really hang around to attract pests. The real trick is to avoid using any meat, dairy, or oily scraps in your garden recipes. Those are the things that will bring unwanted guests to the party.
For solid additions like coffee grounds, just gently scratch them into the top inch or so of soil instead of leaving a pile on the surface. Problem solved.
How Can I Tell if It’s Actually Working?
Patience is key here. Unlike the quick, almost shocking, jolt of growth you get from chemical fertilisers, the results from natural feeds are more subtle and build over time. But once you know what to look for, the signs of a happy, well-fed plant are easy to spot.
You'll start to see a deeper, more vibrant green in the leaves – a classic sign of good health. Look for stronger stems that stand up tall, more flower buds appearing, and eventually, better-tasting fruit. The real transformation, though, is happening out of sight as your soil gets darker, richer, and more crumbly.
The best evidence is simply a plant that looks full of life. When your soil is healthy, your plants are naturally tougher and better at fending off pests and diseases on their own. You'll probably find you're reaching for the bug spray a lot less.
Can I Use These Recipes on My Indoor Plants?
You certainly can! Most of these homemade fertilisers are great for houseplants, you just need to tweak the recipe a bit. Remember, a pot is a closed system, and your indoor plants' roots are a bit more sensitive.
As a general rule of thumb, I always dilute any liquid feed to about half the strength I’d use in the garden. It’s also worth thinking about the smell. That pungent nettle tea might be fine for the allotment, but something more subtle like banana peel water or a properly aerated compost tea is a much kinder choice for your living room!
What's the Best Way to Store My Liquid Feeds?
Storing your liquid brews properly keeps them potent. Once you’ve made a batch, pour it into a container you can seal. An old plastic milk jug or a bucket with a tight-fitting lid is perfect.
Just be sure to keep the lid slightly loose, or open it to ‘burp’ the container once a day. The fermentation can create a bit of gas pressure, and nobody wants a fizzy fertiliser explosion in their shed!
Keep it in a cool, dark place and try to use your homemade plant food within a week or two. After that, the beneficial microbes start to die off, and it won't be nearly as effective.