Before you even think about picking up a hammer, the most important part of creating a gallery wall happens in your head. It’s all about shaping a vision. A truly great gallery wall isn’t just a random collection of pictures; it’s a personal exhibition that tells a story about you, your taste, and your life.
This early planning is what separates a chaotic jumble from a cohesive, professional-looking display. It's where you make the intentional choices that will guide every decision that follows, from the art you find to the frames you choose.
Crafting Your Personal Gallery Wall Vision
Define Your Gallery Wall Style
First things first, what’s the overall feeling you're going for? Do you love the clean lines and symmetry of a modern look, or does a more free-spirited, collected vibe feel more like you? Your personal style is the bedrock of your gallery wall's layout and mood.
A few popular styles might get your ideas flowing:
- Minimalist Grid: Think matching frames and precise, even spacing. This creates a clean, symmetrical look that’s perfect for modern spaces. It works beautifully with a related series of images, like black-and-white photos or a set of botanical prints.
- Eclectic Salon: Inspired by the grand art-filled salons of Paris, this style is all about a dense, organic arrangement. You mix art sizes, frame styles, and orientations to create something that feels deeply personal and can easily evolve over time.
- Linear or Stair-Step: This layout follows a strong horizontal or diagonal line, making it a brilliant choice for hallways, the space above a sofa, or climbing up a staircase. It gives you structure but still leaves room for a mix of frame sizes.
Thinking about these styles helps you set some ground rules for your project, which makes the actual arranging process so much easier down the line.
Find a Unifying Theme or Colour
A unifying element is the secret ingredient that pulls a gallery wall together, making it feel cohesive rather than cluttered. This common thread could be a theme, a colour palette, or even something as simple as the frame material. It’s what connects all the different pieces into one harmonious design.
Your theme could be as straightforward as family portraits or as abstract as "moody landscapes." Or, you could tie everything together with colour. Maybe every piece features a hint of blue, or you decide on classic black frames to ground a collection of vibrant, colourful art.
The goal isn't to make everything match perfectly. It's about creating a visual connection that lets the eye flow smoothly from one piece to the next, making the entire collection feel like a single work of art.
Don't forget the wall colour itself—it plays a huge part. A neutral background lets your art take centre stage, while a bold wall colour can become an integral part of the gallery’s overall palette. If you're a bit stuck, our guide on how to choose paint colours has some really helpful direction.
It's a trend that's really taken off in the UK. In fact, recent research shows that 61% of people prefer paintings and prints for decorating their living spaces, with modern and abstract styles leading the way. This just goes to show how gallery walls have become a go-to for making a home feel truly personal.
To help you nail down these foundational ideas, take a moment to consider the core elements of your plan.
Core Elements of Your Gallery Wall Vision
This quick reference guide will help you define the key components of your gallery wall before you start.
Taking a few minutes to think through these points gives you a solid blueprint to work from, making the entire process feel less daunting and more creative.
Pinpoint the Perfect Location
Finally, where is this gallery wall going to live? The location is just as important as the art itself. You need to think about the room's purpose, the furniture you already have, and how the light changes throughout the day. A gallery wall above a sofa or a headboard can really anchor a room, while a display in a hallway can turn a simple walkway into a destination.
Think about sightlines. Where will you be looking at it from most often? As a rule of thumb, make sure the central point of the whole arrangement hangs at eye level—which is typically around 145-152 cm (57-60 inches) from the floor. Also, watch how the light hits the wall during the day. You’ll want to avoid hanging your art in direct, harsh sunlight, which can cause the colours to fade over time.
Sourcing Art and Selecting the Right Frames

This is the fun part—where your gallery wall shifts from a project into a genuine expression of who you are. Sourcing your art is a creative hunt for pieces that really resonate, and it certainly doesn't have to break the bank. In my experience, the most captivating gallery walls are the ones that feel collected over time, telling a real story about the people who live in the home.
You can forget the pressure to fill your wall with expensive, original paintings. A truly personal collection is built from a mix of meaningful and often very affordable sources. Just look for things that spark a memory or bring you a bit of joy.
Finding Art That Tells Your Story
Often, the best place to start the search for art is right inside your own home. Personal items carry an emotional weight that no mass-produced print can ever quite match. Your gallery wall should be a reflection of your life, your passions, and your journey.
Think about incorporating some of these personal and budget-friendly pieces:
- Treasured Family Photos: Dig out those old black-and-white photos of your grandparents or finally print your favourite candid snaps from a recent holiday.
- Children's Artwork: A child's colourful drawing, when framed beautifully, is transformed into a whimsical, cherished centrepiece. It adds so much character.
- Meaningful Mementos: What about that ticket stub from an unforgettable concert? Or a postcard from a trip that changed your life? Even a beautiful piece of fabric or wallpaper can become art.
- Digital Prints: Websites like Etsy are absolute goldmines for affordable, printable art. For just a few pounds, you can download a high-resolution file and have it printed locally. This gives you complete control over the final size and paper quality.
Building a collection this way is also a brilliant approach to affordable interior design, proving that a beautiful home is about curation, not cost. When you mix these elements, you create a display that feels authentic and gathered over time, not just bought in one go.
Anything can be art. A cocktail napkin from a first date, an ultrasound scan, a pressed flower from your garden. If it means something to you, it has a place on your wall.
Once you’ve gathered your collection, it’s time to think about frames. This is just as important as the art itself, because the frames are what will ultimately define the overall feel of your gallery wall.
Choosing the Perfect Frames
The frames you choose will either unify your diverse collection into a cohesive whole or celebrate its eclectic charm. There’s no right or wrong answer here—it all comes back to the style you decided on in your initial planning.
If you’re after a seamless, organised look, stick with matching frames. Using all black, all white, or all-natural oak frames creates a really clean, polished aesthetic. This works especially well for structured grid layouts and lets the art do all the talking.
On the other hand, if you’re aiming for a more relaxed, bohemian vibe, mixing up your frame styles is the way to go. Don't be afraid to combine different materials like wood, metal, and painted finishes. Charity shops and flea markets are fantastic places to find unique and inexpensive frames. A quick coat of spray paint can easily unify mismatched finds if you want a consistent colour scheme without losing that lovely textural variety.
The Impact of Mounts and Colour
Never underestimate the power of a good mount (sometimes called a mat board). That simple border of space between the art and the frame can completely change the final look. A wide, generous mount can make a tiny piece of art feel much more substantial and sophisticated. It gives the artwork "breathing room" and really draws your eye into the image.
When it comes to mount colour, a crisp white or a soft off-white is a classic choice that works with almost anything. For a more custom-designed feel, try choosing a coloured mount that picks up a subtle shade from within the artwork itself—it’s a simple trick that looks incredibly professional.
The frame colour also plays a huge role.
- Black frames offer a classic, graphic contrast that makes the colours in your art really pop.
- White frames create a light, airy, and modern feel, perfect for a fresh, clean look.
- Wood frames add warmth and a natural, organic texture to the wall.
- Metallic frames (like gold or silver) can bring in a touch of glamour and elegance.
Think about how all these elements work together. You might decide to mix different tones of wooden frames for a warm, rustic feel, or pair sleek black frames with wide white mounts for that timeless, professional gallery look. It’s this careful consideration of frames and mounts that elevates a simple collection of pictures into a stunning, curated gallery wall.
Getting the Layout Just Right

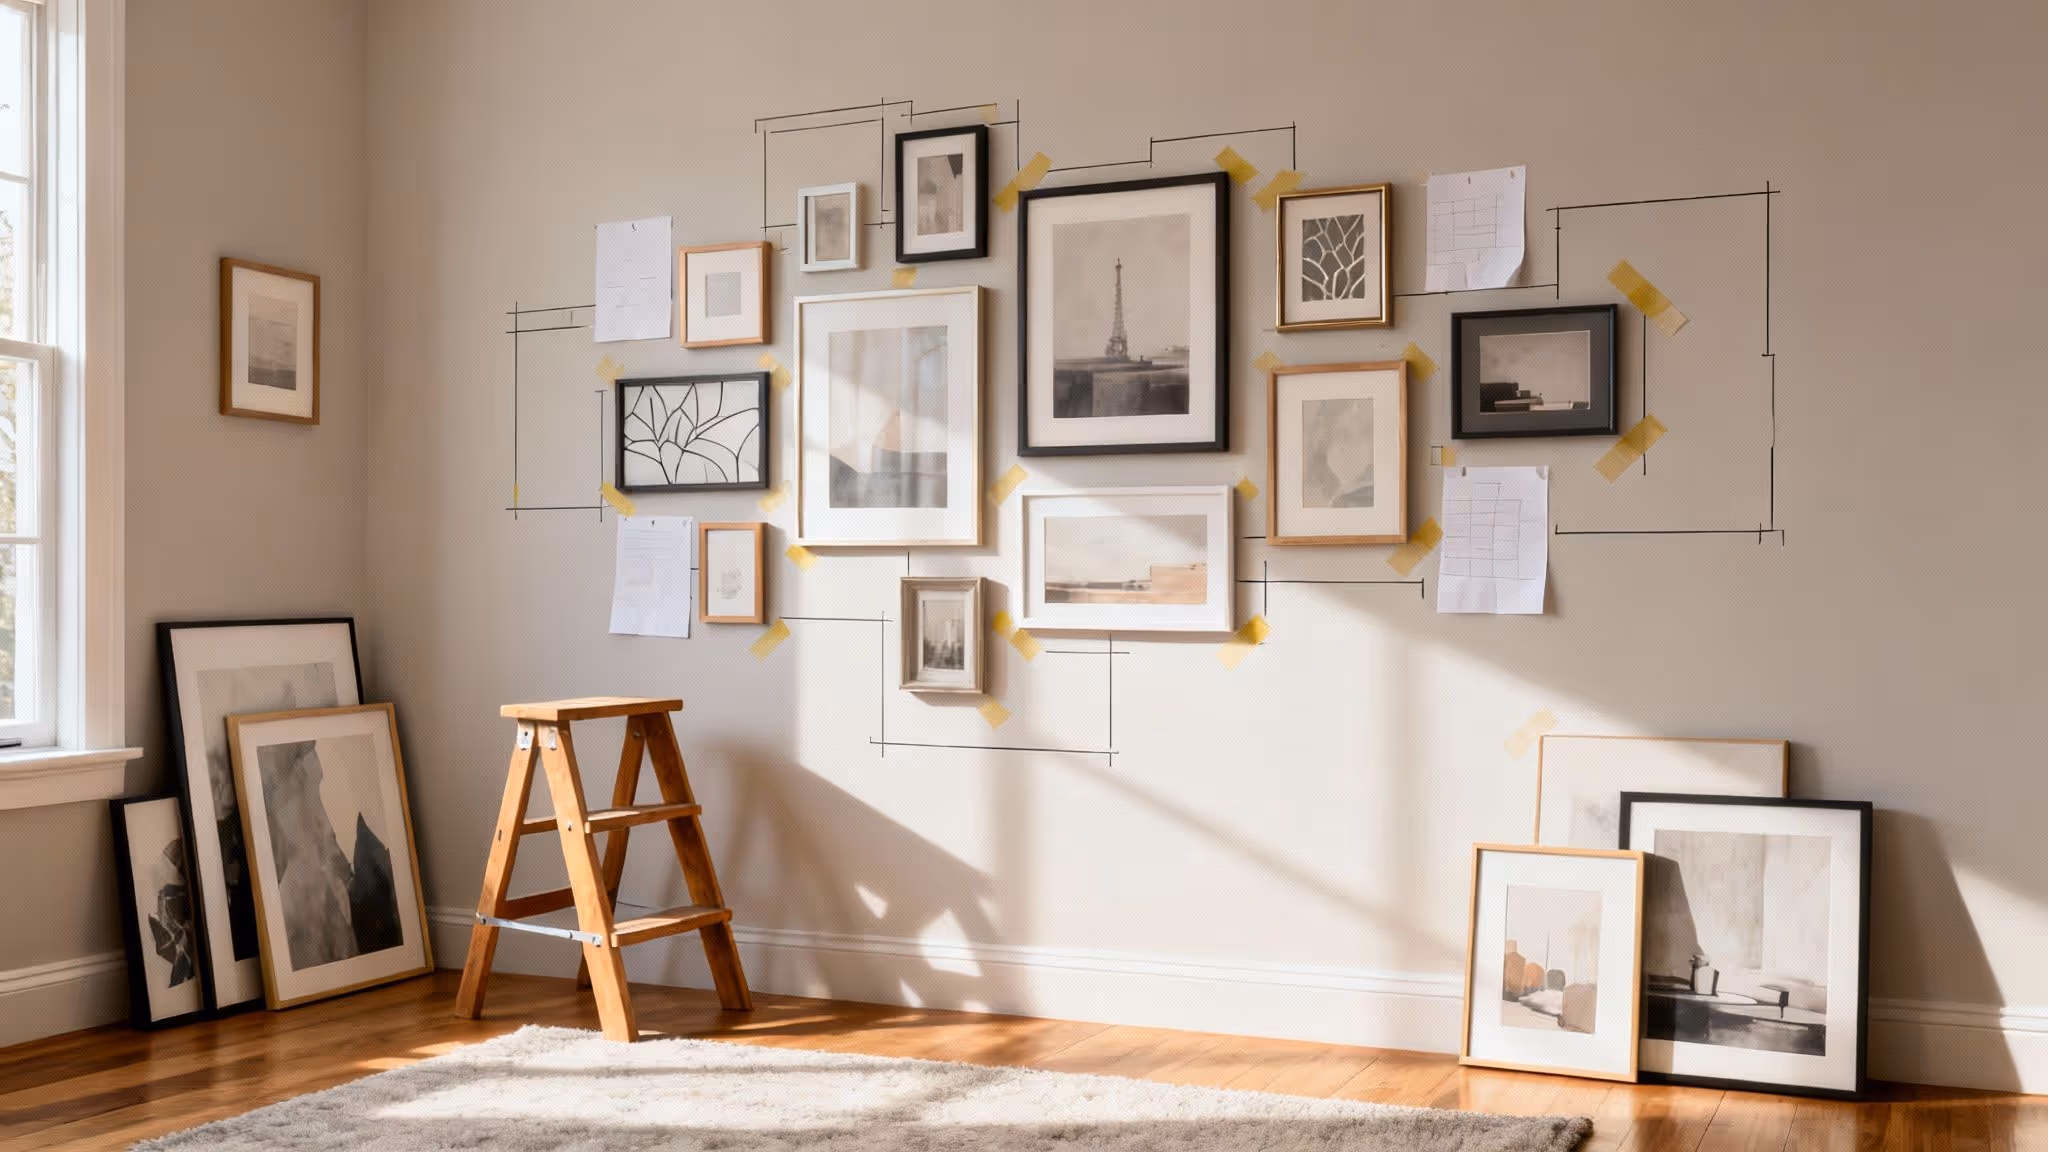
Here’s a little secret from my years of styling homes: the magic of a show-stopping gallery wall isn't just in the art. It's all in the layout. A thoughtful arrangement creates a sense of balance and flow, transforming a group of individual pictures into one cohesive, powerful statement.
The best part? You can get this composition absolutely perfect before a single nail touches your wall. My go-to, foolproof method is to create paper templates. Just trace each frame onto some old newspaper or Kraft paper and cut them out. Using a bit of painter's tape, you can stick these stand-ins to the wall, rearrange them endlessly, and even live with the layout for a day or two. It’s the ultimate risk-free way to visualise the final result.
Finding Your Gallery Wall Style
Before you even think about taping, it helps to have a particular layout style in mind. The shape of your wall and the character of your art collection will often steer you towards the right arrangement. Think of these as a starting point—a blueprint you can make your own.
A few classic designs are popular for a reason; they just work.
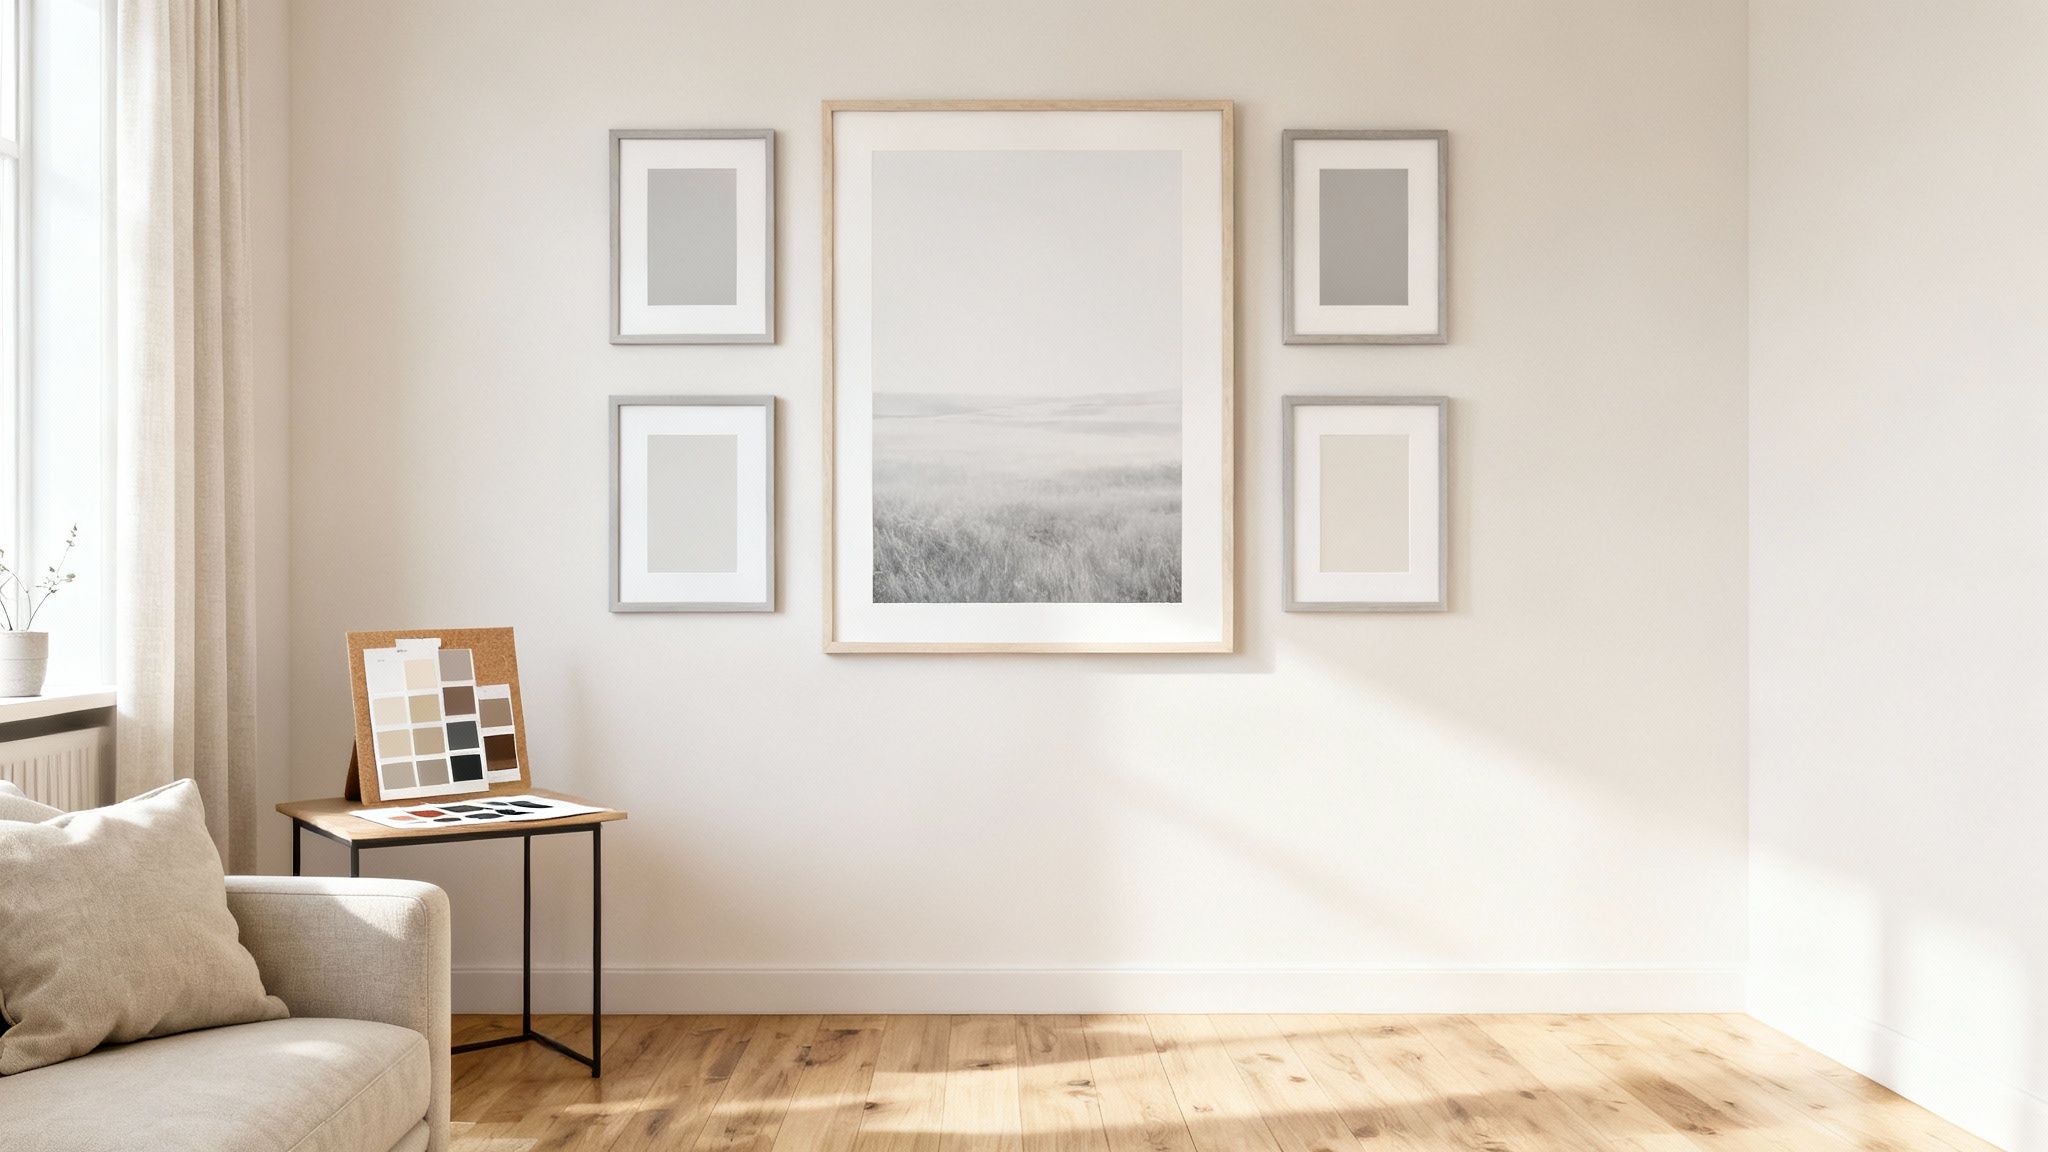
- The Classic Grid: This is for the lovers of order. It's a structured, symmetrical layout that uses frames of the same size and orientation, all spaced evenly. The result is a clean, formal look that works wonders for a series of related prints or photos.
- The Organic Salon Hang: If your style is more eclectic, this free-flowing approach is for you. It involves mixing different frame sizes, styles, and orientations to build a dense, collected-over-time feel. It’s also incredibly forgiving and perfect for a collection that’s always growing.
- The Stair-Step Design: Just as it sounds, this layout follows the diagonal line of a staircase. By arranging your frames to ascend with the steps, you create a beautiful, dynamic display that makes a feature out of a purely functional space.
Of course, your gallery wall doesn't exist in a vacuum. The arrangement needs to complement your furniture and the overall feel of the room. We’ve got some great advice on this in our guide on how to arrange furniture in a living room that can really help tie everything together.
Start with a "Hero" Piece
Whether you’re aiming for a neat grid or a sprawling salon hang, every great gallery wall has an anchor. This is usually your largest or most striking piece of art, and it acts as the visual foundation for the whole arrangement.
Resist the urge to hang your anchor piece dead in the centre. That can make the layout feel a bit static and predictable. Instead, try placing it slightly off-centre—a little to the left or right, or maybe a bit higher or lower. This simple trick forces the eye to dance across the entire collection instead of just settling in the middle.
With your anchor in place, you can begin to build outwards. I often place the second-largest piece diagonally from the first to establish a sense of balance right away. From there, it's a matter of filling the gaps with your smaller works, creating a lovely rhythm of different shapes and sizes.
A rookie error I see all the time is hanging art way too high. The centre of your entire gallery wall should be at eye level, which for most people is around 145-152 cm (57-60 inches) from the floor. This makes the art feel grounded and properly connected to the room’s furnishings.
The Finishing Touches: Spacing and Balance
The invisible force holding your gallery wall together is the spacing. The gaps between your frames are just as important as the frames themselves. If the spacing is all over the place, even the most beautiful collection can look messy and accidental.
As a general rule, aim for a consistent gap of 5-8 cm (2-3 inches) between each frame. For a very formal grid layout, you'll want this to be precise. For a more organic salon style, you can be a little more relaxed, but keeping the spacing relatively uniform will always look more polished.
The final piece of the puzzle is visual weight. You don't want all your large, heavy, or dark-framed pieces clustered on one side. Scatter them throughout the layout to create a feeling of equilibrium. At the same time, mix in both horizontal and vertical orientations to keep things interesting. By carefully balancing colour, size, and orientation, you’ll create a display that feels dynamic, harmonious, and expertly curated.
Hanging Your Gallery Wall Like a Pro
https://www.youtube.com/embed/ck3HZmE9Ks0
With your layout planned and perfected on the floor, it's time for the most exciting part: getting everything up on the wall. This is where your vision truly comes to life.
Don't be nervous about this stage! A little bit of prep and a methodical approach are all it takes to hang every single piece perfectly level and exactly where you want it. It's all about translating your plan from the floor to the wall with confidence.
Getting Your Toolkit Ready
Before you hammer in that first nail, it's a good idea to gather your essentials. Having everything to hand makes the whole process smoother and much less stressful. You don't need a massive workshop, just a few key items.
Here’s a quick checklist of what I always have ready:
- A spirit level: This is your best friend for a professional-looking finish. A small one is great for individual frames, but a longer one can be a real help for aligning a whole row.
- Tape measure: Essential for checking your distances from the ceiling, floor, or pieces of furniture to make sure the whole arrangement feels grounded.
- Pencil: For making light, easy-to-erase marks.
- Hammer: A good old-fashioned hammer for traditional picture hooks.
- Your paper templates: These are the real secret weapon here! You'll be using them to mark exactly where each nail goes.
Transferring Your Layout to the Wall
This is where your paper templates prove their worth. The idea is to transfer the hanging point from the back of the frame onto the wall, completely eliminating any guesswork.
Start by looking at the back of each frame. Find the sawtooth hanger or picture wire and measure how far down it sits from the top of the frame. Now, grab the matching paper template and mark that exact spot on the paper.
Once all your templates are marked, tape them back onto the wall in your final layout. Use your spirit level to make sure every piece of paper is perfectly straight.
Once all your paper templates are in position, simply hammer your nail or drill your screw directly through the hanging mark you made on the paper. Then, just tear the paper away. The nail is left in the perfect spot.
This little trick is my go-to for a flawless hang. It ensures the finished gallery wall is an exact match to the layout you spent so much time perfecting on the floor.
Choosing the Right Hanging Method
The hardware you use really depends on your walls, how heavy your frames are, and whether you're allowed to make holes. If you're renting, you'll probably lean towards damage-free options, whereas heavier, more valuable art needs something a bit more robust.
It’s never been easier to find art for our homes, and this has completely changed how we go about curating our walls. The market for affordable prints has boomed, especially here in the UK, where sales of prints under £5,000 have shot up by 79% since 2020. With so many people creating gallery walls, knowing the best way to hang them is more important than ever.
To help you decide what’s right for your home, I've put together a quick comparison of the most common options.
Choosing the Right Hanging Method
A comparison of common hanging methods to help you decide which is best for your home and artwork.
Making the right choice here ensures your art isn't just displayed beautifully but is also hung securely for years to come. For example, the right hanging method can also help your art stand out in a darker space. If you're working with a room that lacks natural light, have a look at our guide on how to brighten a dark room for more tips.
Creative Ideas to Really Make Your Wall Display Pop

So, you’ve got your gallery wall beautifully arranged and hung. Job done? Not quite. A truly exceptional display is one that feels alive, breathing personality into your space. Now’s the time to push beyond simple prints and frames to create something dynamic and deeply personal.
Thinking outside the box is what turns a nice arrangement into a stunning focal point. It's all about layering in texture, dimension, and unexpected character that tells a richer story about you and your home.
Mix in Some Texture and Dimension
A flat wall of pictures is classic, but adding a few three-dimensional objects is a complete game-changer. It breaks up the sea of rectangles and adds a sculptural quality that makes the whole collection far more engaging.
This is your chance to get creative and finally display some of those interesting bits and bobs that are usually tucked away in a drawer. You'd be amazed how well everyday objects can blend into an artistic display, adding both depth and personal meaning.
Try mixing a few of these into your collection:
- Mirrors: A small, ornate mirror or a cluster of vintage hand mirrors can bounce light around the room and add a little sparkle.
- Tiny Floating Shelves: These are perfect for propping up a small plant, a favourite ceramic pot, or a little sculpture, giving your wall literal depth.
- Ceramic Plates: A single decorative plate, whether it’s modern or antique, introduces a lovely circular shape that contrasts beautifully with angular frames.
- Textural Objects: Think about woven wall hangings, a bunch of antique keys, or even a piece of architectural salvage. Anything with a unique texture can become art.
Get Creative With Placement
Who says a gallery wall has to live on one flat surface? Some of the most memorable displays I've seen are the ones that play with the architecture of the room in surprising ways. When you break free from the standard centre-of-the-wall spot, you create a custom, high-end feel.
Think about how your collection can flow through your home, leading the eye on a little journey. This approach turns your gallery wall from a simple feature into an experience that feels perfectly woven into the fabric of the space. For more inspiration, you can find a whole host of unique gallery wall ideas to get your imagination going.
A gallery wall doesn't have to be a perfect rectangle. Letting it grow organically into the nooks and crannies of your home is what gives it a truly custom and lived-in feel.
Why not try one of these placements?
- Wrap it Around a Corner: This is a favourite of mine. Extending your collection from one wall onto the adjacent one creates a really compelling visual effect that draws you right into the space.
- Integrate with Furniture: Let your art interact with a bookcase or a console table. You could have frames leaning on shelves while others hang on the wall just above, blurring the lines between furniture and art.
- Fill an Awkward Nook: That small, odd bit of wall in your hallway or on the landing? It’s the perfect spot for a concentrated, jewel-box-style gallery wall.
Light It Up
The right lighting can completely transform your gallery wall. It takes it from a lovely daytime feature to a dramatic, atmospheric display in the evening. A dedicated picture light is the ultimate finishing touch, highlighting the colours and details in your art while casting a warm, ambient glow.
Not long ago, picture lights were a costly job for an electrician. Thankfully, the market is now full of fantastic rechargeable, battery-operated LED options that are a breeze to install yourself. Many even come with a remote, letting you dim the lights or set timers.
It’s a small investment that adds a real layer of polish, making your collection feel like a curated exhibit. It ensures all your hard work gets the attention it deserves, day and night.
Answering Your Top Gallery Wall Questions
Even with the most meticulous plan, a few questions always crop up right when you’re in the thick of it. It’s completely normal to start second-guessing your spacing or wondering if the frames really look right together. I’ve been there.
To help you push past those last-minute doubts, here are some practical answers to the questions I get asked all the time. This is your cheat sheet for getting the final details just right.
How Far Apart Should Pictures Be in a Gallery Wall?
Getting the spacing right is probably the single most important detail for a polished-looking gallery wall. As a solid rule of thumb, aim for a consistent gap of 5-8 cm (2-3 inches) between each frame. This little bit of breathing room is what separates a deliberate collection from a cluttered mess.
If you’re going for a very formal, structured grid, then precision is your best friend—keep that measurement exact. For a more organic, salon-style hang, you’ve got a bit more wiggle room. Even then, try to keep the spacing visually consistent. My best tip? Once you have your paper templates on the wall, stand back and see what looks balanced. Trust your eye, find a distance that feels right, and then stick with it for the whole arrangement.
Should All the Frames in a Gallery Wall Match?
Definitely not! Unless, of course, a uniform look is exactly what you’re after. The truth is, there are no hard-and-fast rules here; it all boils down to the style you want to create in your space.
- Matching Frames: Sticking to one frame style and colour gives you a clean, cohesive look. This works brilliantly for minimalist interiors, symmetrical grids, or any time you want the artwork itself to do all the talking.
- Mixed Frames: On the other hand, mixing up different frame styles, materials, and colours can add so much personality and texture. It creates a more eclectic, collected-over-time feeling that’s full of character.
If you do decide to mix and match, the trick is to have at least one common element that ties everything together. Maybe you use different frame profiles but stick to a black finish, or perhaps you mix various light-toned woods for a warm, Scandi-inspired vibe. Sometimes, the art itself provides all the harmony you need.
A great gallery wall tells a story, and the frames are a huge part of that narrative. Whether you choose perfect uniformity or a beautiful jumble, what matters most is that it feels like you.
How Do I Start a Gallery Wall on a Budget?
Creating a gallery wall that looks incredible doesn't have to cost a fortune. Honestly, some of the most personal and charming displays I've seen were put together on a shoestring. It’s all about being creative and resourceful.
First, think outside the box for affordable art. You can frame your own favourite photos, find stunning digital prints on sites like Etsy that you can print at home, or get creative with other paper treasures you already own. Consider framing things like:
- Vintage postcards you’ve collected
- A beautiful swatch of fabric
- A page from an old book or sheet music
- Your children’s best drawings
When it comes to frames, charity shops, car boot sales, and budget retailers are goldmines. Don't be put off by a random assortment of secondhand finds. A quick coat of spray paint can work wonders to unify a mismatched collection with a single colour. Remember, a gallery wall doesn't have to be completed overnight. Start with a few pieces you absolutely love and let the collection grow with you.