Pruning roses is all about giving them a good haircut in late winter, snipping away dead, diseased, or tangled branches. It’s the secret to boosting the plant's health and kickstarting vigorous new growth, paving the way for a truly stunning flower show come summer.
Why Pruning Roses Is Your Garden's Best Kept Secret
Let’s be honest. Standing in front of a beloved rose bush with a pair of secateurs can feel a bit daunting. The fear of cutting too much or in the wrong place stops many gardeners in their tracks. But here's the thing: pruning is less about following rigid rules and more about having a quiet conversation with your plant. It’s what turns a messy, overgrown shrub into a healthy, bloom-covered star of the garden.
Think of it as setting the stage for a spectacular performance. Every single cut has a purpose, telling the plant where to focus its energy—not on weak, woody stems, but on producing big, beautiful flowers.
The Core Principles of Pruning
No matter what type of rose you're dealing with, the best place to start is always with the ‘three Ds’. It’s a simple mantra that helps you clean up the plant and see what you’re working with.
- Dead Wood: This is the easy bit. Look for canes that are brown, dry, and snap easily. They’re doing nothing for the plant, so getting rid of them instantly tidies things up and removes a potential hiding spot for pests.
- Diseased Wood: Keep an eye out for stems with black spots, strange growths, or a generally withered look. Snipping these out is crucial for stopping the spread of fungal problems like black spot, which absolutely loves the damp UK climate.
- Damaged Wood: Any canes that are cracked, broken, or rubbing against each other need to go. These weak points are an open invitation for infection and can compromise the whole plant.
Once you’ve tackled these, you can step back and see the rose’s true shape. Suddenly, the next steps feel much less intimidating.
Pruning isn’t just about control; it’s about rejuvenation. By snipping away the old and the weak, you’re directing the rose's precious energy into strong new canes that will produce the very best flowers.
This tidy-up also does wonders for air circulation. Creating an open, almost vase-like shape allows air to flow freely through the middle, helping the leaves dry off faster after a downpour. This one change alone can dramatically cut down the risk of fungal diseases.
Ultimately, the goal is to create a strong framework of well-spaced stems ready to support a summer of glorious blooms. A beautifully pruned rose also sits wonderfully alongside other plants; you can get some brilliant garden border plant ideas to really complete the look. A few confident cuts now are all it takes to guarantee a garden filled with breathtaking beauty later.
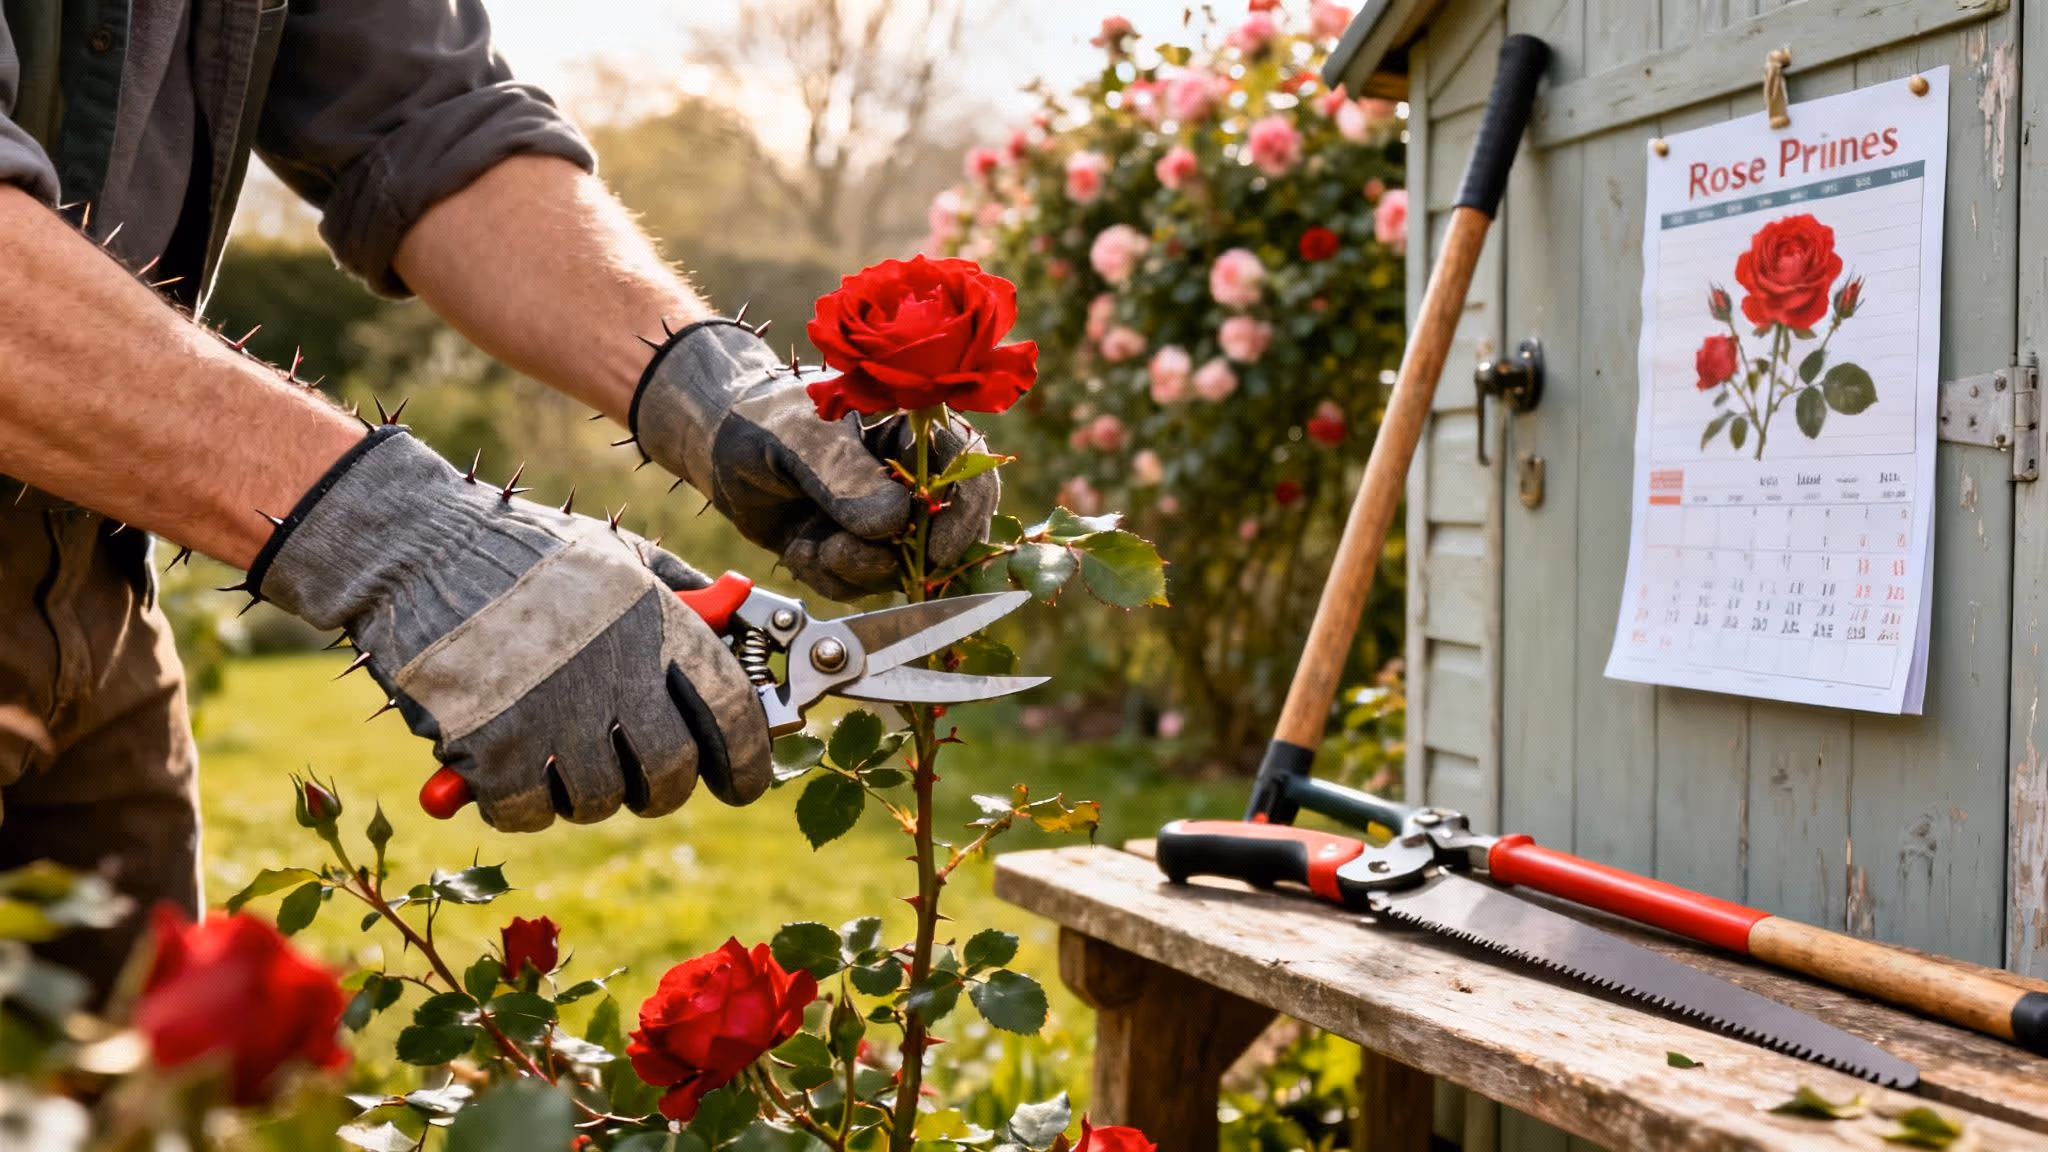
The UK Rose Pruning Calendar: When to Make Your Cuts
In gardening, as in most things, timing is everything. Get it right, and you're rewarded with a garden full of vigorous, healthy roses putting on their best show. For most roses across the UK, that sweet spot for their main prune is during the dormant period, from late winter into early spring.
This window, usually from January through to March, is perfect because the plant is resting. Pruning then encourages it to burst into new, productive growth as soon as the weather warms up, without the risk of tender new shoots getting fried by a late, hard frost.
Regional Timings Across the UK
Of course, the UK's famously varied climate means there’s no single, one-size-fits-all date. Your local weather conditions are your best guide here. A gardener in Cornwall will likely be reaching for their secateurs much earlier than someone up in the Scottish Highlands.
- Southern England & Milder Areas: If you live in the balmier South, you can often get started as early as late January or February. The risk of prolonged, severe frosts is lower, giving your roses a valuable head start.
- Northern England, Scotland & Colder Regions: In colder parts of the country, it's wise to hold your nerve until late March or even early April. Waiting until the worst of the winter weather has passed is crucial to protect that vulnerable new growth.
A simple rule of thumb? Keep an eye out for the buds beginning to swell on the stems. It's the plant's way of telling you it’s waking up, making it the perfect moment to make your cuts.
The biggest mistake I see gardeners make is pruning too early in autumn. This can coax the plant into producing soft, new growth that has no chance of hardening off before the first frosts hit, which can seriously weaken it for the following year.
Get the timing right, and you could see your bloom yields jump by an impressive 40-50%. For more fantastic seasonal tips, the team at GardenersWorld.com always have sound advice.
When to Prune Different Rose Types
While late winter is the main event for most roses, some types play by different rules. Knowing which rose you’re growing is the key to getting the timing right and maximising your flowers.
To make things a bit clearer, here's a quick reference guide for pruning times across the UK.
UK Rose Pruning Calendar at a Glance
As you can see, rambling roses are the main rebels here. They flower on wood produced the previous year, so if you prune them in winter, you'll be cutting off all of next summer's flowers before they've even started. Disaster!
Instead, give them a trim right after they finish their magnificent display in late summer. This encourages fresh new growth that will carry the blooms for the following season. Juggling all these garden tasks can feel a bit much, but our detailed UK gardening calendar is a great way to help you stay on track and plan your year.
Gathering Your Essential Rose Pruning Tools
Before you even think about making that first cut, it’s worth getting your kit in order. Having the right tools isn’t just about making the job easier on yourself; it’s about being kinder to your roses. Think of it like this: a clean, sharp cut heals quickly.
A jagged or crushed stem, which you’ll get from blunt or unsuitable tools, is basically an open invitation for pests and diseases to move in. So, if you’re serious about getting the best from your roses, having the right gear is non-negotiable.
Your Core Pruning Toolkit
You don’t need a shed bursting at the seams with gadgets. Just a few high-quality essentials will see you through season after season. Investing in good tools now will pay you back with healthier plants and a much more enjoyable afternoon in the garden.
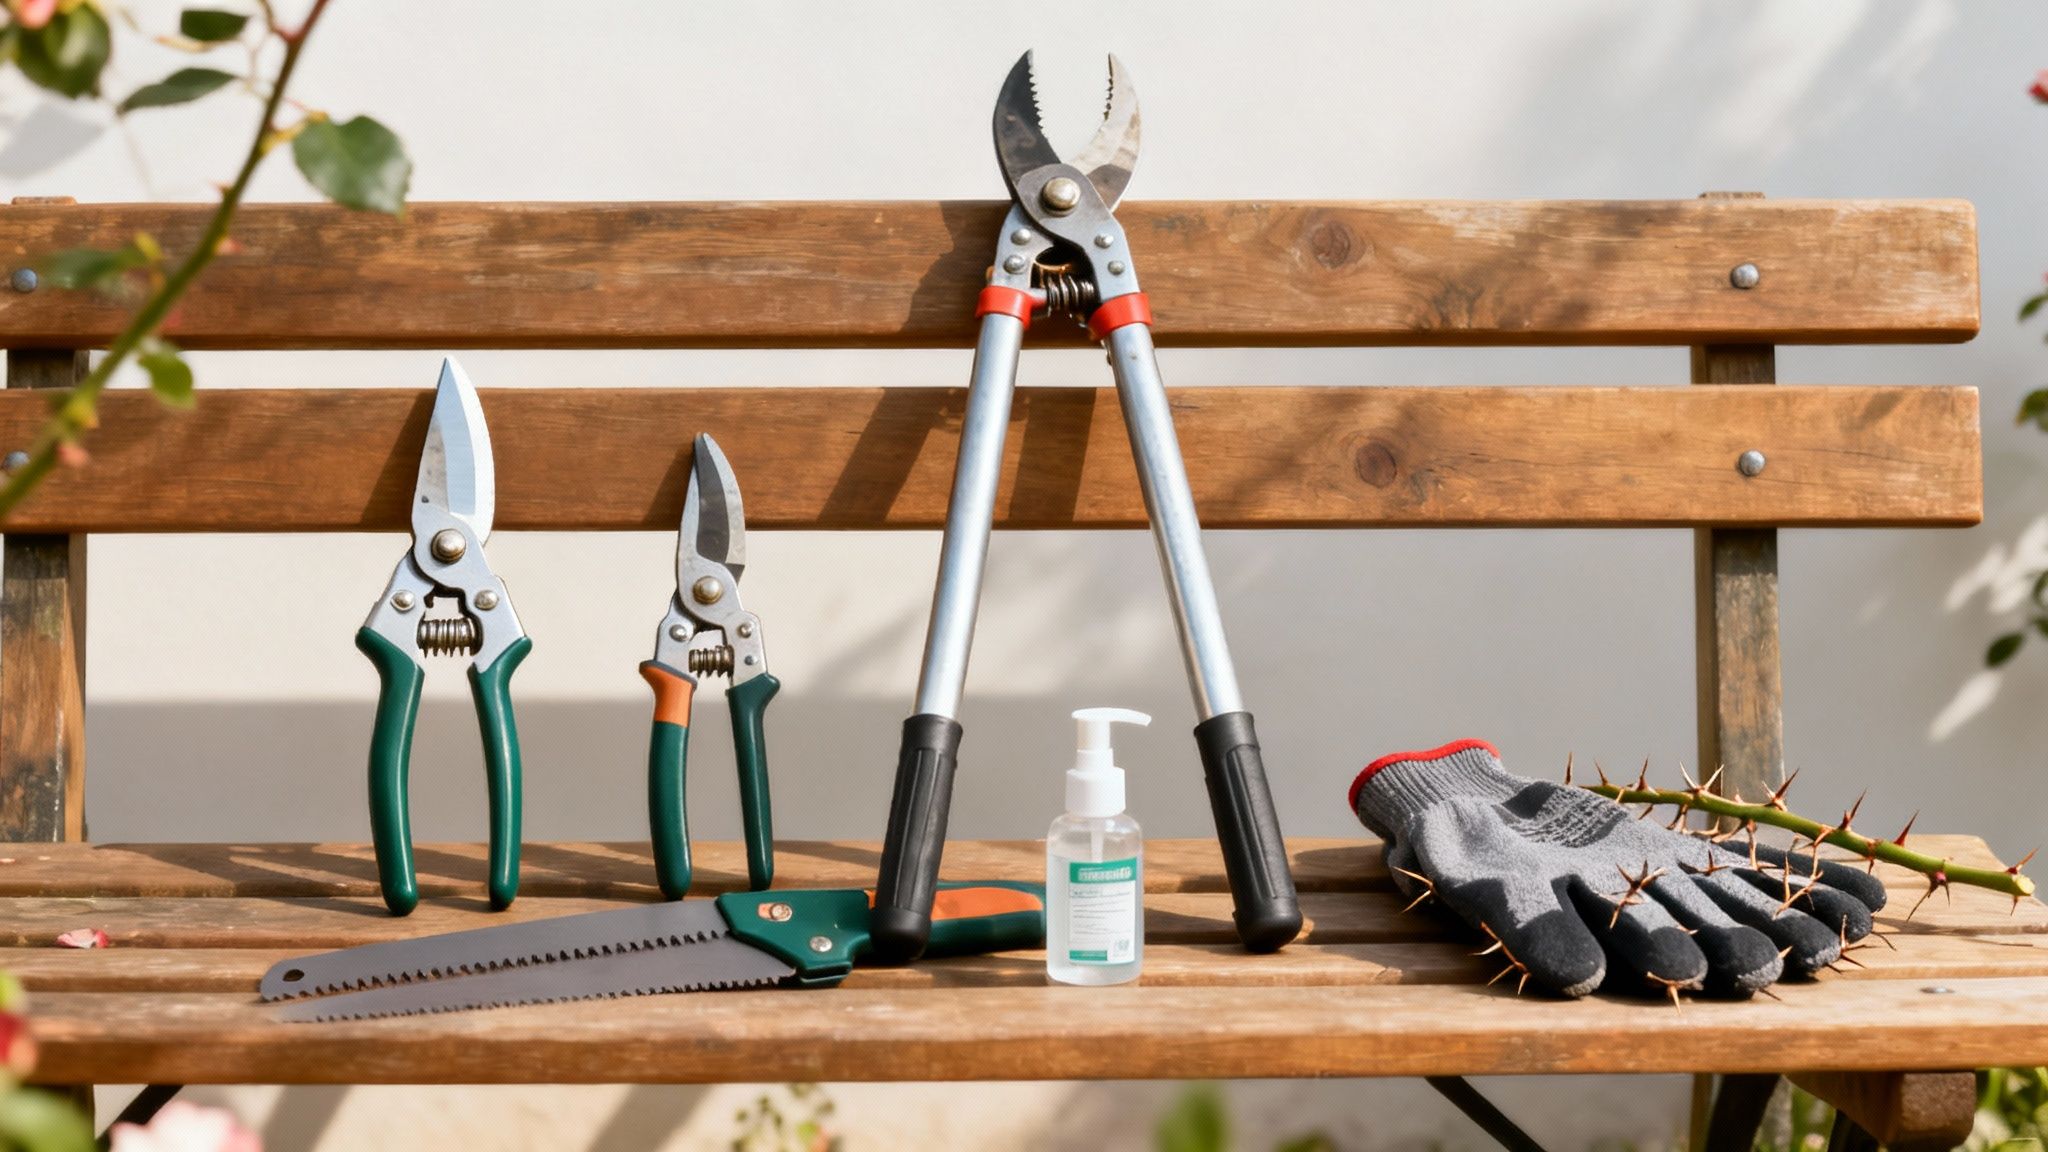
Here’s what every rose lover should have within arm’s reach:
- Bypass Secateurs: This is your go-to tool for most stems, anything up to the thickness of a pencil. Unlike anvil secateurs that can crush stems, bypass blades slice cleanly past each other like scissors. Find a pair that feels comfortable in your hand – you’ll be using them a lot.
- Long-Handled Loppers: For those thicker, woodier canes your secateurs just can’t manage, loppers give you the extra leverage needed. Their long handles are also brilliant for reaching into the centre of a dense shrub without getting covered in scratches.
- A Small Pruning Saw: When you come across a really old, tough cane thicker than a 50-pence piece, this is your best friend. It’s designed to cut on the pull stroke, making light work of stubborn wood without damaging the rest of the plant.
- Thorn-Proof Gauntlet Gloves: An absolute must-have. A sturdy pair of long-cuffed gloves will protect your hands and forearms from those vicious thorns, letting you get right into the plant with confidence.
If you take away one thing, let it be this: always, always clean your tools. A dirty blade can spread fungal spores and bacteria from one rose to another, wiping out your entire collection with something like black spot in a single session.
Keeping Your Tools in Top Condition
Looking after your tools is just as important as buying the right ones. It all comes down to two things: cleanliness and sharpness. A quick routine after you finish pruning will keep them in perfect working order.
First, give the blades a wipe-down with a cloth soaked in methylated spirits or a disinfectant wipe. This removes sap and kills off any pathogens. This simple habit, which takes less than 30 seconds per tool, is your best defence against spreading disease. Make sure they’re completely dry before you put them away to stop rust setting in.
Once they're clean and dry, check the blades. A few strokes with a sharpening stone will restore a keen edge, guaranteeing those clean cuts next time. Staying organised helps, too; sorting out your garden tool storage ideas means you’ll always know exactly where everything is when you need it.
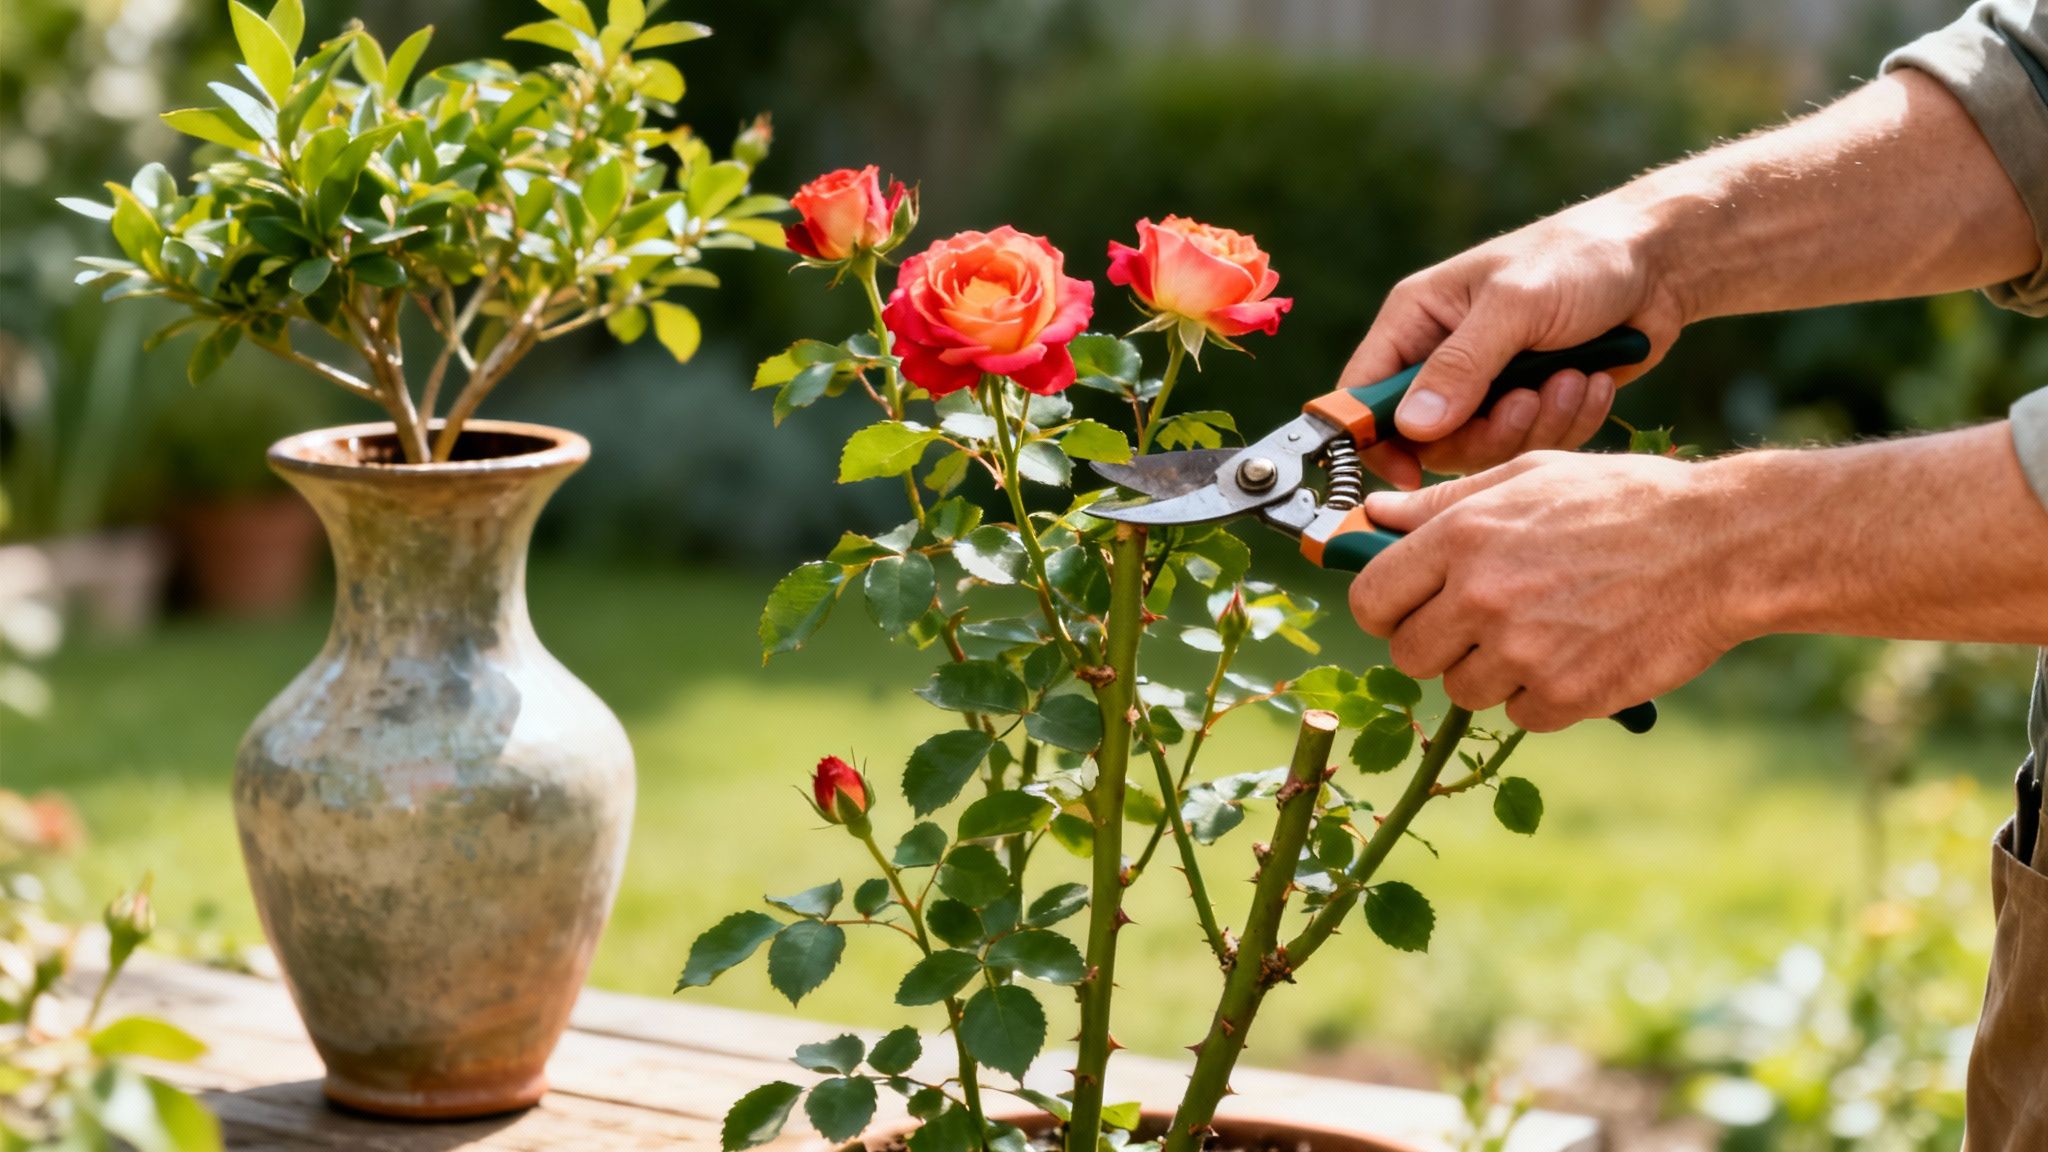
Pruning Bush Roses Like Hybrid Teas and Floribundas
Hybrid Teas and Floribundas are the heart and soul of so many classic UK gardens. They’re the ones we picture when we think of elegant, long-stemmed flowers and generous clusters of blooms. But here’s the secret: they respond brilliantly to a firm, confident prune. Getting this right is probably the single most important thing you can do to guarantee a summer bursting with flowers.
Unlike climbers or ramblers, which need a lighter touch, these bush varieties absolutely thrive on a hard annual haircut. The whole point is to encourage the plant to send up strong, vigorous new shoots from its base. It’s these fresh stems that will carry the best and most plentiful blooms.
Think of it as hitting the reset button. You’re clearing out all the old, tired wood and creating a clean, open framework that’s ready to burst into life when spring finally arrives. This isn't just about keeping the size in check; it’s about channelling all the rose’s energy exactly where you want it.
Starting with a Clean Slate
Before you even think about shortening the main stems, your first job is to give the plant a proper tidy-up. This initial clear-out makes everything easier, immediately opening up the structure so you can see which strong canes you actually want to keep.
Start by cutting out any of the ‘three Ds’—dead, diseased, or damaged wood—right back to where it meets healthy growth. You’ll also want to snip off any spindly, weak stems, which are usually thinner than a pencil. These flimsy shoots will never produce decent flowers and just sap precious energy from the plant.
Finally, have a good look for any stems that are crossing over or rubbing against each other. This is a crucial step for preventing wounds that can become an open invitation for disease. In these situations, you’ll usually want to remove the weaker or more awkwardly placed of the two.
Shaping for Success: The Open Goblet
With all that clutter gone, you can focus on the main event: shaping your rose. For Hybrid Teas and Floribundas, the goal is a beautiful, open ‘goblet’ or vase shape. This structure is your best friend in our damp UK climate, as it lets air circulate freely through the centre of the plant, helping to fend off fungal diseases like black spot.
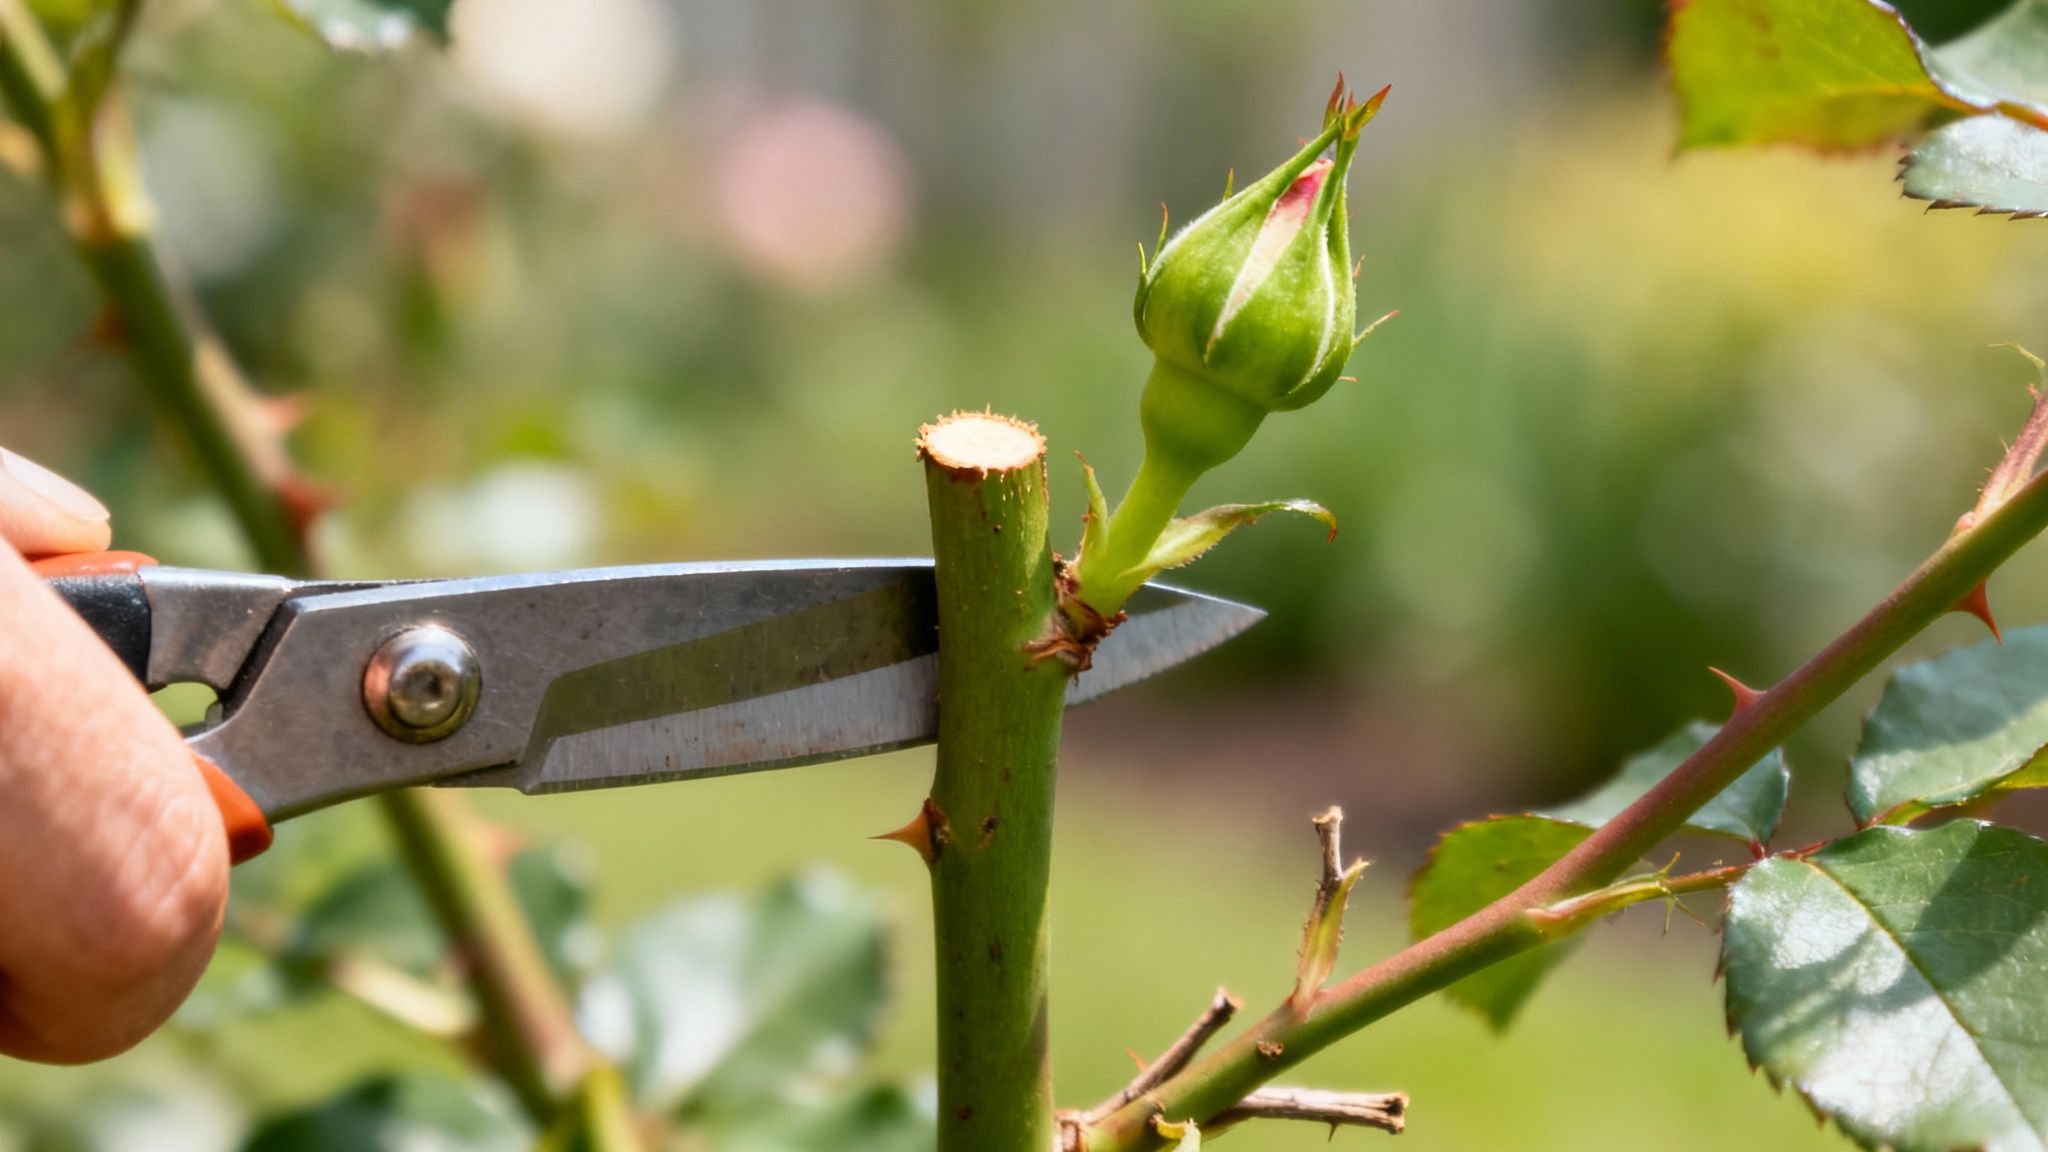
The technique is simple but effective. Shorten the strong, healthy canes you’ve decided to keep, leaving just three to five buds on each one. The most important detail? Make your final cut about 5mm above an outward-facing bud. This little trick encourages the new growth to grow outwards, away from the crowded centre, helping you maintain that perfect open goblet shape.
Every cut should be on a 45-degree angle, sloping away from the bud. This is a clever little detail that ensures rainwater runs straight off the cut surface instead of pooling and causing the stem to rot. It’s a tiny habit that makes a huge difference to the plant’s health.
By tackling it in this order—first clearing out all the weak growth, then cutting the good stems back to an outward-facing bud—you create the perfect framework for a healthy, flower-filled season. It’s a tried-and-tested method that really works.
The Power of a Precision Prune
This isn't just a garden chore; it's a proven technique that has a massive impact on flower production. For Hybrid Teas and Floribundas, this method of clearing out dead, diseased, and crossing stems before shortening the main canes can seriously boost the number of blooms. In fact, demonstrations at RHS Wisley have shown this approach can increase flowering by up to 50%—proof that this annual ritual is perfectly suited to helping roses thrive in our variable UK weather. You can get more expert advice on the effects of pruning over at Plews Garden Design.
By doing this when the plant is dormant and leafless, you’re making sure every ounce of the rose's energy goes into producing a stunning display, not sustaining unproductive wood. Your reward for a bit of focused work in late winter is a season of healthier foliage and an absolute abundance of breathtaking flowers. It truly is the secret to that picture-perfect rose garden.
Tackling Climbing and Rambling Roses
Climbing and rambling roses bring a vertical drama to the garden that bush roses just can’t touch. They scramble over walls, spill over archways, and turn pergolas into floral cathedrals. But here’s the thing: they need a completely different approach to pruning.
Treating a climber like a floribunda is a fast track to disappointment and, frankly, very few flowers. The secret is to think of them as having a permanent structure. Your goal isn’t a hard chop each year, but rather maintaining a healthy framework of main stems that will put on a show for years to come.
Mastering the Art of Pruning Climbing Roses
Climbers, which often flower on repeat all summer, are best pruned in late winter or early spring alongside your bush roses. The real trick to getting them to perform is creating a strong, permanent framework and encouraging those main canes to grow as horizontally as you can.
Why sideways? Bending and tying the main stems more horizontally slows down the sap flow. This little trick encourages the plant to produce lots of short, upright flowering shoots—known as laterals—all along the stem. Let a climber shoot straight up, and you’ll end up with a few lonely flowers right at the top. Not the look we’re going for.
So, your annual prune should focus on these laterals:
- Deal with the Three Ds: First things first, snip out any wood that is obviously dead, diseased, or damaged.
- Snip back the Laterals: Look for the short side shoots that grew and flowered last year. Prune them back hard, leaving just two or three healthy buds (that’s about 5-10cm) from the main stem.
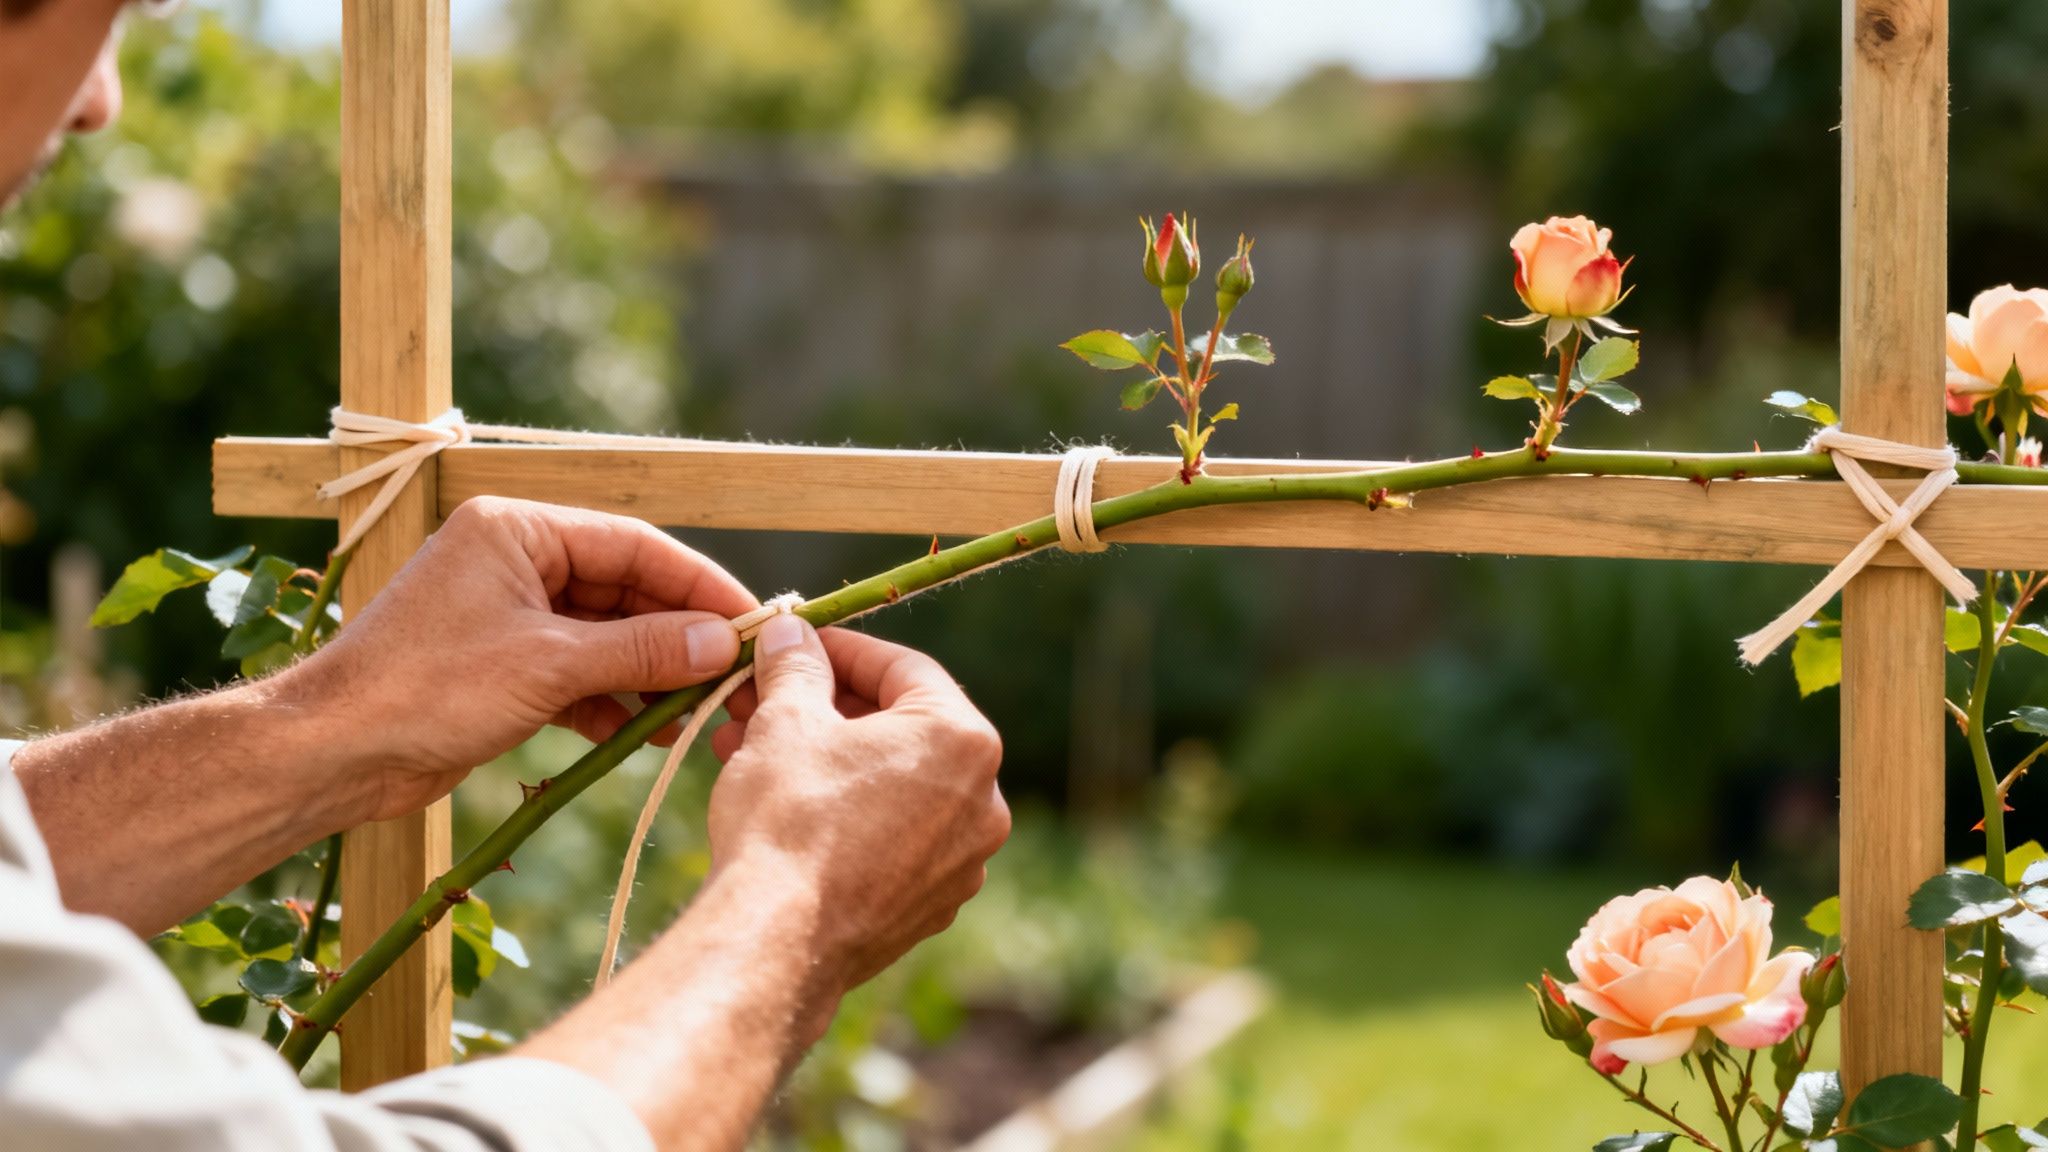
- Tie in Fresh Growth: Gently bend any strong new shoots that have appeared from the base of the plant and tie them in to fill any gaps or extend the main framework.
This simple routine channels all the plant’s energy into producing a wall of blooms, not just a few at the very top. If you’re figuring out how to train yours, getting some inspiration for a garden wall feature can turn a boring bit of brickwork into a total showstopper.
The Different Rules for Rambling Roses
Ramblers are the wilder, more exuberant cousins of climbers. They usually give you one enormous, breathtaking flush of flowers in early summer on the wood they grew last year. This key difference means their pruning time and technique are worlds apart from climbers.
The golden rule for ramblers is simple: prune them immediately after they finish flowering, usually in late summer. If you wait until winter, you'll be cutting off all the stems that were about to give you next year’s flowers.
For ramblers, we use a method called renewal pruning. It’s a beautifully simple system designed to keep the plant vigorous and stop it from becoming a tangled, congested mess. The idea is to take out some of the oldest, tired stems to make room for fresh, productive new ones.
Here in the UK, this summer prune is absolutely vital. By cutting a few of the oldest stems right back to about 15cm from the base after they've flowered, you encourage the rose to send up brand-new shoots from the ground. Tie these in, and you’ve just set the stage for next year’s spectacular flush. It’s a smart strategy perfectly suited to their once-blooming nature.
Rose Pruning Aftercare for a Strong Recovery
So, you’ve put the secateurs down. Job done? Not quite. What you do right after pruning is just as crucial as the cuts themselves. This simple aftercare routine is the secret to helping your roses bounce back fast, fend off diseases, and gear up for a season of knockout blooms.
First things first: a proper tidy-up. All those pruned stems and fallen leaves littering the ground are a five-star hotel for fungal spores like black spot, giving them a cosy spot to wait out the winter. Leaving them there is practically inviting disease back in spring.
Get your rake and be meticulous. Scrape up every last bit of debris from around the base of your roses. Whatever you do, don't chuck this stuff on your home compost heap – it rarely gets hot enough to kill off the nasty pathogens. Pop it straight into your green waste bin for the council to handle.
Feeding for a Flourishing Future
Once the area is spotless, it’s time to lay the table for your roses. A generous layer of organic matter is one of the kindest things you can do for them, fuelling their recovery and enriching the soil for the months ahead.
Aim for a thick mulch, about 5-7cm deep. Spread it all around the base of the plant, but take care not to pile it right up against the main stems, as this can cause them to rot. This layer is a real multi-tasker:
- Feeds the soil: As it breaks down, it slowly releases vital nutrients, improving the soil’s structure and fertility.
- Conserves moisture: It acts like a blanket, stopping the soil from drying out too quickly during warmer spells.
- Protects roots: It insulates the root zone from any sudden temperature drops or late frosts.
Think of mulching as giving your roses their dinner. A good layer of well-rotted manure or garden compost is a slow-release feast that sustains them as they push out all that vigorous new growth.
The Final Touch: Fertiliser
While mulch is all about long-term soil health, a good fertiliser gives a more immediate boost of the specific nutrients roses crave for lush leaves and masses of flowers. But here, timing is everything.
You’ll want to hold off on applying a granular rose fertiliser until early spring, just as you see new growth really starting to shoot. Feed them too early after a winter prune, and you risk encouraging soft, tender growth that’s incredibly vulnerable to damage from a late frost.
Look for a specialised rose food rich in potassium (potash), which is key for strong flowers. Simply sprinkle the recommended dose around the base of each rose, gently fork it into the top layer of soil, and water it in thoroughly. Give them a second feed after their first flush of flowers in early summer, and they'll keep performing right through to autumn. This simple clean, mulch, and feed routine is the gardener's trick to a truly spectacular rose season.
Common Rose Pruning Questions Answered
Even with the best instructions, there are always a few nagging questions that make you hesitate, secateurs in hand. A little extra clarity can be the difference between a tentative snip and a confident cut that sets your roses up for a spectacular summer.
Let's clear up some of the most common queries we hear from UK gardeners. This is all about making pruning an enjoyable ritual, not a source of stress.
What Happens If I Prune My Roses at the Wrong Time in the UK?
Timing is everything, and getting it wrong can really set your roses back.
Pruning too early in autumn is a classic mistake. It tricks the rose into putting out soft, new shoots right when it should be winding down for winter. This tender growth has no chance to harden off before the first frosts hit, leaving it vulnerable to being killed off and weakening the whole plant.
On the flip side, leaving it too late in spring means the rose has already wasted a huge amount of energy on new stems and leaves you're about to chop off. This forces it to start all over again, often resulting in a much poorer show of flowers. And for those once-blooming ramblers? A winter prune is a total disaster – you’ll be cutting off the very wood that was going to carry all of that year's flowers.
For most repeat-flowering roses, sticking to that late winter/early spring window is your safest bet.
How Hard Should I Prune My Roses?
This completely depends on the type of rose you're growing. A "one size fits all" approach just doesn't work here, and can do more harm than good.
- Hard Pruning: Think Hybrid Teas and Floribundas. They love it. Cutting them back by about half their height encourages strong, vigorous new canes to shoot up from the base, which will give you those incredible, large blooms on long, straight stems.
- Light Pruning: Most shrub roses, particularly English varieties, look their best with a lighter touch. Here, the goal is to just shape the plant and maintain a nice, natural form. You're only taking off about a quarter of the growth.
- Selective Pruning: Climbers are a different beast. You need to leave their main framework of canes largely intact. Pruning is focused entirely on shortening the flowering side shoots that sprout from these main stems.
If you hard prune a delicate shrub rose like it’s a tough Hybrid Tea, you'll ruin its graceful shape and get far fewer flowers for your trouble. Knowing your rose is half the battle.
Do I Need to Seal Pruning Cuts on My Roses?
This is an old piece of advice that has been well and truly debunked. While it feels like you're protecting the plant, sealing pruning cuts can actually cause problems.
Waxes and paints trap moisture against the open wound, creating a damp, airless environment that’s the perfect breeding ground for fungal diseases and rot. A clean, sharp cut made with sterilised secateurs, angled at 45 degrees, is all a rose needs to heal itself. It will form its own protective callus far more effectively. In over 99% of cases, sealing cuts is completely unnecessary.
Can I Save a Badly Overgrown Rose Bush?
Absolutely! Bringing a tangled, woody old rose back to life is one of the most satisfying jobs in the garden. The secret is patience – don't try to fix everything in one year.
The trick is to spread the renovation over two or three winters. Start by cutting out all the dead and diseased wood. Then, identify the oldest, thickest stems and remove about a third of them, cutting them right back to about 15cm from the ground.
The following year, take out another third of the remaining old stems. By the end of year three, you'll have replaced the entire old, unproductive framework with fresh, vigorous new growth. It’s like hitting the reset button on the whole plant. For a more detailed walkthrough, you can learn more about how to revive roses that look like they're past it.


