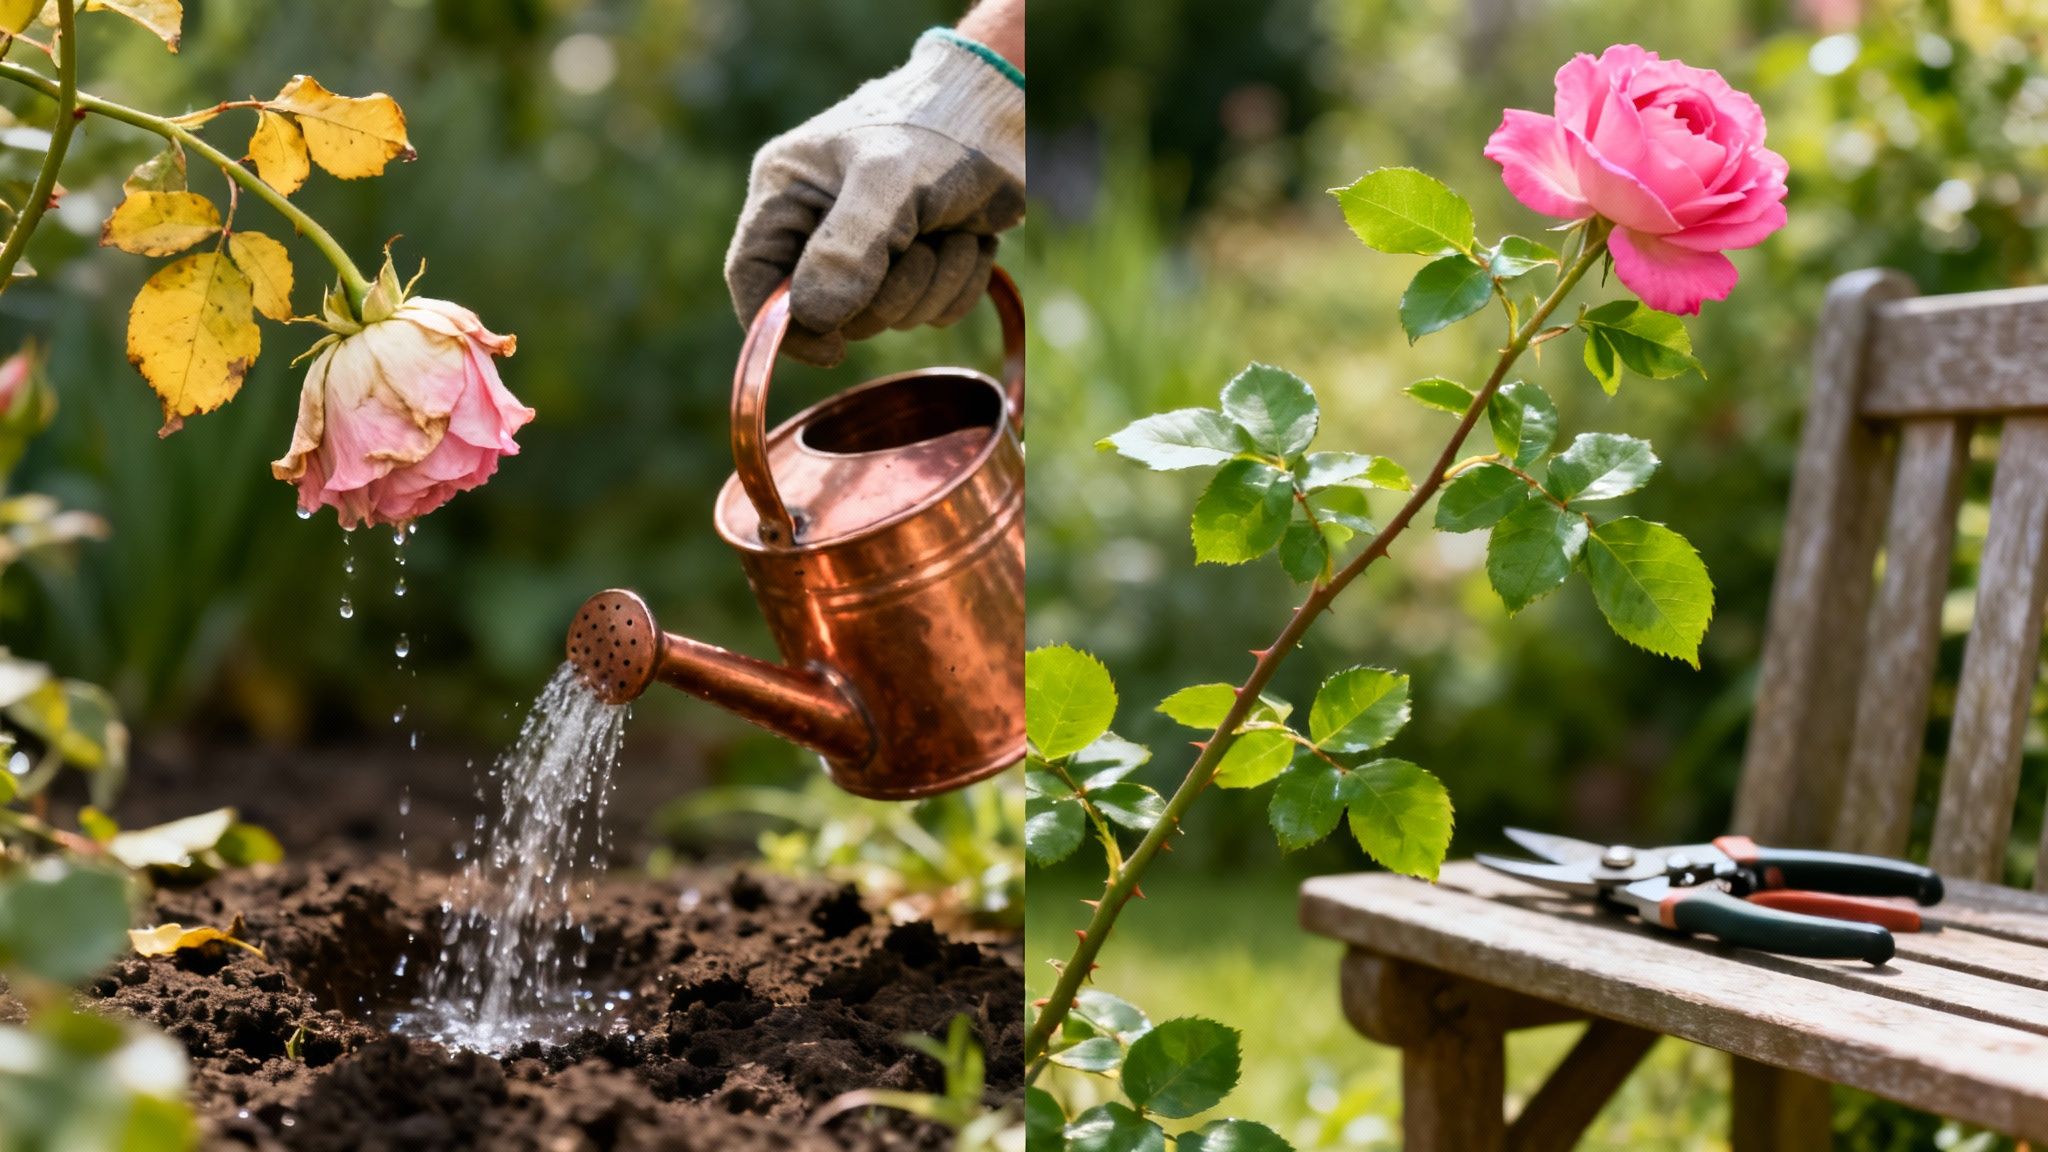
Knowing when to prune your fruit trees is just as important as knowing how. Get the timing wrong, and you could be inviting disease or sacrificing your harvest. In the UK, the answer really boils down to one simple question: what kind of fruit tree are you growing?
For classic pome fruits like apples and pears, the sweet spot is during their winter dormancy. On the other hand, stone fruits—think plums and cherries—absolutely must be pruned in summer to protect them from a particularly nasty disease.
Why Getting the Timing Right is Everything

Think of pruning as a form of tree surgery. Every cut you make is a wound, and the tree's ability to heal quickly and effectively is crucial. Timing your pruning is all about working with the tree's natural growth cycle, not fighting against it.
A poorly timed cut can leave the tree vulnerable, stunt its growth, and seriously reduce the amount of fruit it produces. This is precisely why we treat pome and stone fruits so differently here in the UK.
The Great Divide: Pome vs. Stone Fruits
So, what's the difference? It all comes down to their biology and susceptibility to disease.
Apples and pears are tough customers. The best time to prune them is when they’re dormant, which is usually anytime from November to early March. During this winter rest period, the tree has pulled all its energy down into the roots. Pruning at this stage kick-starts vigorous new growth come spring, channelling that stored energy into producing healthy branches and, eventually, more fruit.
Stone fruits, however, are a different story. Plums, cherries, peaches, and apricots are all highly vulnerable to a fungal disease called Silver Leaf. The spores for this disease are airborne and rampant during the damp, cool weather of autumn and winter—exactly when you’d be pruning apples.
Pruning a plum or cherry tree in winter is like leaving an open wound in a hospital ward. The fresh cuts provide the perfect entry point for Silver Leaf spores, which can devastate and even kill the tree. By pruning in summer, the tree’s active sap flow helps to seal the wound almost immediately, creating a natural barrier against infection.
To help you keep track, here’s a quick overview of the ideal pruning times for common UK fruit trees.
Quick Guide to UK Fruit Tree Pruning Seasons
This seasonal approach ensures you're helping your trees, not harming them.
A Nod to Horticultural Science
While gardeners have been pruning trees for centuries, our modern understanding is deeply rooted in plant biology. It wasn't until the 20th century that UK horticultural practices fully embraced the science behind why seasonal timing is so critical for different species.
Ultimately, respecting the tree’s energy cycles and natural defences is the key. Your efforts will be rewarded with a healthier, stronger tree and a far more bountiful harvest. A great way to stay on top of this and other seasonal jobs is to follow a gardening calendar, which can help you plan your entire year in the garden.
Winter Pruning for Apples and Pears
For those of us with apple and pear trees, the cold, quiet months are anything but a time for rest. This is our window of opportunity. Winter is, without a doubt, the best time to prune these particular fruit trees. From November to early March, the bare branches give you a clear, honest look at the tree's structure, making it the perfect time for some strategic shaping.
When a tree is dormant, all its energy is tucked away in the roots, waiting for the first signs of spring. By making your cuts now, you're telling the tree exactly where to send that powerful burst of energy. The result? Strong, healthy growth and, most importantly, high-quality fruit. It's a foundational practice if you're aiming for a brilliant harvest year after year.
What to Look For When Pruning
Your main goal with a winter prune is to create an open, healthy framework. Think of it like giving the tree room to breathe. This allows sunlight and air to get right into the canopy, which is crucial for ripening fruit and warding off fungal diseases.
I always start with the basics, often called the 'three Ds':
- Dead Wood: These branches are easy to spot. They'll be brittle, often a different colour, and show no signs of life. They contribute nothing and can become an open door for pests and disease.
- Diseased Wood: Keep an eye out for cankers, strange growths, or discoloured patches on the bark. Getting rid of this quickly helps stop any infection from spreading through the rest of the tree.
- Damaged Wood: Any branch that’s been broken—whether by wind, a heavy crop last year, or just bad luck—should be cut back to a healthy point.
Once you’ve sorted the 'three Ds', it's time to focus on shaping. I improve the tree's overall structure by removing any branches that are crossing or rubbing against each other. That friction creates wounds that are just an invitation for trouble. It's also a good idea to prune out any weak, spindly shoots that are growing inwards towards the tree's centre; they just add to the congestion.
The Logic Behind Dormant Pruning
Pruning during dormancy is the go-to strategy for apples and pears here in the UK, and for good reason. This period, typically from November to early March, lines up perfectly with the tree's natural rhythm. Forestry experts often point out that the tree is far less vulnerable to infection when it’s leafless, and the cuts have plenty of time to start healing before the sap begins to rise in spring.
This careful timing is what allows us to create that classic open 'goblet' shape in the canopy. It's a key factor that can dramatically increase your fruit yield simply by letting more light and air in. For a deeper dive, the Woodland Trust has some excellent insights on the topic.
By making precise cuts in winter, you're essentially drawing up a blueprint for the coming season's growth. The tree responds in spring with vigorous new shoots, channelling its resources exactly where you intended.
It’s also worth remembering that the cold winter temperatures naturally help protect your trees from certain pests and diseases. For more tips on getting your garden through the harshest weather, have a look at our guide on protecting plants in winter. Taking these steps now ensures your fruit trees come out of the cold season strong and ready for a productive year.
Summer Pruning for Plums and Cherries
While winter is the classic time to tackle apples and pears, you need to throw that rulebook out the window when it comes to stone fruits. For trees like plums, cherries, and apricots, pruning is strictly a summer job. This isn't just a matter of preference; it's a vital step to shield them from a particularly nasty fungal disease common across the UK.

The main culprit we’re trying to avoid is Silver Leaf disease (Chondrostereum purpureum). Its fungal spores are most active in the damp, cool air of autumn and winter. Making a pruning cut during this period is like leaving an open door for the disease to get into the tree’s system, which can cause serious harm and, in some cases, even kill the tree.
Why Summer is the Safest Season
By shifting your pruning schedule to late spring through late summer (usually between May and August), you give your trees a massive advantage. At this time of year, the tree is in full, active growth, with sap pumping through its veins.
This means any cut you make triggers an immediate response. The rising sap helps to seal the wound quickly, creating a natural barrier that stops Silver Leaf spores from getting a foothold. This rapid healing is the single biggest reason summer pruning is a non-negotiable for stone fruit trees in the UK. Getting the timing right is a simple way to keep your trees healthy and fruitful for years to come.
"For stone fruits, summer pruning is less about stimulating vigorous growth and more about disease prevention and crop management. It's a lighter, more strategic touch designed to work with the tree's active state."
A Lighter Touch for Better Fruit
Forget the hard, structural pruning you might do on an apple tree in the depths of winter. Summer pruning is a much gentler, more refined process. The focus here isn't on creating a new shape but on maintaining health and getting the absolute best from this year's harvest. You're mainly looking to manage the new growth that’s shot up since spring.
Here’s what you should be concentrating on:
- Improving Airflow: Thin out any crowded clusters of new growth. This lets air move freely through the branches, which is brilliant for preventing other problems like brown rot on your ripening fruit.
- Letting the Sun In: By snipping away some of the leafy new shoots, you allow more sunlight to reach the fruit. This makes a world of difference to its final colour, size, and, most importantly, its flavour.
- Redirecting Energy: Your tree is working hard to produce both fruit and new branches. By removing extra shoots that won't bear fruit, you channel all that precious energy into ripening a better-quality crop.
This approach ensures you’re not putting the tree under stress while it's in its productive phase. Keeping on top of your garden timings is crucial, and a good UK planting calendar can be an invaluable tool for mapping out your pruning and other key jobs. It’s all about making small, intelligent tweaks that deliver a fantastic reward when it's time to harvest.
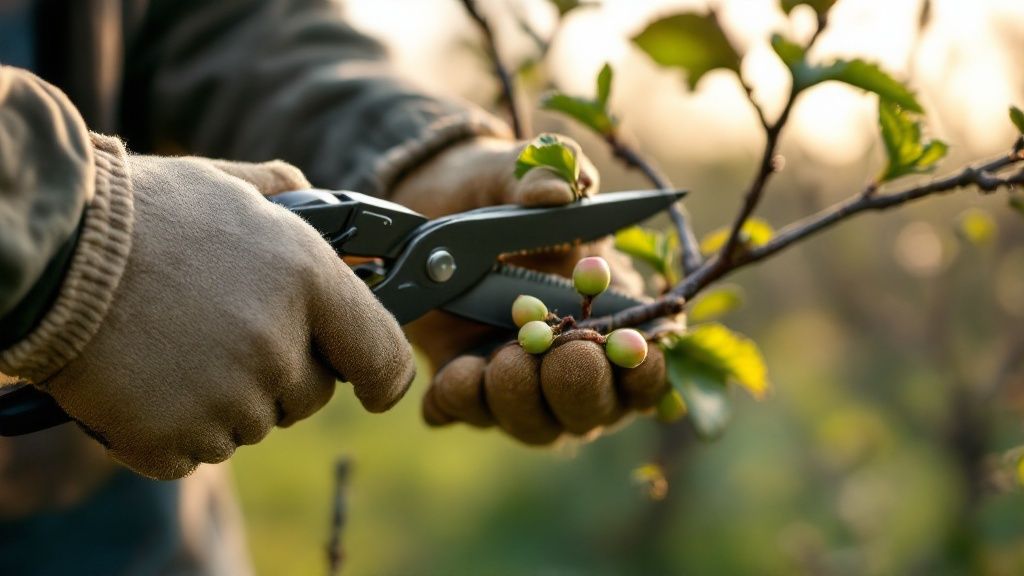
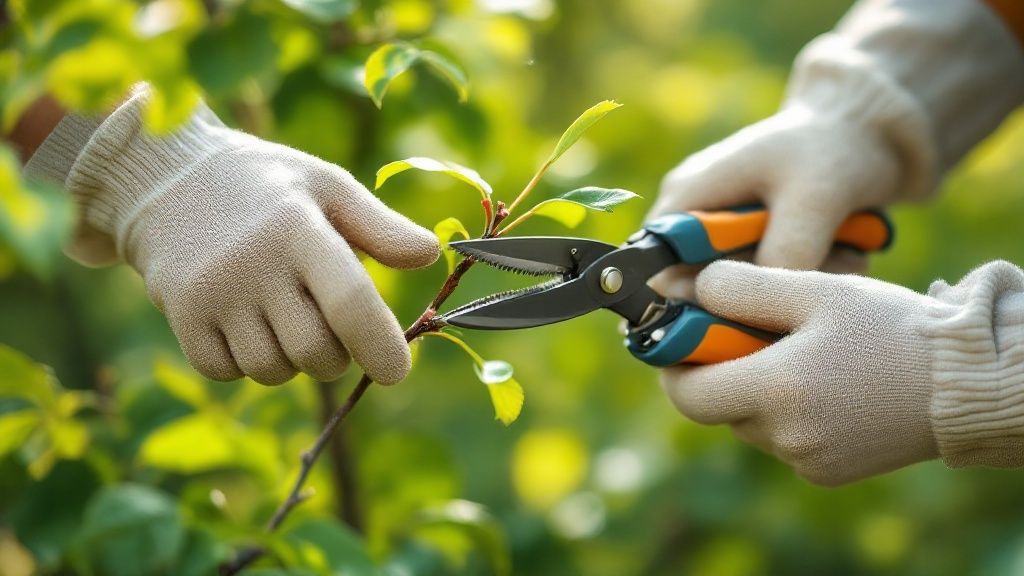
The Right Tools and Techniques for a Perfect Cut
Knowing when to prune is a great start, but it's only half the story. Without the right gear and a bit of know-how, you can accidentally do more harm than good. Using sharp, clean tools isn't just about making the job easier for you; it's absolutely vital for your tree's health, ensuring every cut heals quickly and cleanly.
Before you even think about making a cut, get into the habit of sterilising your tools. A quick wipe-down with a cloth soaked in rubbing alcohol or a disinfectant between each tree is a non-negotiable step. It might seem like a small thing, but it's the best way to stop diseases like canker from spreading through your entire orchard.
Choosing Your Pruning Arsenal
Matching the tool to the branch size is the secret to making clean, effortless cuts. You really don't need a shed full of equipment. For most UK gardens, three core tools will see you through almost any pruning task you’ll encounter.
Secateurs (or Hand Pruners): These are your workhorse for most small jobs. They're perfect for snipping away thin, new growth and branches up to about the thickness of your thumb. My advice? Always go for a bypass model. The two curved blades slice past each other like scissors, giving a much cleaner cut than the anvil types which can crush stems.
Loppers: When you come across a branch that's just too much for your secateurs, it's time to bring out the loppers. Their long handles give you the leverage you need to cut through branches up to two inches in diameter without a struggle.
Pruning Saw: For anything bigger, a pruning saw is essential. These saws are brilliant because they're designed to cut on the pull stroke, giving you far more control and preventing the blade from jamming. They make light work of mature branches that loppers simply can't handle.
A sharp blade is a safe blade. Dull tools require you to use more force, which massively increases the risk of it slipping and causing an injury. More importantly for the tree, a dull blade crushes and tears plant tissue, leaving a ragged wound that heals slowly and becomes an open invitation for disease.
Mastering the Art of the Cut
Once you've got the right tool in hand, it all comes down to technique. The goal is to make cuts that the tree can heal and seal over as quickly as possible. The key to this is finding the branch collar—that slightly swollen, wrinkled area of bark where a branch joins a larger limb or the main trunk. This little ring contains special cells that are crucial for healing.
When you're removing a branch completely, you need to cut just outside this collar, angling your cut slightly away from the trunk. Never, ever cut flush against the trunk. This removes the collar and creates a huge wound that the tree will really struggle to heal. On the other hand, leaving a long stub is just as bad, as it will likely die back and invite rot.
For any branch thicker than two inches, you'll want to use the classic three-cut method. This is what the pros do to stop a heavy branch from tearing a strip of bark off the trunk as it falls.
- Start by making an undercut about a foot away from the trunk, sawing about a third of the way through the branch from below.
- Move an inch or two further out from that first cut and saw down through the top of the branch. It will snap off cleanly and safely.
- Now you're left with a manageable stub, which you can remove with one final, precise cut just outside the branch collar.
Finally, don't forget about tool care. After a day of pruning, give your tools a good clean and dry them thoroughly before putting them away. This prevents rust and keeps them in prime condition for years. If you need some inspiration for keeping your gear in order, have a look at our guide to garden tool storage ideas.
Common Pruning Blunders (And How to Steer Clear)
Even with the best of intentions, it’s surprisingly easy to make a wrong move with the secateurs. Getting to know the common pitfalls is the first step towards avoiding them, ensuring your hard work actually helps your trees instead of setting them back.
Let's walk through some of the most frequent errors I see and talk about how you can sidestep them for a healthier, more fruitful tree.
One of the biggest mistakes is simply getting carried away. It’s so tempting to give an overgrown tree a major haircut, but taking off more than 20-25% of the canopy in one season can seriously stress it out. This often sends the tree into a panic, causing it to throw out a thicket of weak, vertical shoots known as water sprouts. These don't fruit and just create a tangled mess you'll have to deal with next year.
My mantra is 'little and often'. A gentle, thoughtful prune each year is infinitely better for a tree than a drastic overhaul every few years. Think of it as guiding the tree’s growth, not fighting it.
The Trouble with Topping and Tidy-Ups
Another all-too-common practice is ‘topping’ a tree—lopping off all the main branches at the same height. This is incredibly damaging. It leaves huge wounds that can’t heal properly and encourages a weak flush of new growth that's poorly attached and prone to snapping in the wind.
Just as bad is leaving long stubs when you remove a branch. These bits of wood just die back, stopping the tree from callusing over the wound and essentially leaving an open door for rot and disease to get in. You always want to cut back to just outside the branch collar—that slightly swollen ring of bark where the branch meets a larger limb or the trunk.
Getting the Cut Just Right
Making your cuts in the right spot is everything. A poorly placed cut can be just as harmful as not pruning at all. Keep these simple principles in mind, and you'll be on the right track.
- Don't Cut Flush: Never cut a branch completely flush against the trunk. This removes the branch collar, which contains all the specialised cells the tree needs to seal the wound and heal itself.
- The 'Three D's' First: Before you even think about shaping, your first job is to remove any wood that is Dead, Diseased, or Damaged. It’s just basic tree hygiene.
- Check for Crossing Branches: Look for branches that are growing into each other and rubbing. This creates wounds and potential entry points for infection. Choose the weaker of the two and remove it.
Getting the hang of this takes a bit of practice, but keeping these common blunders in mind will set you up for success. While these principles apply to most trees, some, like ornamental maples, have very specific requirements. For a deeper dive into these more delicate species, our guide on pruning Japanese Maple trees has all the detailed advice you'll need. Knowing when to prune is key, but knowing how is what truly makes the difference.
Got Pruning Questions? We've Got Answers
Even the most detailed guide can't cover every single scenario you'll face in your own garden. It's one thing to read about pruning, but it's another entirely to be standing in front of a tree, secateurs in hand, wondering if you’re about to make the right cut. It's perfectly natural to have a few last-minute questions.
Think of this section as a chat with an experienced gardener, offering straightforward answers to those common dilemmas that pop up just when you're ready to start.
Can I Prune a Newly Planted Fruit Tree?
Not only can you, but you absolutely should. Giving a young, newly planted tree its first prune is one of the most important steps you can take, particularly if it was a bare-root specimen. This initial trim helps the tree establish a healthy balance between its branches and the root system, which was inevitably disturbed during transplanting.
If you’ve planted a young ‘maiden’ tree (which looks like a single, unbranched whip), the job is simple. Just shorten the main stem by about one-third. This single cut encourages the tree to branch out lower down, creating the foundation of a strong, well-spaced framework for its future growth. It’s the perfect head start for a long and fruitful life.
What if I Missed the Ideal Pruning Season?
This is a really common worry, but thankfully, the answer is usually simple: just wait. If you’ve missed the prime pruning window for your tree, it's almost always better to hold off until the next appropriate season rolls around.
Pruning at the wrong time can cause real problems. If you prune an apple tree too hard in late spring, for instance, you'll just encourage a wild flush of leafy, non-fruiting shoots. Far more seriously, you must never prune stone fruits like plums or cherries in winter, as this leaves them dangerously vulnerable to Silver Leaf disease.
The only time you should break this rule is to remove branches that are clearly dead, damaged, or diseased. This kind of clean-up can be done carefully at any time of year.
The most patient gardeners often have the healthiest trees. Resisting the urge to prune at the wrong time is a skill in itself and shows a true understanding of the tree's needs.
How Much Should I Actually Cut Off?
A fantastic rule of thumb is to never remove more than 20% of the tree's total canopy in a single year. In reality, for routine annual pruning, you'll likely be taking off much less than that. Hacking away too much can send the tree into shock, prompting it to produce weak, bushy growth as a defence mechanism.
A good strategy is to start with the obvious problem-solvers first.
- Begin by cutting out any dead or diseased wood.
- Next, look for any branches that are crossing over and rubbing against each other.
- Finally, thin out any areas that look congested to let more light and air into the centre of the tree.
Remember to step back often. Look at the tree's overall shape from a distance. You're aiming for a balanced, open structure, not a brutal haircut.
Should I Use Wound Paint on the Cuts?
In short, no. Modern horticultural advice here in the UK is very clear: don't use pruning paint or any other type of wound sealant. It feels counter-intuitive, I know, but research has shown that these products can actually do more harm than good.
These paints can trap moisture against the freshly cut wood, which slows down the tree’s natural ability to heal itself. This damp, sealed-in environment can become a breeding ground for fungal diseases and decay. A clean, sharp cut, made with sterile tools at the right time of year, is all a tree needs to form its own protective callous and heal perfectly well.