Giving old wood furniture a fresh coat of paint is one of the most satisfying ways to completely transform a piece. It’s not just about slapping on a new colour, though. The real magic happens in the preparation—the thorough cleaning, sanding, and priming that sets the stage for a flawless, long-lasting finish. This is how you turn tired, dated items into custom treasures that feel personal and stylish.
Gathering Your Essential Painting Toolkit
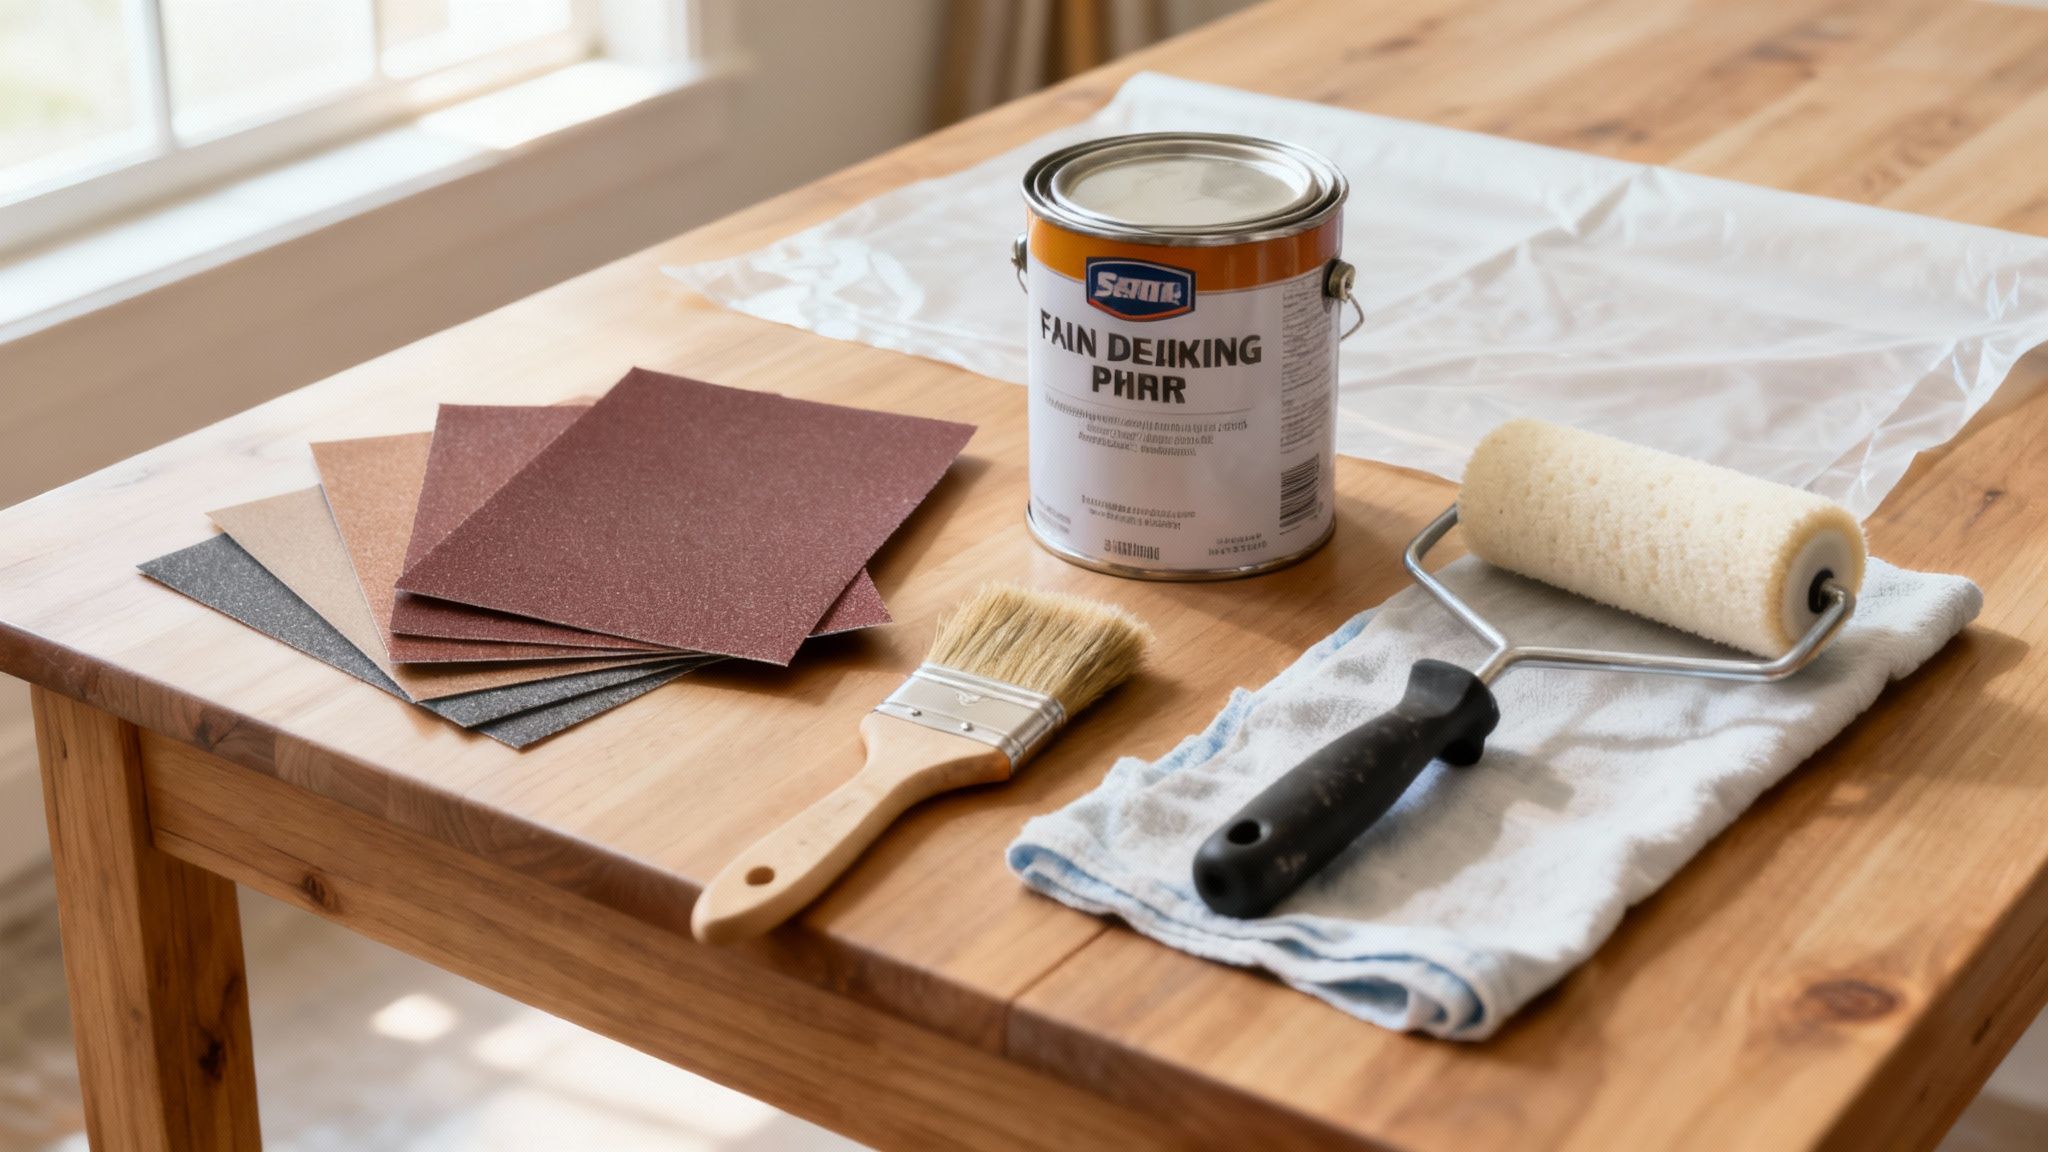
Before you even think about cracking open a tin of paint, the most crucial step is getting your toolkit in order. Honestly, having everything you need within arm's reach is a game-changer. It stops those annoying mid-project runs to the hardware shop and, more importantly, sets you up for success from the get-go.
It’s easy to get fixated on the perfect paint colour and forget about everything else, but your applicators and prep materials are just as important. A cheap brush, for instance, will likely shed bristles all over your lovely smooth surface—a complete nightmare to fix. A good-quality synthetic brush, on the other hand, will give you clean lines and no unwanted extras. For big, flat areas like tabletops or cabinet doors, I always recommend a small foam roller. It leaves a beautiful, even finish that looks almost as if it's been professionally sprayed.
This hands-on approach has become incredibly popular, partly because finding reliable tradespeople can be a real challenge. In fact, the UK painting industry has been grappling with significant labour shortages, with a staggering 61% of businesses reporting they struggle to hire skilled professionals.
Your Core Supplies Checklist
Let's say you're tackling a classic project, like a tired old pine dresser or a dark, gloomy bedside table. Your shopping list needs to go way beyond just the paint.
Here’s what I’d have in my kit:
- Sandpaper in Various Grits: Start with a medium grit (around 120) to scuff up the old surface so the primer can grip. You'll also need a fine grit (220 or higher) to get a super-smooth feel between coats.
- Stain-Blocking Primer: This is an absolute must-have, especially for woods like pine that have knots, or for any piece with a dark stain. It stops oils and tannins from bleeding through and creating ugly yellow patches on your final paint colour.
- Tack Cloths or Microfibre Rags: These are your best friends for removing every last particle of dust after sanding. A clean surface is a non-negotiable for a professional finish.
- Wood Filler and a Putty Knife: Perfect for patching up any dings, scratches, or old hardware holes before you even think about painting.
The secret to a durable, beautiful paint job isn't in the final coat of paint; it's in the meticulous preparation you do beforehand. Every minute spent on prep work saves you hours of frustration later.
Getting these items together is a real investment in the quality of your finished piece. Plus, once you have a well-stocked kit, you'll be ready to tackle any future projects that catch your eye. If you’re looking for more inspiration, you might find some great ideas in our guide on home decorating on a budget.
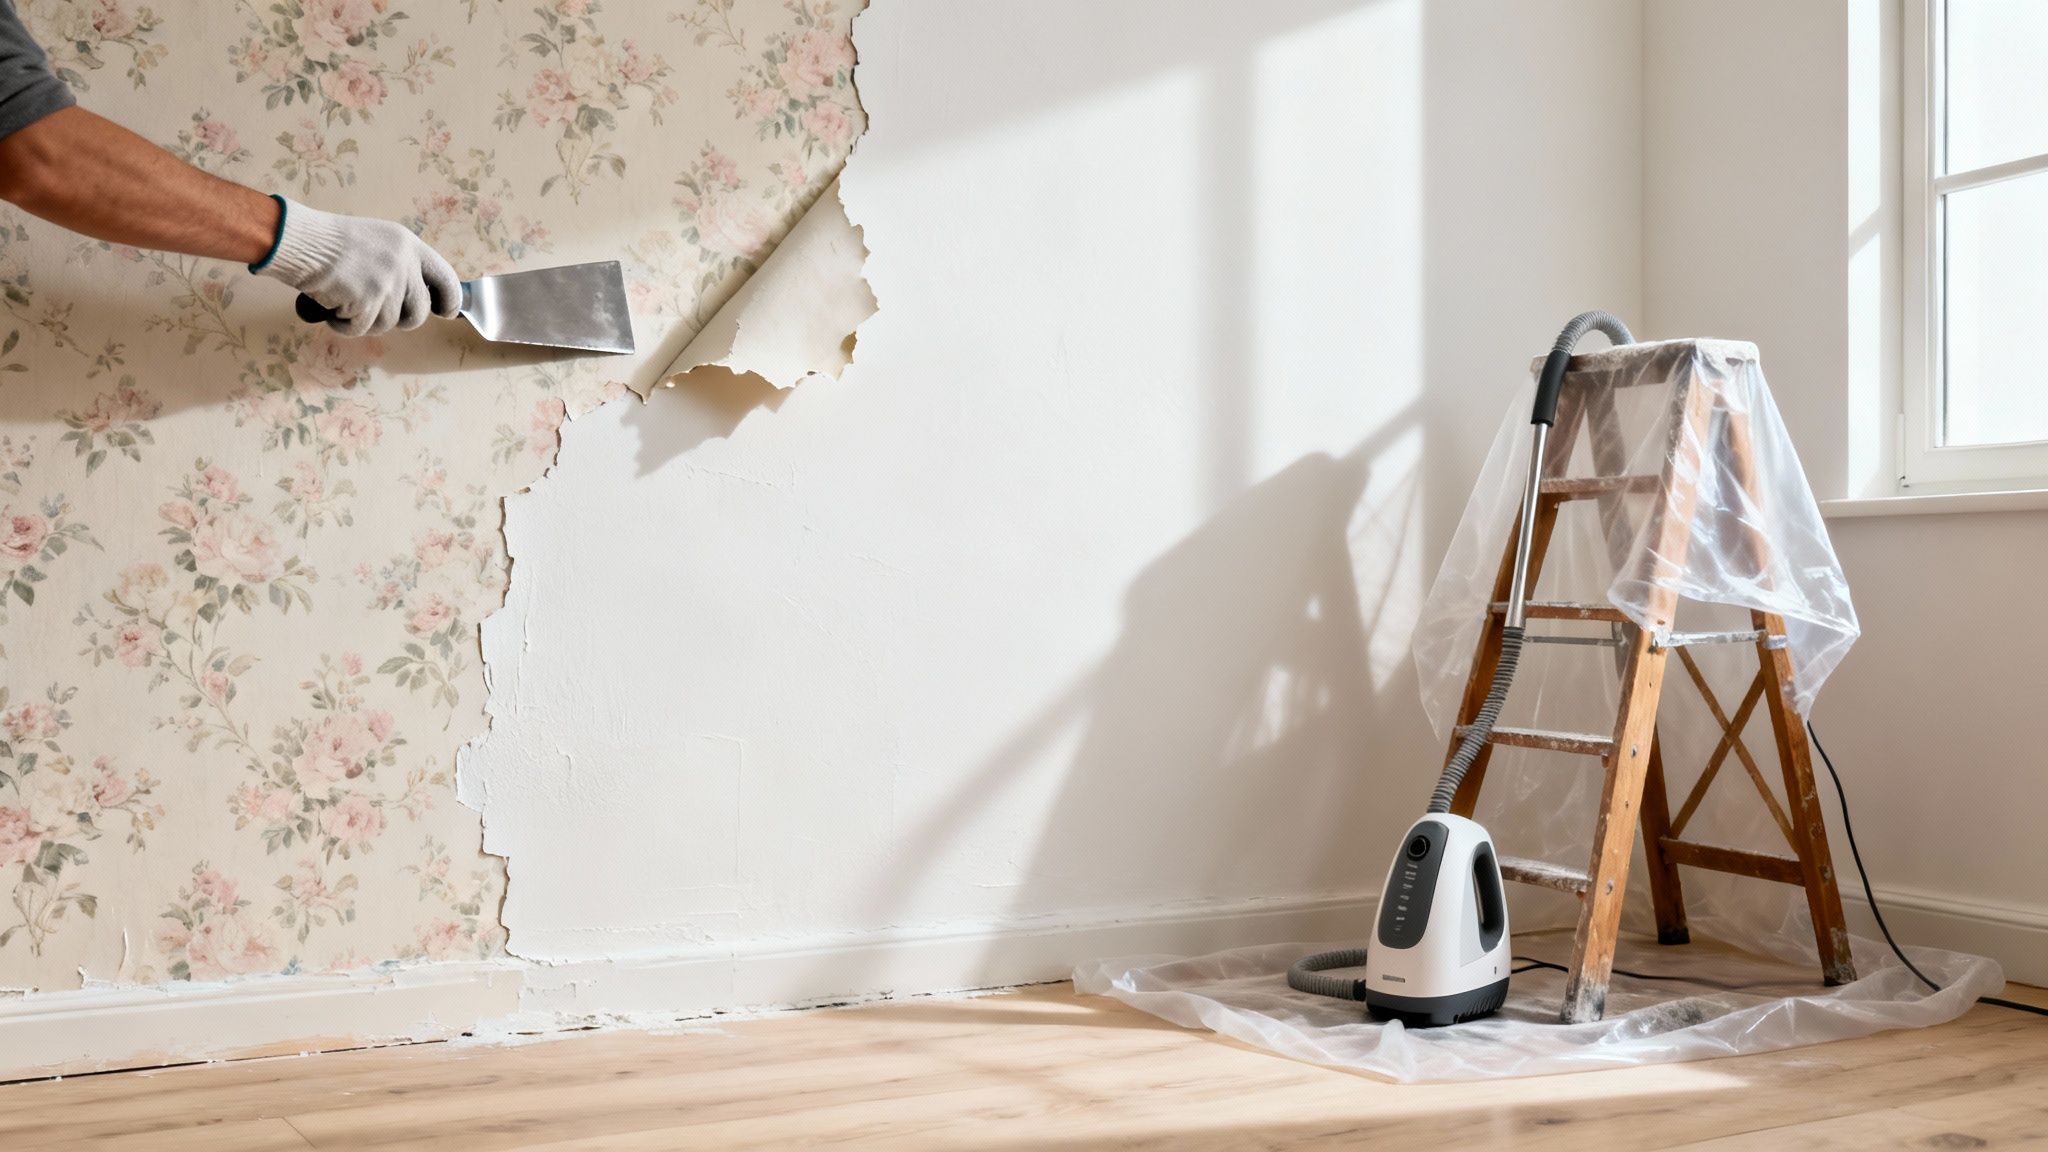
Getting Your Furniture Ready for a Flawless Paint Job
This is where the magic really starts, and it happens long before you even think about dipping a brush into a pot of paint. I can't stress this enough: solid prep work is the absolute bedrock of a professional, long-lasting finish. Cutting corners here is the number one reason paint jobs fail, resulting in chips, peeling, and a whole lot of wasted effort.
Think of it like an artist preparing a canvas. The cleaner and smoother it is, the more beautiful the final painting will be.
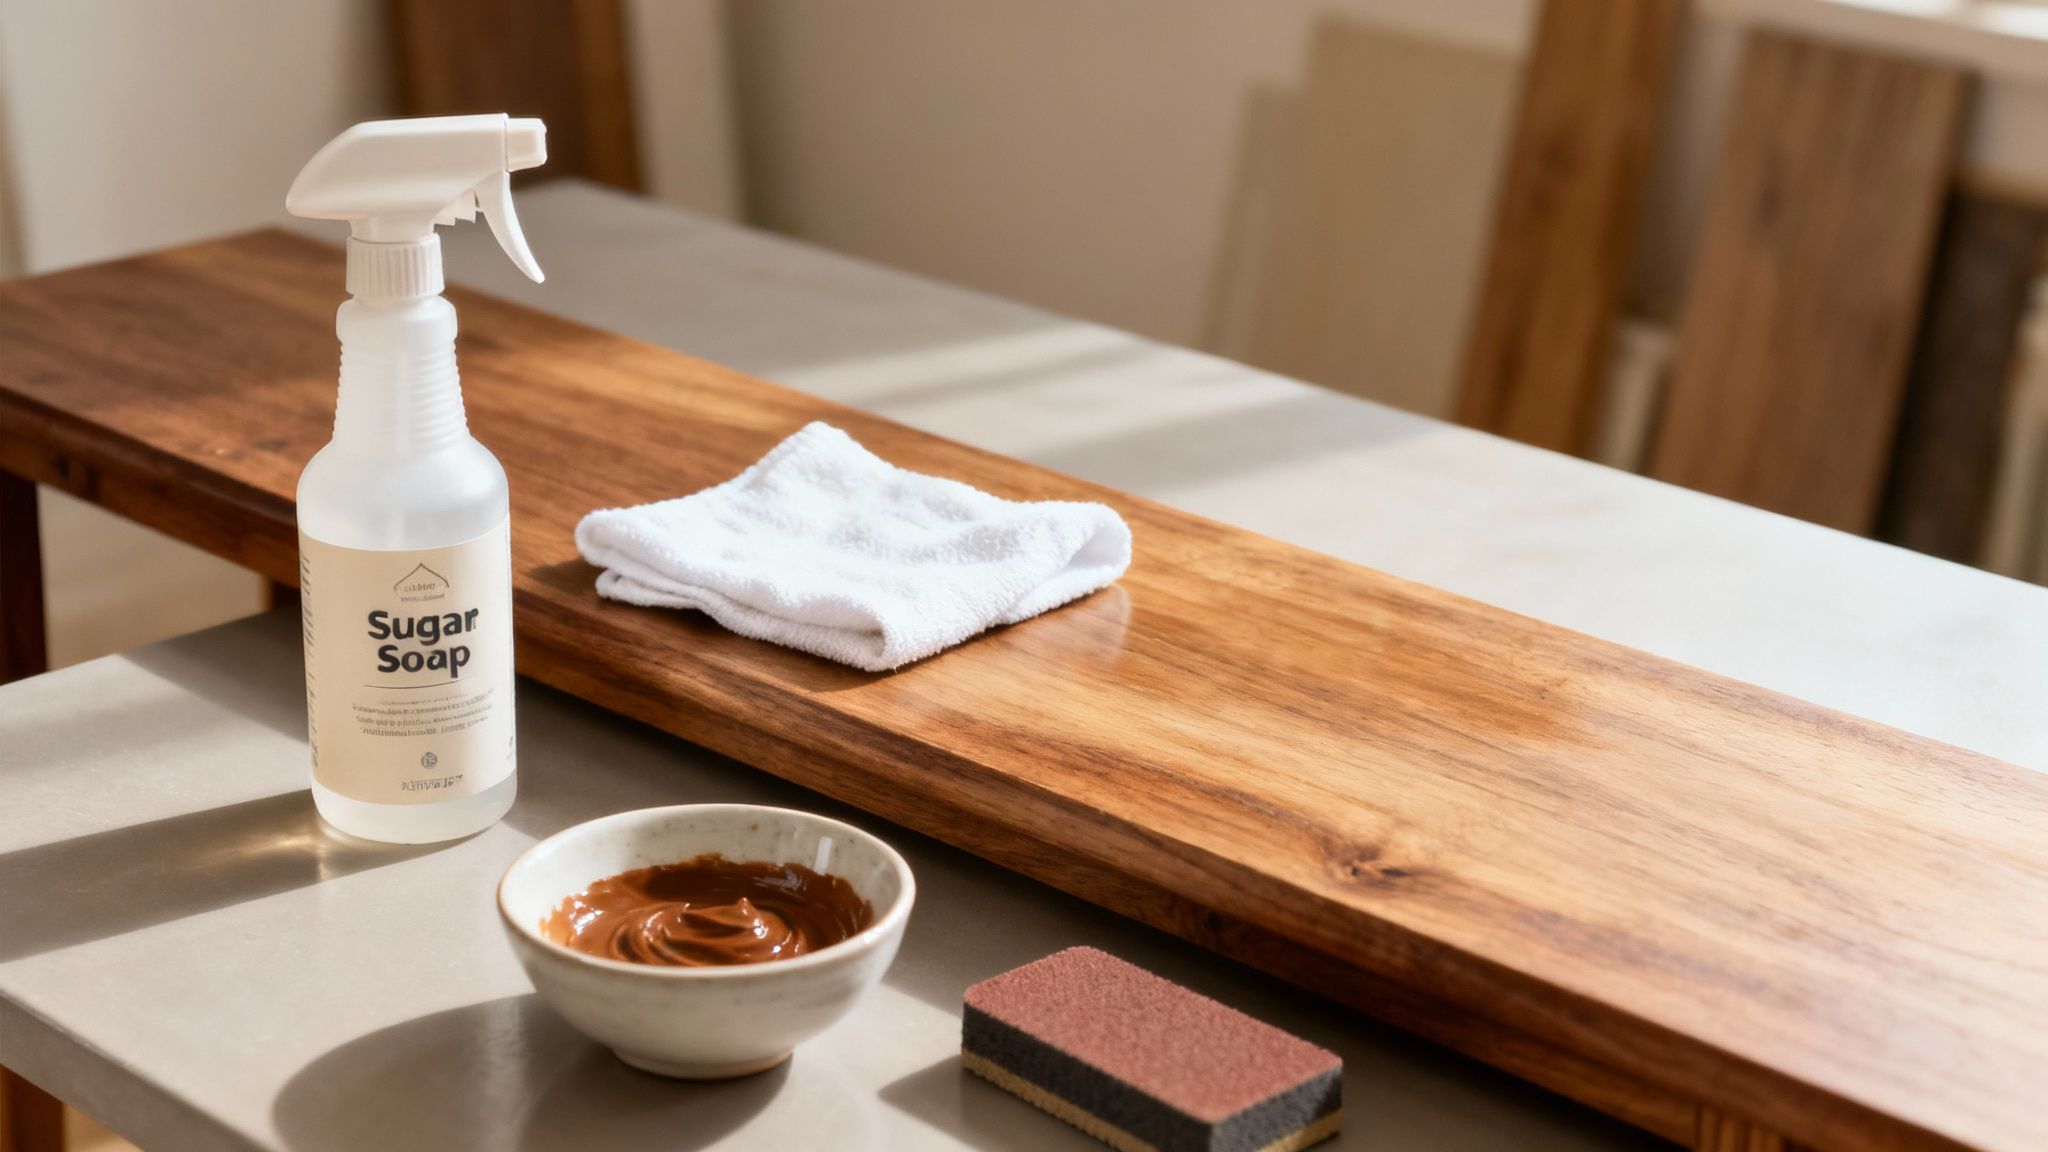
Your first job is a proper, deep clean. Furniture collects an incredible amount of grime, old polish, and oils from our hands over the years, all of which will stop your new paint from sticking properly. A quick wipe isn't going to cut it. Grab a good sugar soap solution and a scouring pad to really get into it. This will slice through all that build-up and leave you with a squeaky clean surface.
Making Repairs and Creating a Smooth Surface
Once your piece is sparkling clean and completely dry, it’s time for a close inspection. Most pre-loved furniture comes with a bit of history – a few dents, some deep scratches, or holes from old knobs and handles. This is where a good quality wood filler becomes your best friend.
Using a flexible putty knife, press a small amount of filler into any dings or holes. It's a good idea to overfill it slightly, as most fillers shrink a little as they dry. When it's rock hard (always check the instructions on the tin), you can sand it perfectly flush with the wood around it. Done right, the repair will be totally invisible under the paint.
A flawless paint finish is entirely dependent on what lies beneath. Taking the time to properly fill and sand away imperfections is what separates an amateur paint job from a professional one.
With all the repairs sorted, you're onto the most critical step of all: sanding. Now, we're not trying to strip the whole thing back to bare wood here. The aim is simply to scuff up the surface, giving it a 'key' so the primer and paint have something to grip onto.
For most pieces that have an existing varnish or paint on them, a light once-over with 120-grit sandpaper is all you need. This quick but essential step is what ensures your paint job will stand the test of time. Afterwards, be meticulous and wipe down every last particle of dust with a tack cloth to get a perfectly clean base.
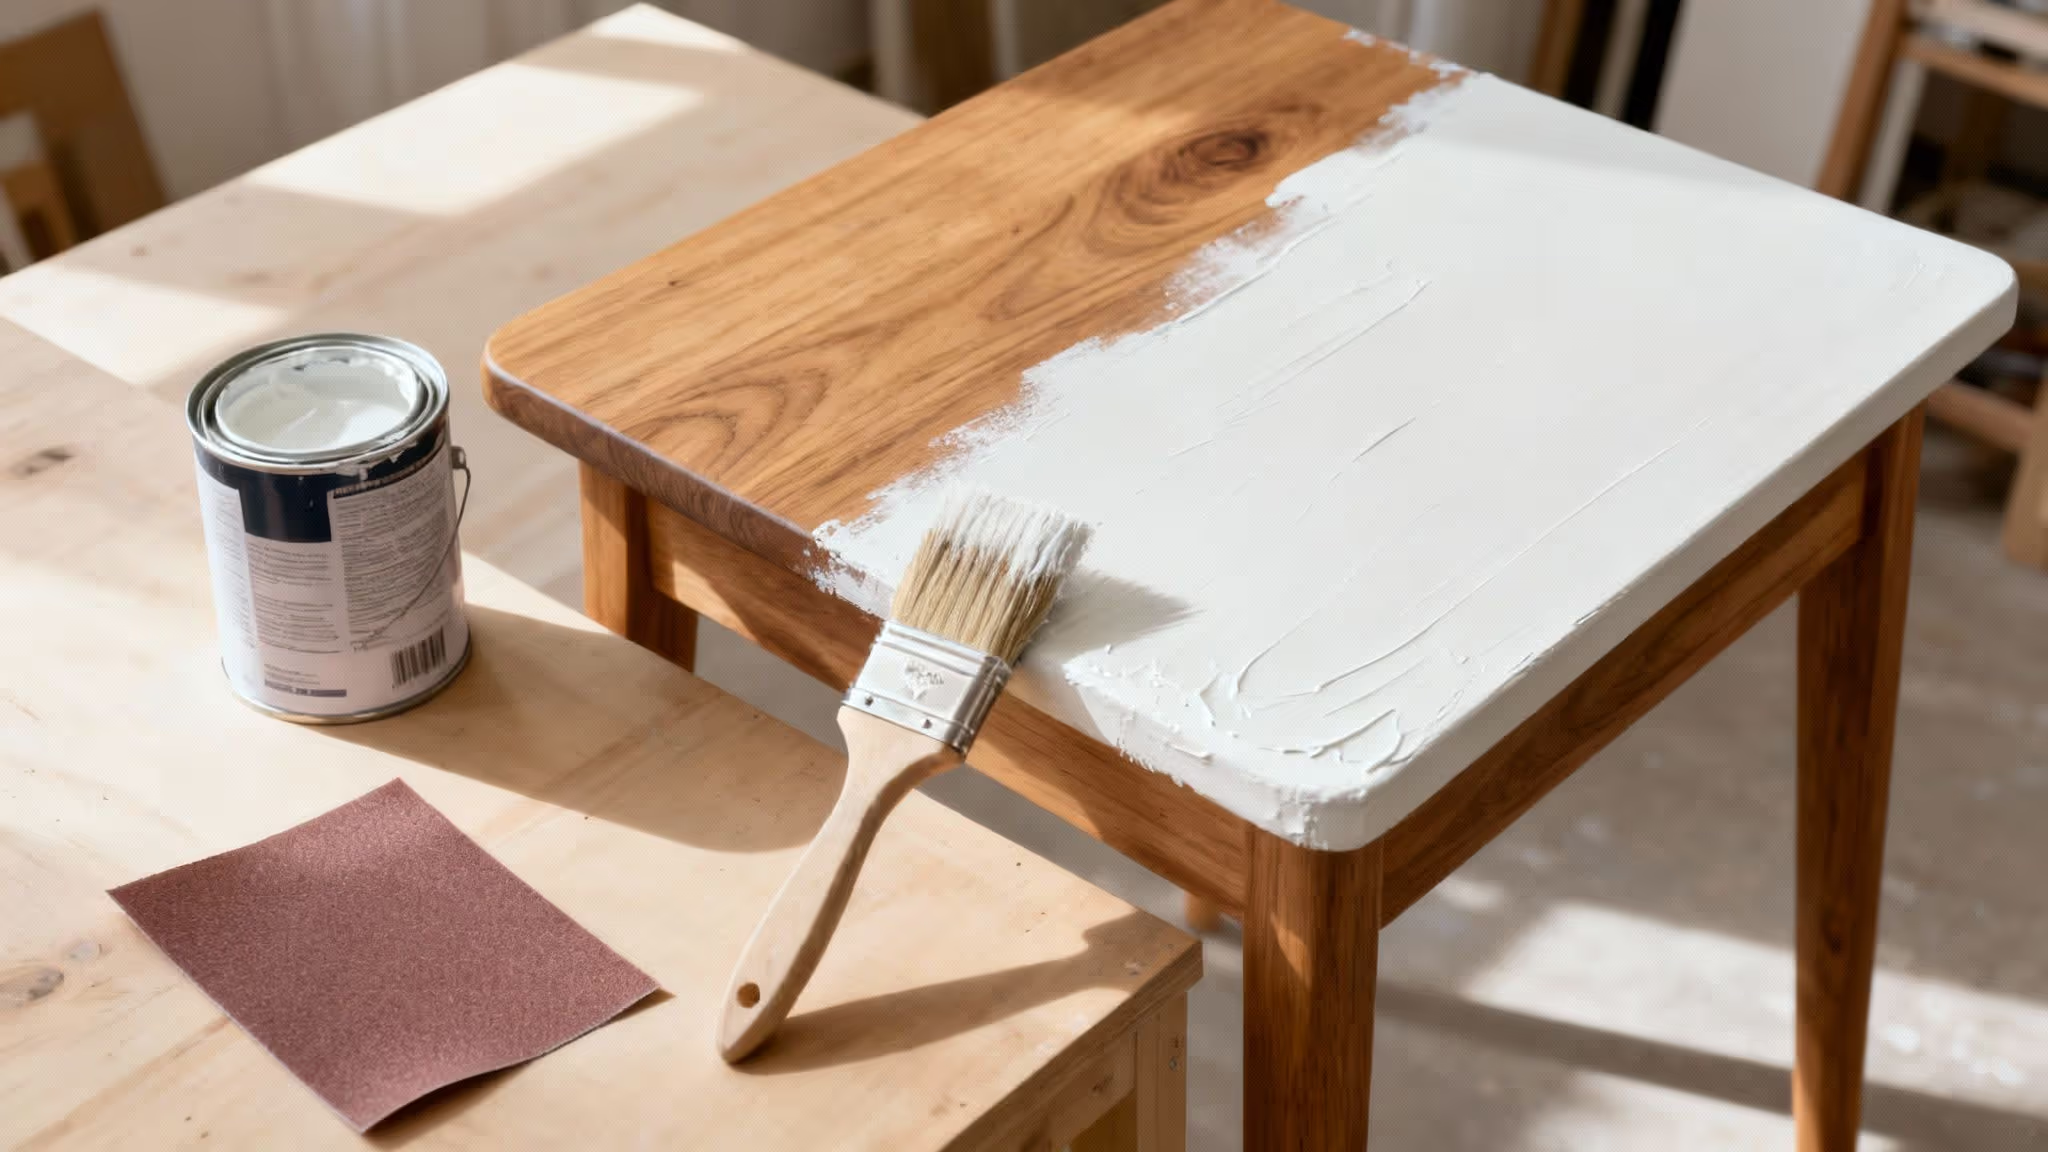
How to Apply Primer and Paint Like a Pro
Now that the sanding dust is gone, you’re left with a perfectly prepped, blank canvas. This is the fun part, where the real transformation happens and a bit of good technique will give you that flawless, professional finish you're after.
Your Essential First Step: Primer
Don't be tempted to skip the primer. It’s not just an extra layer of paint; it’s the essential foundation that grips the wood and ensures your final colour looks even and vibrant. Without it, you're risking a patchy finish or, even worse, stains from the old wood bleeding through and ruining all your hard work.
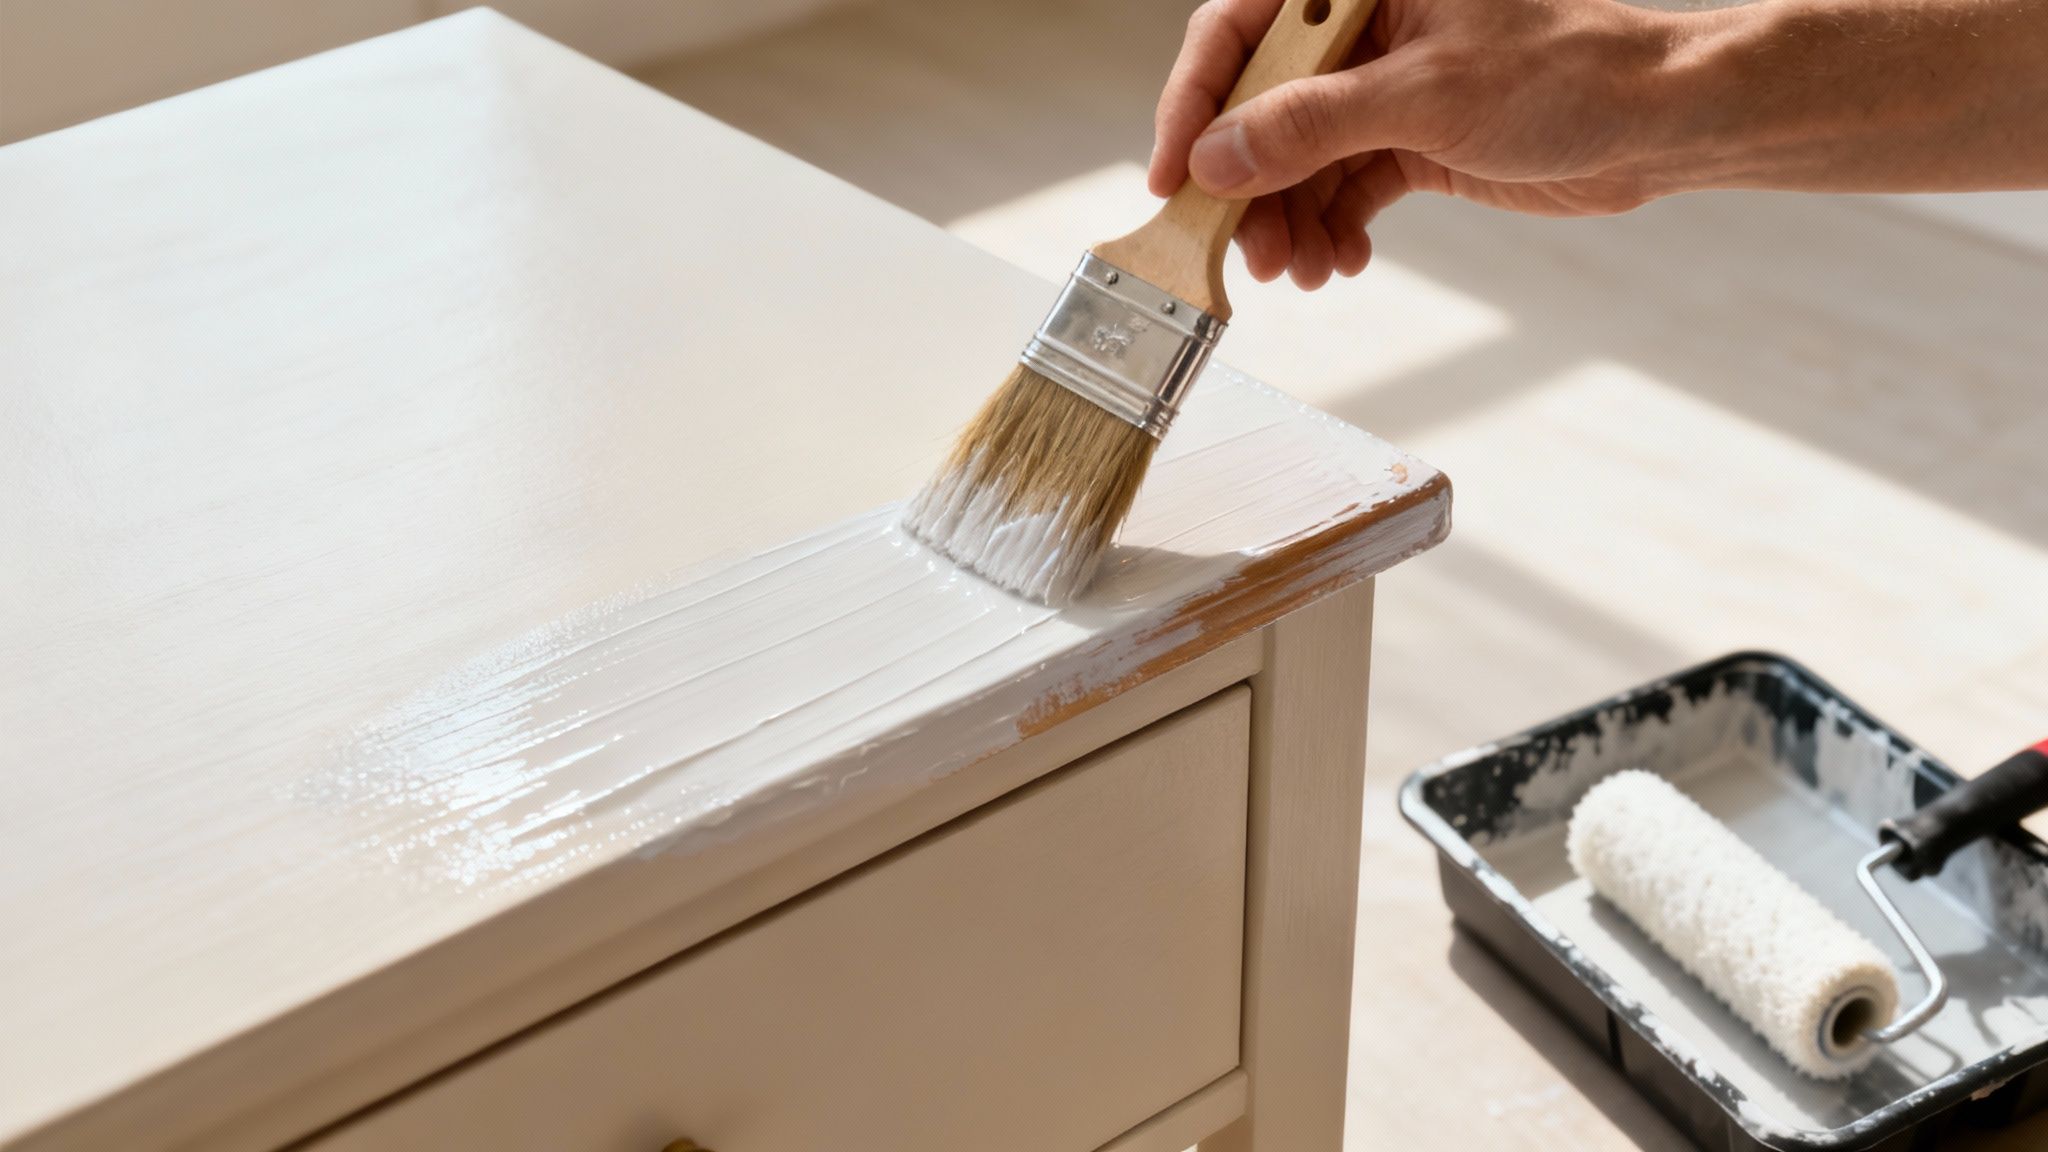
Grab a quality brush or a small foam roller and apply a thin, even coat of primer across the entire piece. The key here is thin. Two delicate coats are always better than one thick, gloopy one.
Mastering Your Brush Strokes
Once the primer has fully dried, it’s time for the main event: the colour. The real secret to avoiding those frustrating brush marks is to always maintain a ‘wet edge’.
This just means you should always paint from the wet area you’ve just covered into the dry, unpainted section, slightly overlapping each stroke. This simple trick prevents the paint from drying at different rates, which is what causes those tell-tale lap marks.
If you’re using a brush, make sure your strokes follow the natural direction of the wood grain. For big, flat surfaces like a tabletop, a small foam roller can be a game-changer. It makes getting a super-smooth, almost spray-painted look incredibly easy.
Patience is the most underrated tool in any furniture painter's kit. Rushing between coats is the quickest way to create a tacky, uneven finish. Always respect the recommended drying times on the paint tin.
Building Up the Colour
It’s great to know that the UK has a thriving paint manufacturing industry, with around 75% of the paint sold here also made here. This gives us fantastic access to high-quality, low-VOC paints that are ideal for indoor projects. You can read more about the UK's paint industry statistics and the shift towards greener products.
Apply your first coat of paint using the same methods as the primer—go for thin, even strokes and follow the grain. Let it dry completely. You’ll probably notice the surface feels a little rough to the touch now. This is perfectly normal.
Just take a very fine-grit sandpaper (think 220-grit or higher) and give it an incredibly light sanding to smooth out any raised wood grain. Wipe away the dust with a tack cloth.
This light sanding between coats is what gives professional jobs their signature silky-smooth feel. Now you’re ready for your second coat, and maybe a third, until you have that rich, solid colour you envisioned. The type of finish also plays a big part in the final look; it's worth exploring the differences between eggshell and satin to see which one suits your project best.
Take It to the Next Level: Distressing and Advanced Finishes

With the final coat of paint dry, you could absolutely call it a day. You'll have a gorgeous, clean finish that looks brand new. But if you’re after something with a bit more soul and personality, this is where the real magic happens. Advanced finishing is what separates a nicely painted piece from a true one-of-a-kind statement.
One of the most loved techniques is distressing. The whole idea is to replicate the gentle wear and tear that beautiful old furniture gathers over a lifetime. It’s perfect for achieving that coveted rustic, shabby chic, or farmhouse vibe. A word of warning though: the secret is knowing when to stop. It's surprisingly easy to go too far.
How to Get That Perfectly Worn Look
The trick to believable distressing is to think about how a piece would age naturally. Where would hands, keys, and daily life leave their mark? You'll want to focus on the high points and edges—places like the corners of drawers, the feet of a table, or any raised carvings. These are the spots where paint would chip and thin out over the years.
Here are a couple of ways to get the look:
- Fine-Grit Sandpaper: Grab a piece of 220-grit sandpaper and lightly rub it over the edges you want to distress. Start with a very gentle touch; you can always apply more pressure to remove more paint.
- A Damp Rag: For a much softer, more blended effect, dampen a cloth and rub the paint in those same high-contact areas. This method lifts the paint more subtly than sandpaper, giving a beautifully faded appearance.
The real art of distressing lies in subtlety. You're aiming for imperfections that look like they've been earned through years of genuine use and affection, not created in an afternoon.
Adding Dimension with Wax and Dry-Brushing
Distressing is just the start. If you want to add some serious depth, a couple of other techniques work wonders. Applying a dark furniture wax, usually a deep brown or even black, is a fantastic way to make details pop. You just brush the wax into all the nooks, crannies, and carvings, then immediately wipe the excess from the flat surfaces with a clean rag. The dark wax stays put in the recesses, creating an instant look of age and depth.
Another brilliant yet simple trick is dry-brushing. Dip the very tips of your paintbrush into a contrasting colour (a lighter shade often works well). Next, and this is the important part, wipe almost all of it off onto a paper towel. Now, lightly flick the nearly-dry brush over the surface of your furniture. This deposits just a hint of colour, creating a gorgeous, textured effect. It’s techniques like these that are used to create incredible pallet wood projects, turning humble materials into something truly special.
Sealing and Curing for a Finish That Lasts
You’ve done the hard work, and your piece looks fantastic. But to keep it looking that way, you need to protect it. This final step is all about giving your furniture a durable shield against real life—spills, scuffs, and daily use.
Think carefully about how the piece will be used. A dining table in the heart of a busy family home needs a much tougher finish than a decorative console table in the hallway. This is the moment to decide if you need a true workhorse sealer or a softer, more stylistic finish.
Choosing Your Topcoat
For most furniture projects, you'll be deciding between two main options: water-based polyacrylic and furniture wax. They each have their place.
Water-Based Polyacrylic: This is your best bet for high-traffic surfaces. Think kitchen tables, coffee tables, and desks. It creates a hard, clear film that’s brilliant at resisting scratches, stains, and water rings. The best part about modern formulas is that they dry crystal clear and won't yellow over time, so the paint colour you chose is the colour you get.
Furniture Wax: I love using wax for pieces that won't see a lot of action, like a bedside table or a set of drawers in a guest room. It gives the surface a gorgeous, soft, buttery feel and a subtle, hand-rubbed sheen. It’s less protective than polyacrylic, for sure, but it’s incredibly simple to apply and even easier to touch up if you get a minor scuff down the line.
If there's one thing to take away from this stage, it's that patience is everything. The topcoat is what determines how well your hard work holds up over time. Don't rush it.
Dry Time vs. Cure Time: The Waiting Game
This is a classic rookie mistake, and it can ruin a perfectly good paint job. It's so tempting to start using your piece as soon as it feels dry to the touch, but 'dry' and 'cured' are two very different things.
Dry Time: This is just the initial phase when the water in the paint has evaporated, and the surface is no longer tacky. This usually only takes a few hours.
Cure Time: This is the real magic. It’s the much longer chemical process where the paint molecules cross-link and harden into a properly tough, durable film. This can take anywhere from 2 to 4 weeks.
During that curing period, you need to be gentle. Your furniture is still vulnerable. Avoid sliding heavy objects across the surface and always use coasters for drinks. A few weeks of careful treatment will pay off with a finish that lasts for years.
The boom in DIY projects has spurred huge growth in the home improvement world, with the global furniture paint market expected to grow at a CAGR of over 6% between 2024 and 2029. It speaks to a real desire we all have to put our own stamp on our homes, whether it's revamping a chest of drawers or finding a great deck paint idea for an outdoor space. You can find more details on the global furniture paint market trends on ResearchAndMarkets.com.
Your Top Furniture Painting Questions, Answered
Even with the best-laid plans, a few questions are bound to pop up when you're in the middle of a project. Let's tackle some of the most common stumbling blocks I hear about, so you can feel confident from start to finish.
Do I Really Have to Sand Before Painting?
Ah, the million-dollar question. I get it, sanding feels like a chore, but skipping it is a mistake I see all too often. For almost any piece of furniture that has an existing finish—whether it's varnish, lacquer, or old paint—sanding is non-negotiable.
Think of it this way: you're not trying to strip the piece back to its original state. You’re just giving the surface a bit of 'tooth'. A quick once-over with medium-grit sandpaper creates microscopic scratches that give your primer something to really bite into. This is your number one defence against chipping and peeling down the line. The only time you might get away with it is if you're using a chalk-style paint on a completely raw, unfinished wood piece. Even then, a light scuff will give you a far better result.
What Is the Best Paint for Wood Furniture in the UK?
This really boils down to what the piece is and the look you’re going for. There's no single "best" paint, only the right paint for the job.
- For high-traffic items that get a lot of daily abuse, like a kitchen table or a set of dining chairs, I always recommend a modern water-based satin or eggshell. They're tough, easy to clean, and don't have the harsh smells of old oil paints.
- For that rustic, matte look, chalk paint is a brilliant entry point. It’s incredibly forgiving. The crucial thing to remember is that it must be sealed with wax or a clear lacquer to protect it from marks and stains.
- For a classic, high-gloss finish, you can't beat the durability of a traditional oil-based paint. Just be prepared for longer drying times and the need for good ventilation.
Picking the right shade is just as vital as the type of paint. If you need a little help, our guide on how to choose paint colours has plenty of inspiration.
How Can I Avoid Brush Strokes?
Getting that perfectly smooth, factory-like finish is the holy grail of furniture painting, and it all comes down to technique and tools. First off, ditch the cheap brushes. A high-quality synthetic brush will make a world of difference, holding paint better and laying it on more evenly.
The key is to apply thin coats, and don't be tempted to overload your brush. Always follow the direction of the wood grain. On your final coat, use long, gentle strokes to smooth everything out. For big, flat surfaces like a tabletop or the side of a chest of drawers, a small high-density foam roller is your secret weapon for a flawless finish.
Here's a little trick of the trade: try adding a splash of paint conditioner (sometimes called a paint extender) to your paint. It slows the drying time just enough for the paint to level itself out, making those brush marks simply melt away.
Why Is My White Paint Turning Yellow?
This is a gut-wrenching moment for any painter, but don't panic! If you're seeing yellow or pinkish stains bleeding through your beautiful new white paint, the culprit is almost always tannins.
Woods like pine, oak, and mahogany contain natural oils and resins called tannins. When you apply a water-based paint over them, the moisture can draw these tannins right up to the surface, staining your paint from behind.
The only real fix is a preventative one. You must use a proper stain-blocking primer. Don’t just grab any old primer; you need one specifically designed to seal in stains. A shellac-based or oil-based primer is your best bet here. A couple of coats will create an impenetrable barrier, locking those tannins in the wood for good and keeping your white finish crisp and clean.

.jpeg)