Wooden pallets are more than just humble shipping materials; they are a blank canvas for the resourceful DIY enthusiast. In a world increasingly focused on sustainability and unique home decor, transforming a simple pallet into a functional and stylish piece of furniture is both rewarding and remarkably cost-effective. This guide is designed to be your comprehensive resource, showing you exactly what is possible with a bit of creativity and effort. We've curated a definitive list of inspiring things to make from pallets, covering everything from sophisticated indoor furniture to practical garden solutions.
Before you can start building, however, it's crucial to understand the basics of sourcing and preparation. We'll briefly touch upon the essentials, ensuring your projects are not only beautiful but safe. This includes how to identify the right pallets for your needs, focusing on heat-treated (marked with 'HT') pallets, which are safe for home and garden use. You must always avoid chemically treated pallets (marked 'MB' for Methyl Bromide), as they are hazardous. We’ll also cover the fundamental tools you'll need, from a trusty sander for a smooth finish to a reliable drill for assembly.
This curated list goes beyond simple ideas, offering actionable insights and practical implementation details for each project. Whether you're looking to build an industrial-chic coffee table, a space-saving vertical garden, or a comfortable outdoor sofa, you'll find clear, step-by-step guidance. Our goal is to equip you with the knowledge and inspiration to turn reclaimed wood into treasured features for your home. Let's explore the incredible potential of upcycled pallets together.
1. Pallet Coffee Table
A pallet coffee table stands as one of the most iconic and achievable things to make from pallets, serving as a perfect entry point into the world of upcycled furniture. This project transforms a humble shipping pallet into a functional and stylish centrepiece for your living room. Its popularity, championed by DIY pioneers like Ana White and the vast Pinterest community, stems from its simplicity and the rustic-industrial charm it brings to any space. The basic design often involves cleaning, sanding, and stacking one or two pallets, but the customisation options are nearly endless.
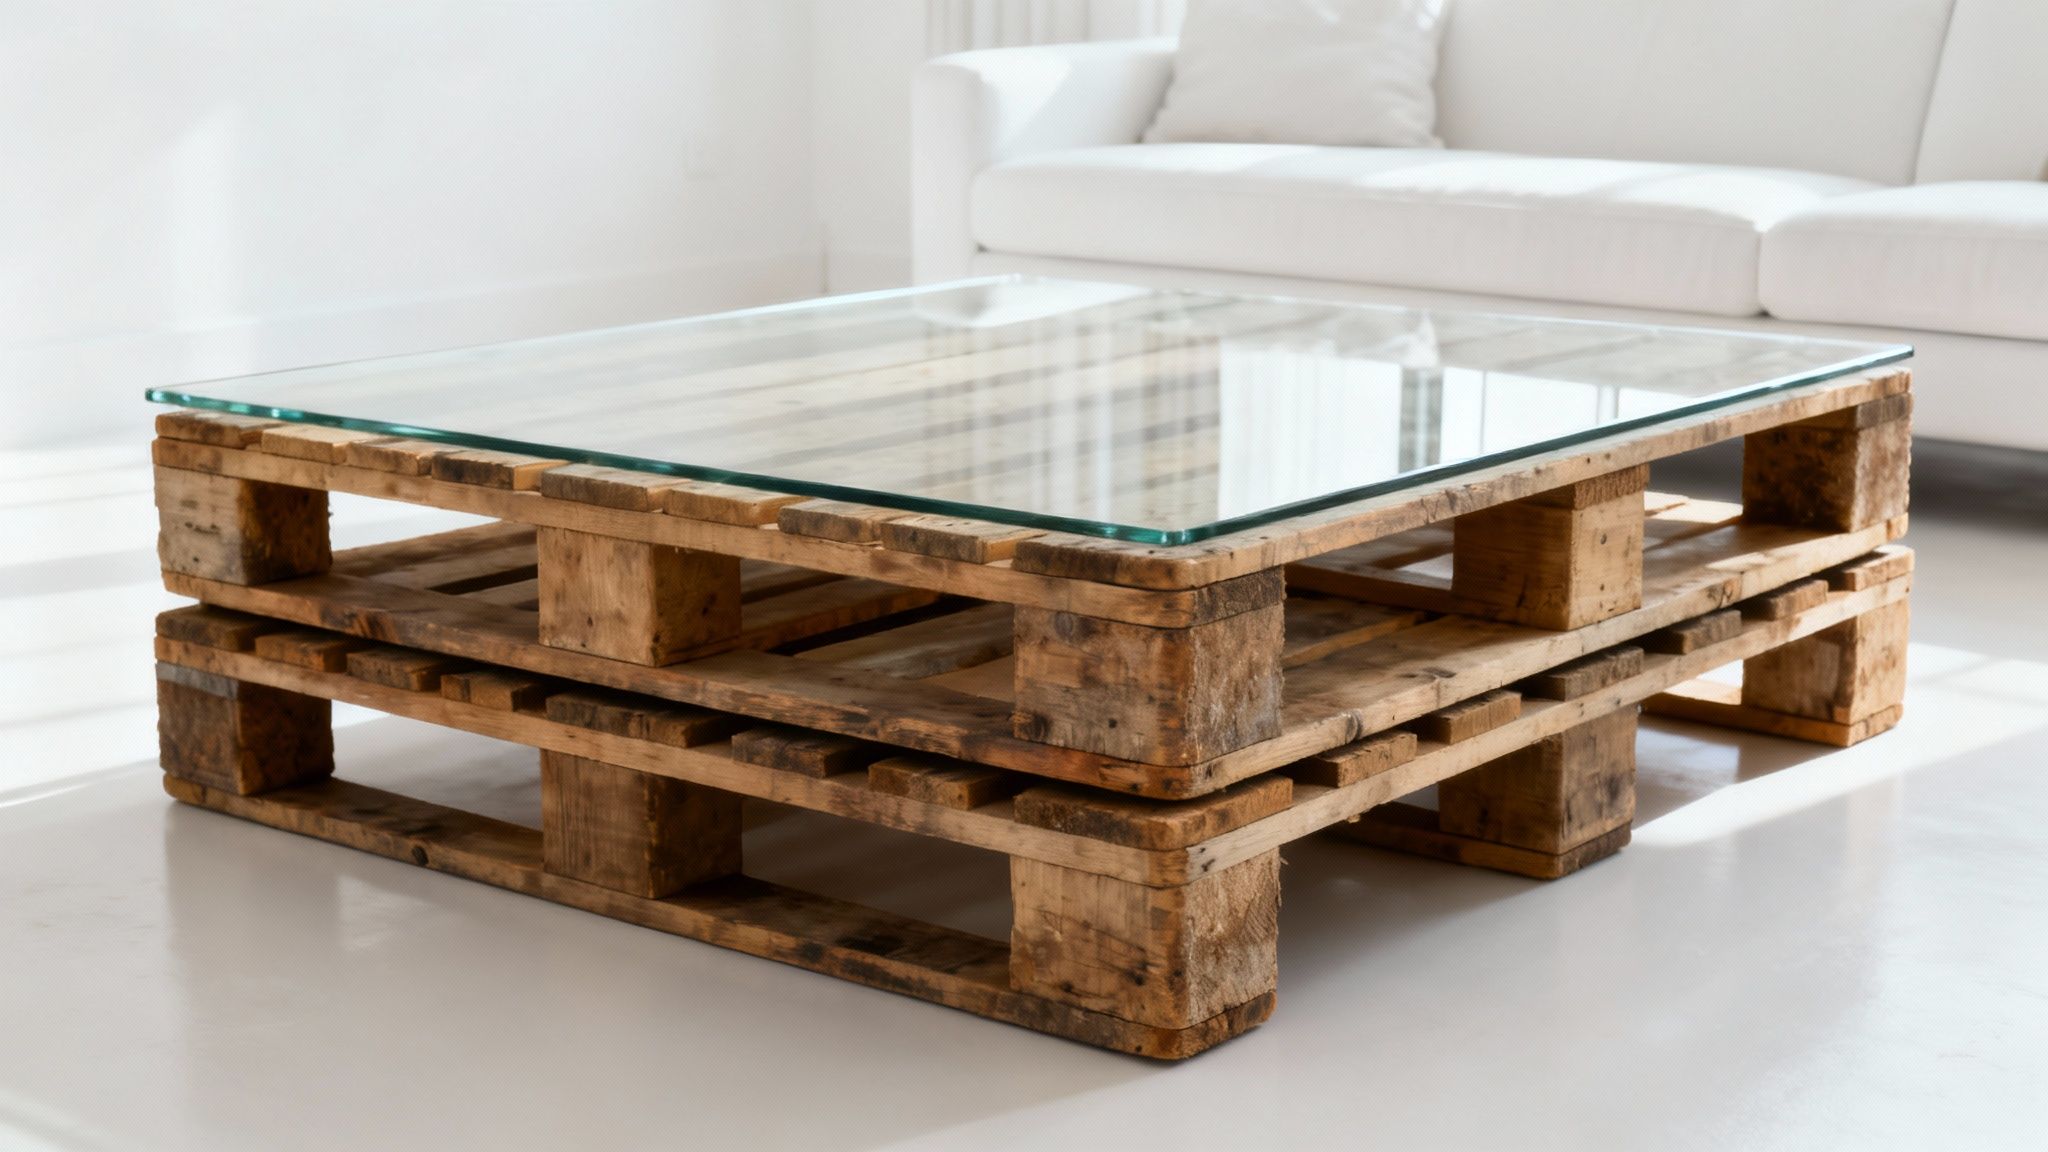
This project is ideal for anyone seeking a low-cost, high-impact piece of furniture. You can leave the wood raw for an authentic, weathered look or sand and stain it for a more polished finish that rivals high-end reclaimed wood furniture. Many successful designs, like those seen on HGTV's 'Fixer Upper', incorporate practical elements like castor wheels for mobility or a custom-cut glass top for a sleek, easy-to-clean surface.
How to Create Your Pallet Coffee Table
To ensure your project is both beautiful and safe, follow these essential steps. Proper preparation is key to transforming a rough pallet into a refined piece of furniture.
- Select the Right Pallet: Safety first. Always use pallets stamped with "HT" (heat-treated). Avoid those marked "MB" (methyl bromide), as they are treated with harsh chemicals unsuitable for indoor furniture.
- Prepare the Surface: Begin by sanding the wood thoroughly. Start with coarse 80-grit sandpaper to remove splinters and rough patches, then move to a finer 120-grit for a smooth finish.
- Assemble with Care: If you're adding legs, wheels, or stacking pallets, always pre-drill your screw holes. This simple step prevents the wood from splitting and ensures a sturdy construction.
- Protect Your Work: Apply two to three coats of a clear polyurethane or wax finish. This not only protects the wood from spills and stains but also enhances its natural grain and colour.
For those looking for more detailed instructions, you can explore a wide range of inspiring pallet wood projects online.
2. Vertical Pallet Garden
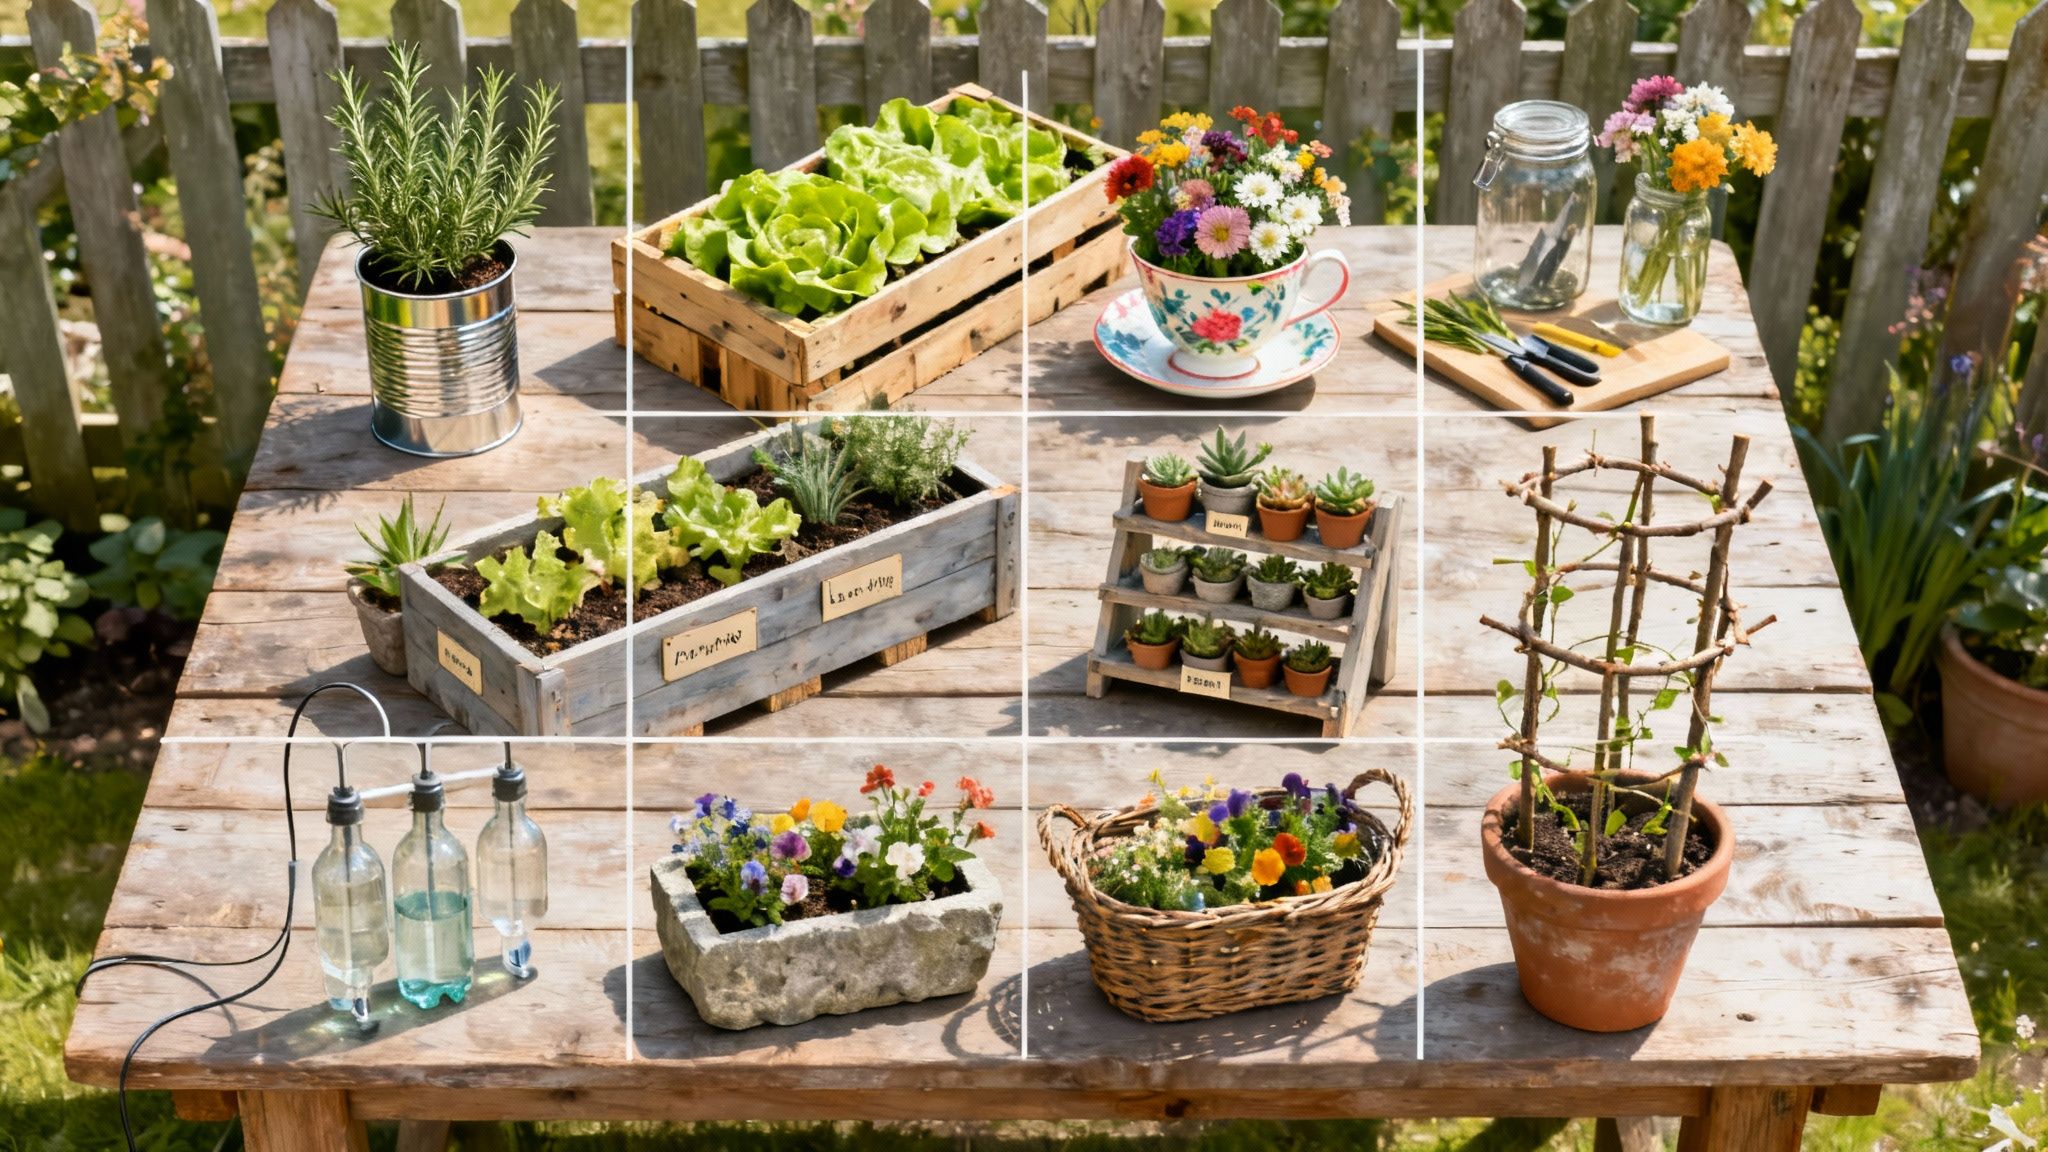
A vertical pallet garden is an ingenious solution for cultivating plants in compact areas, making it one of the most practical things to make from pallets. This project transforms a simple pallet into a space-saving, multi-tiered planter perfect for balconies, patios, or any small garden. Its rise in popularity, championed by garden innovators like Fern Richardson and landscape designer Jamie Durie, is due to its efficiency and visual appeal, allowing anyone to grow herbs, flowers, or even strawberries with a minimal footprint. The basic concept involves standing a pallet upright, lining it, and using the slats as planting pockets.
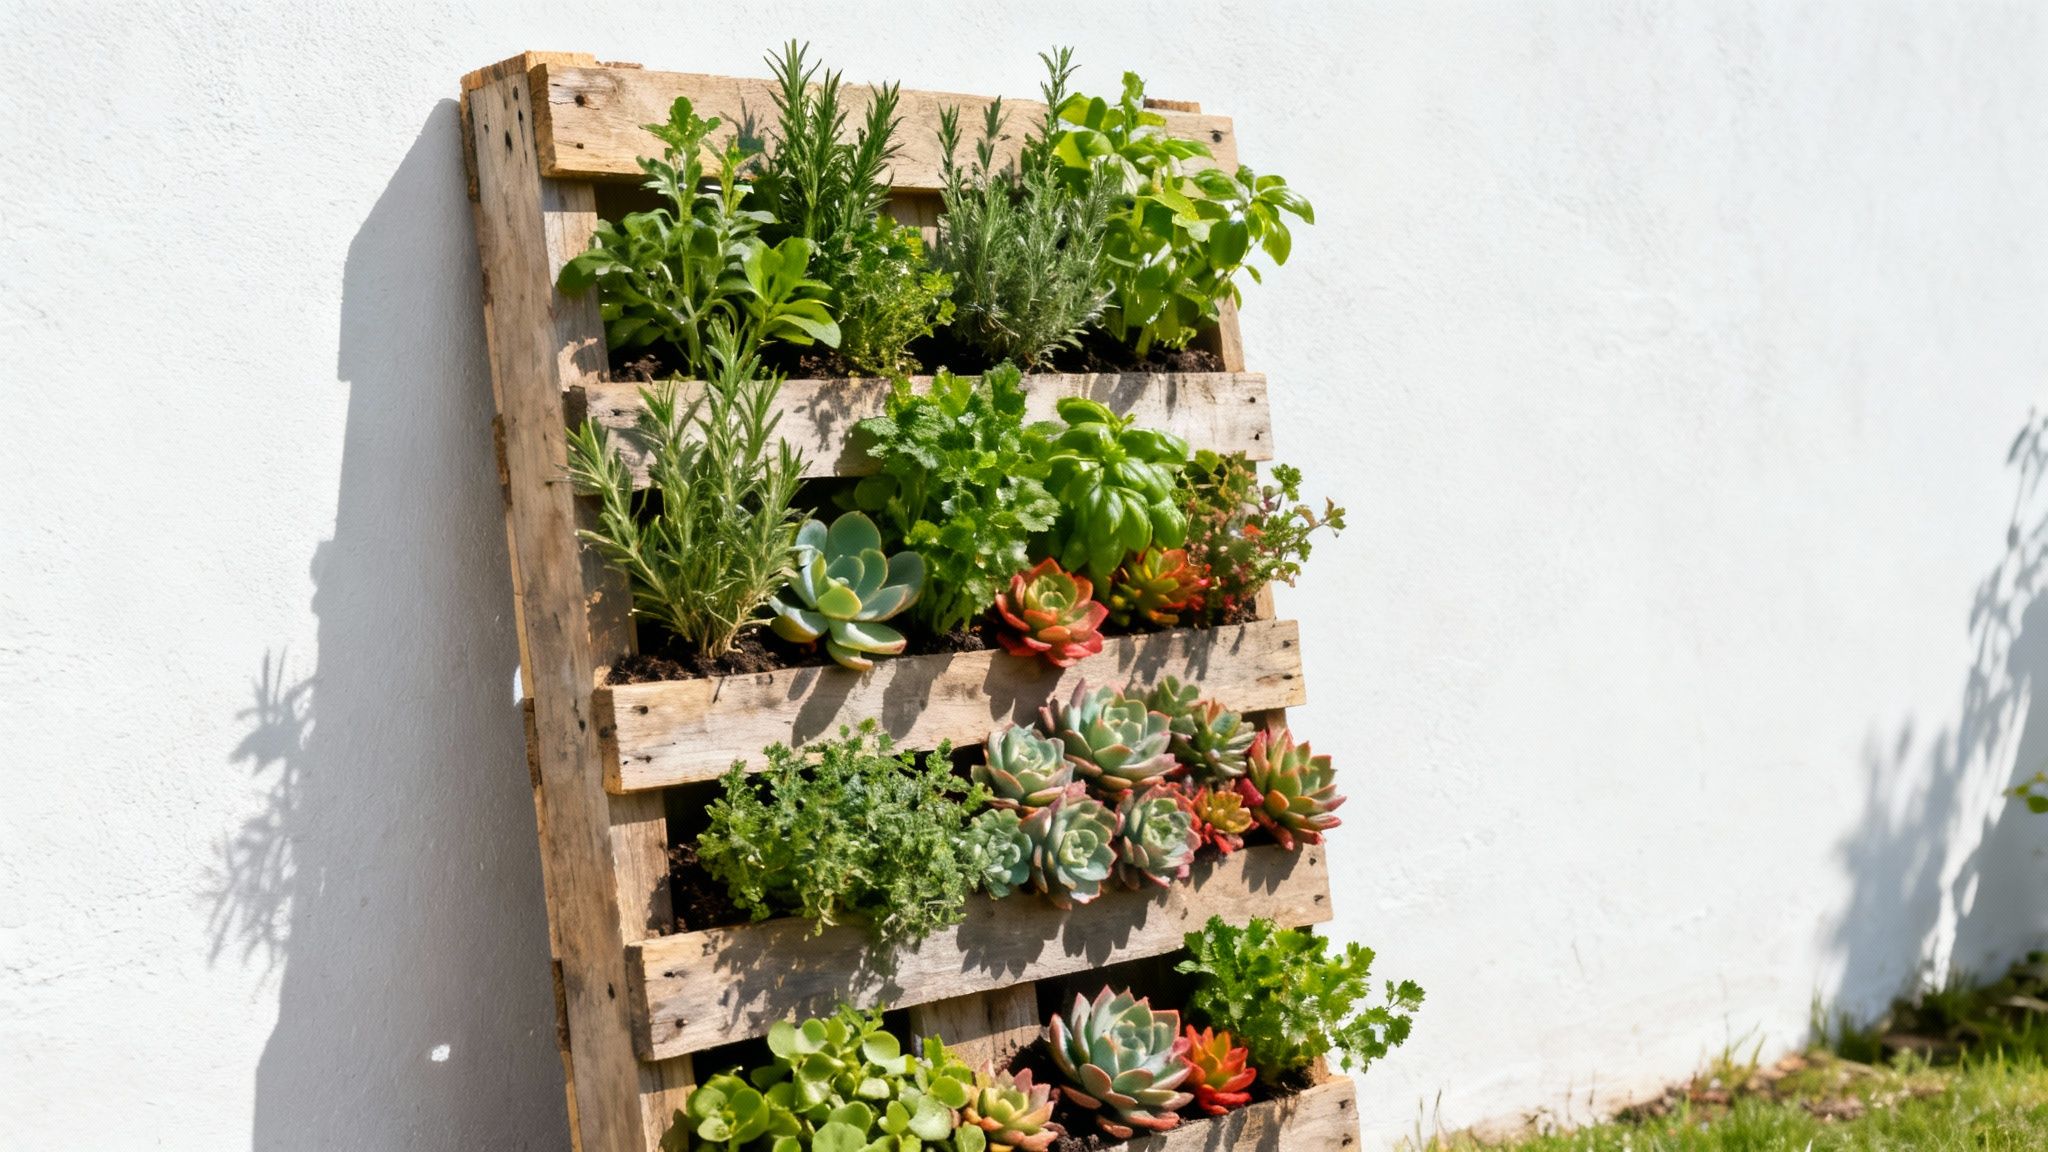
This project is ideal for urban gardeners or anyone looking to add a touch of green without sacrificing floor space. It serves as both a functional garden and a striking piece of living wall art. Successful implementations, from community greening projects by Groundwork London to rooftop farms like Brooklyn Grange, showcase its versatility. You can customise it with a coat of non-toxic paint to match your outdoor décor or leave it natural for a rustic, organic feel that beautifully complements the foliage.
How to Create Your Vertical Pallet Garden
Follow these essential steps to build a thriving and safe vertical garden. Careful preparation ensures your plants have a healthy environment to grow.
- Select the Right Pallet: Safety first. Always choose pallets marked "HT" (heat-treated), especially for growing edibles. Avoid "MB" (methyl bromide) pallets, as the chemical treatment is not suitable for gardening.
- Prepare the Planter: Staple a double layer of landscape fabric to the inside of the front, back, and bottom of the pallet, creating pockets for soil. This fabric provides excellent drainage, which is crucial for healthy plant roots.
- Plant with Patience: Lay the pallet flat and fill it with a good-quality potting soil mixed with compost. After planting, let the pallet sit horizontally for two to three weeks. This allows the plant roots to establish themselves, preventing soil from falling out when you stand it upright.
- Protect the Wood: To prolong its life, treat the wood with a non-toxic sealant like linseed oil. This protects it from moisture and rot without leaching harmful chemicals into the soil.
For those new to growing in limited spaces, you can explore helpful resources on container gardening for beginners to get started.
3. Pallet Bed Frame
A pallet bed frame is one of the more ambitious yet rewarding things to make from pallets, offering a sturdy and stylish platform for your mattress. This project elevates the rustic-chic aesthetic from the living room to the bedroom, creating an industrial or bohemian focal point. Its popularity, fuelled by features in Apartment Therapy and championed by designers like Bobby Berk of Queer Eye, lies in its blend of minimalist design, affordability, and customisable potential. The basic concept involves arranging four to six pallets to create a solid base, but it can be adapted to include headboards, under-bed lighting, or built-in storage.
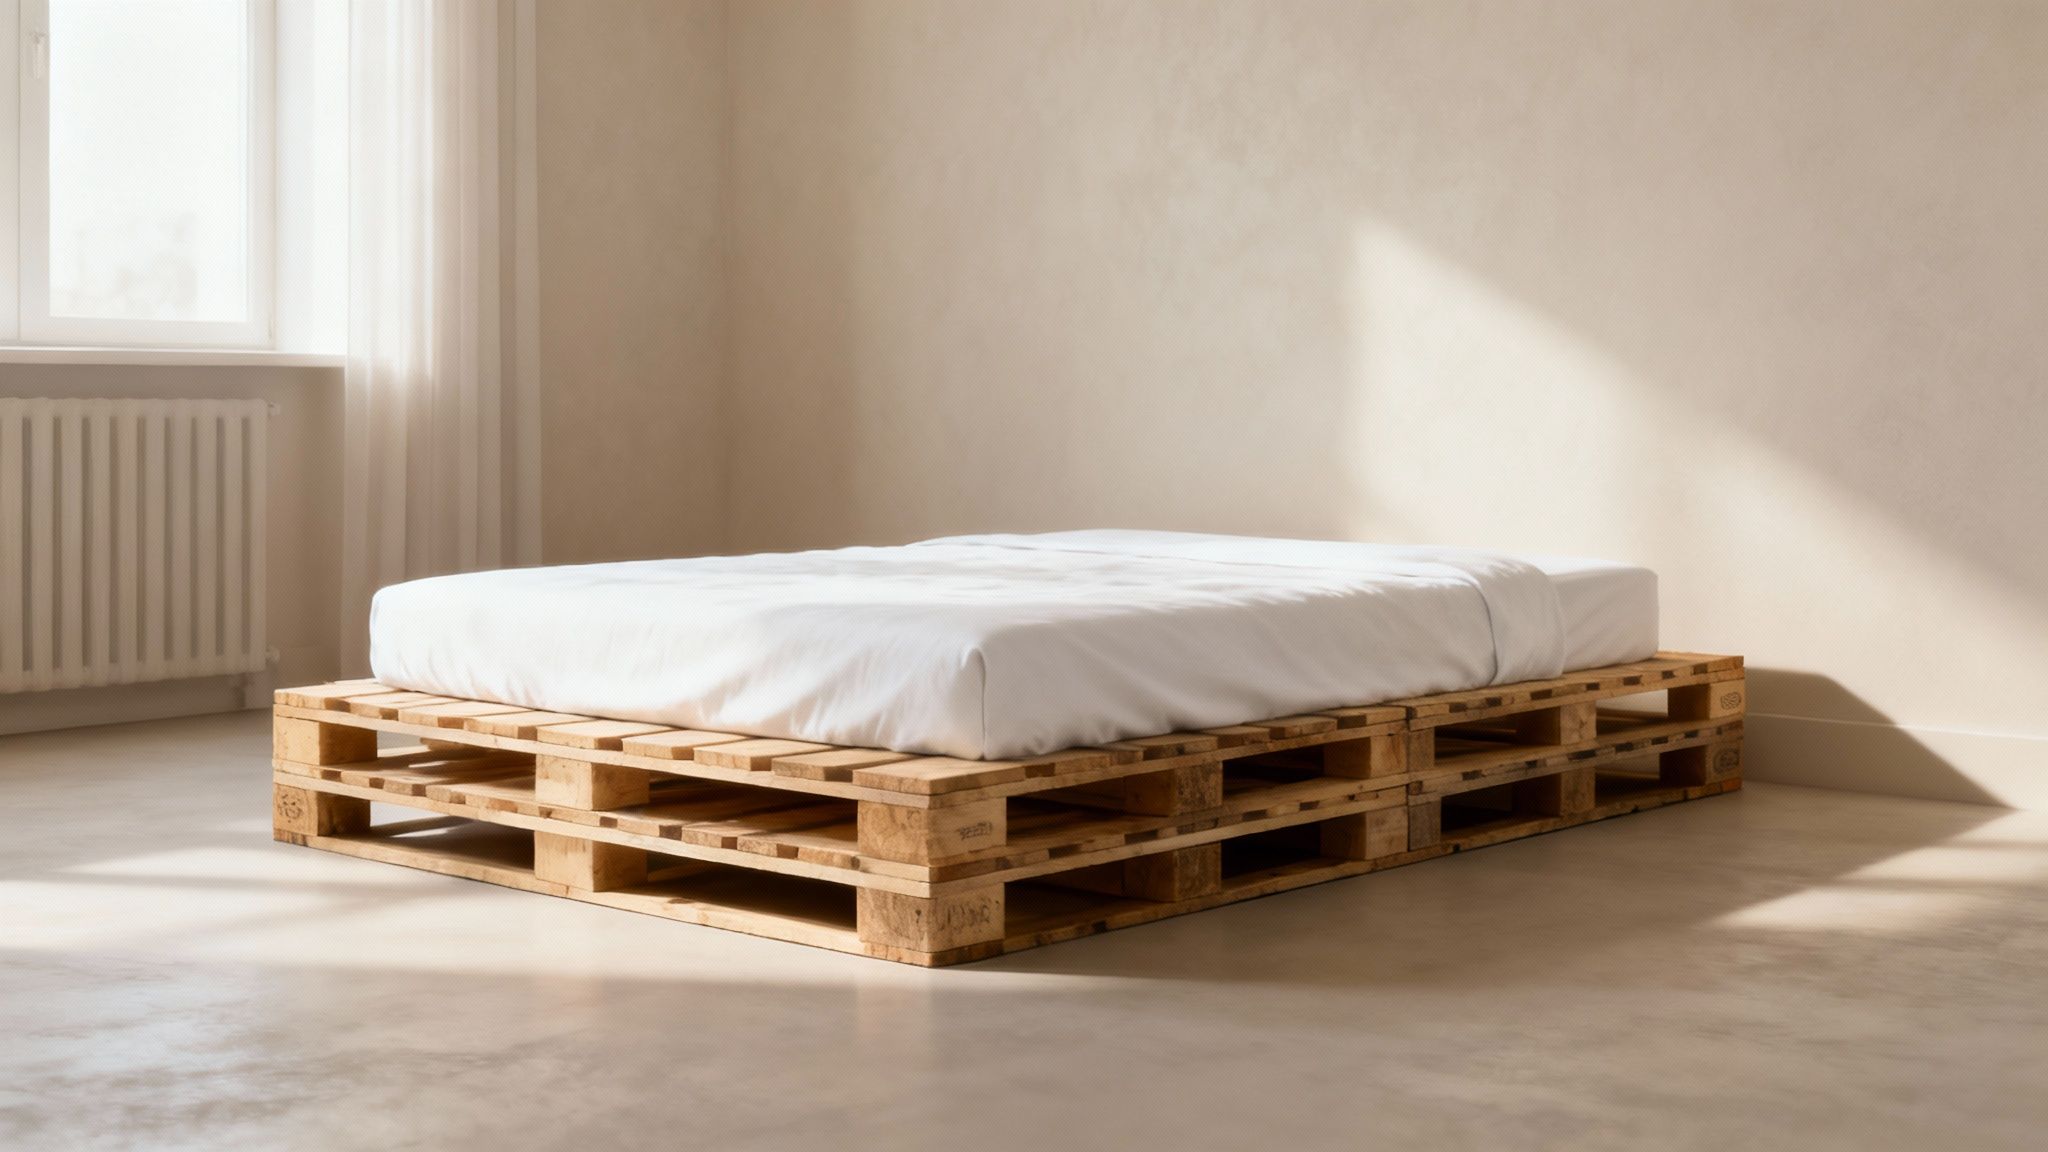
This project is perfect for anyone wanting to create a high-impact piece of furniture on a minimal budget. Its raw, reclaimed look can be left as is for a rustic vibe, or sanded and painted for a more contemporary finish, similar to high-end reclaimed wood beds seen at retailers like Pottery Barn. Iconic spaces like The Joshua Tree House, featured in Architectural Digest, have showcased how pallet-style frames can anchor a room's design with effortless cool, proving this DIY project can deliver magazine-worthy results.
How to Create Your Pallet Bed Frame
Building a safe and stable bed frame requires careful planning and execution. Follow these steps to transform shipping pallets into a dream-worthy bed.
- Select the Right Pallets: Your safety is paramount. Only use pallets stamped with "HT" (heat-treated) and avoid any marked with "MB" (methyl bromide). For a standard UK double or queen-size bed, you will typically need four pallets; for a king, six will be required. Ensure they are all the same size for a level surface.
- Prepare Meticulously: Thoroughly sand every surface, including inside the slats, to prevent splinters. Start with a coarse 80-grit sandpaper and progress to a finer 120-grit for a smooth-to-the-touch finish.
- Assemble for Stability: Arrange the pallets in your desired configuration and join them securely using L-brackets or wood screws. Pre-drilling holes is essential to prevent the wood from splitting and to ensure a robust structure.
- Seal for Safety: Apply a non-toxic, low-VOC (volatile organic compound) sealant or paint. This is especially important for bedroom furniture to ensure a healthy indoor air quality while protecting the wood.
4. Outdoor Pallet Sofa/Sectional
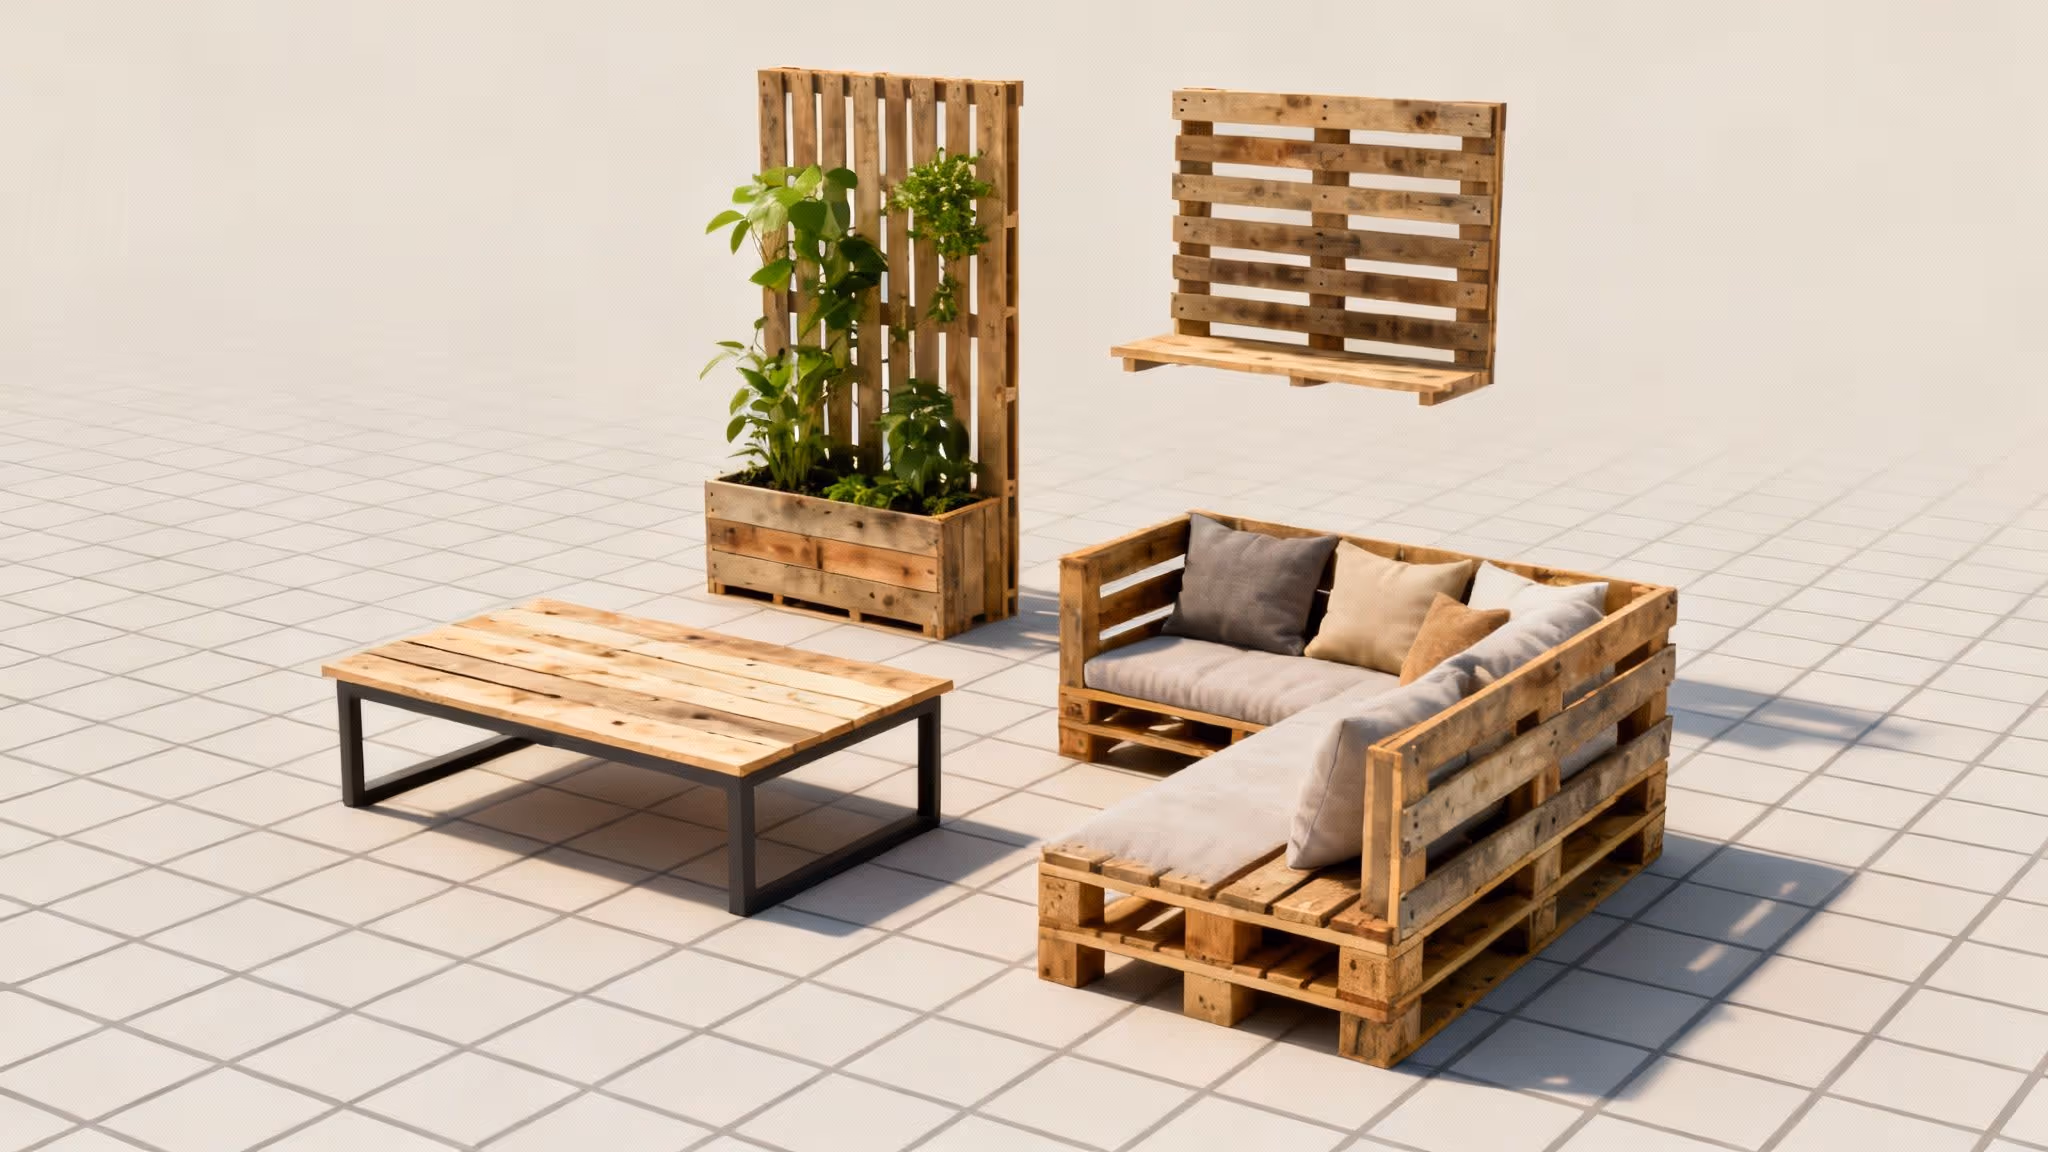
An outdoor pallet sofa or sectional transforms your garden, patio, or deck into a stylish and comfortable retreat. This project is a fantastic example of large-scale things to make from pallets, offering a modular and highly customisable outdoor seating solution. The concept involves stacking and securing pallets to form a sturdy base and backrest, which can then be topped with comfortable cushions. Its popularity, boosted by creators like the Jenna Sue Design blog and the laid-back aesthetic of European beach clubs, lies in its affordability and adaptability.
This project is perfect for anyone wanting to create a bespoke outdoor lounge area without the high cost of conventional garden furniture. You can easily configure the pallets into a simple loveseat, a full-sized sofa, or a sprawling L-shaped sectional to perfectly fit your space. Successful designs, often seen in high-end festival VIP areas or coastal-themed restaurants, prove that with the right finish and styling, pallet furniture can look incredibly chic and inviting.
How to Create Your Outdoor Pallet Sofa
Building a durable and comfortable outdoor sofa requires careful planning and assembly. Follow these key steps to ensure a fantastic result that withstands the elements.
- Choose Suitable Pallets: Safety and durability are vital. Select clean, sturdy "HT" (heat-treated) pallets. Avoid any with signs of rot, mould, or chemical spills, especially since they will be used outdoors.
- Prepare and Protect the Wood: Sand the pallets thoroughly, starting with a coarse grit to remove splinters and finishing with a finer grit for smoothness. Apply a quality marine-grade sealant or an exterior-grade stain to protect the wood from rain, sun, and temperature changes.
- Assemble for Comfort and Stability: Stack two or three pallets for your base to achieve a comfortable seating height. When attaching the backrest pallet, angle it back slightly (10-15 degrees) for a more relaxed lounging position. Secure all sections together using 3-inch deck screws and L-brackets for extra reinforcement.
- Add Finishing Touches: To prevent scratches on your decking, attach furniture glides to the bottom of your pallet base. You can also fasten a pre-cut sheet of plywood over the top slats to create a smooth, even surface for your cushions.
5. Pallet Wine Rack
A pallet wine rack is an exceptionally clever and stylish way to store and display your wine collection, making it one of the most popular things to make from pallets. This project brilliantly repurposes a section of a pallet into a functional piece of art for your kitchen, dining room, or bar area. Its appeal, popularised by DIY creators like The Sorry Girls and blogs such as Shanty 2 Chic, lies in its fusion of rustic charm and practical design. The natural gaps between the pallet's deck boards create perfect cradles for wine bottles, while the top surface can be adapted to hold glasses upside down.
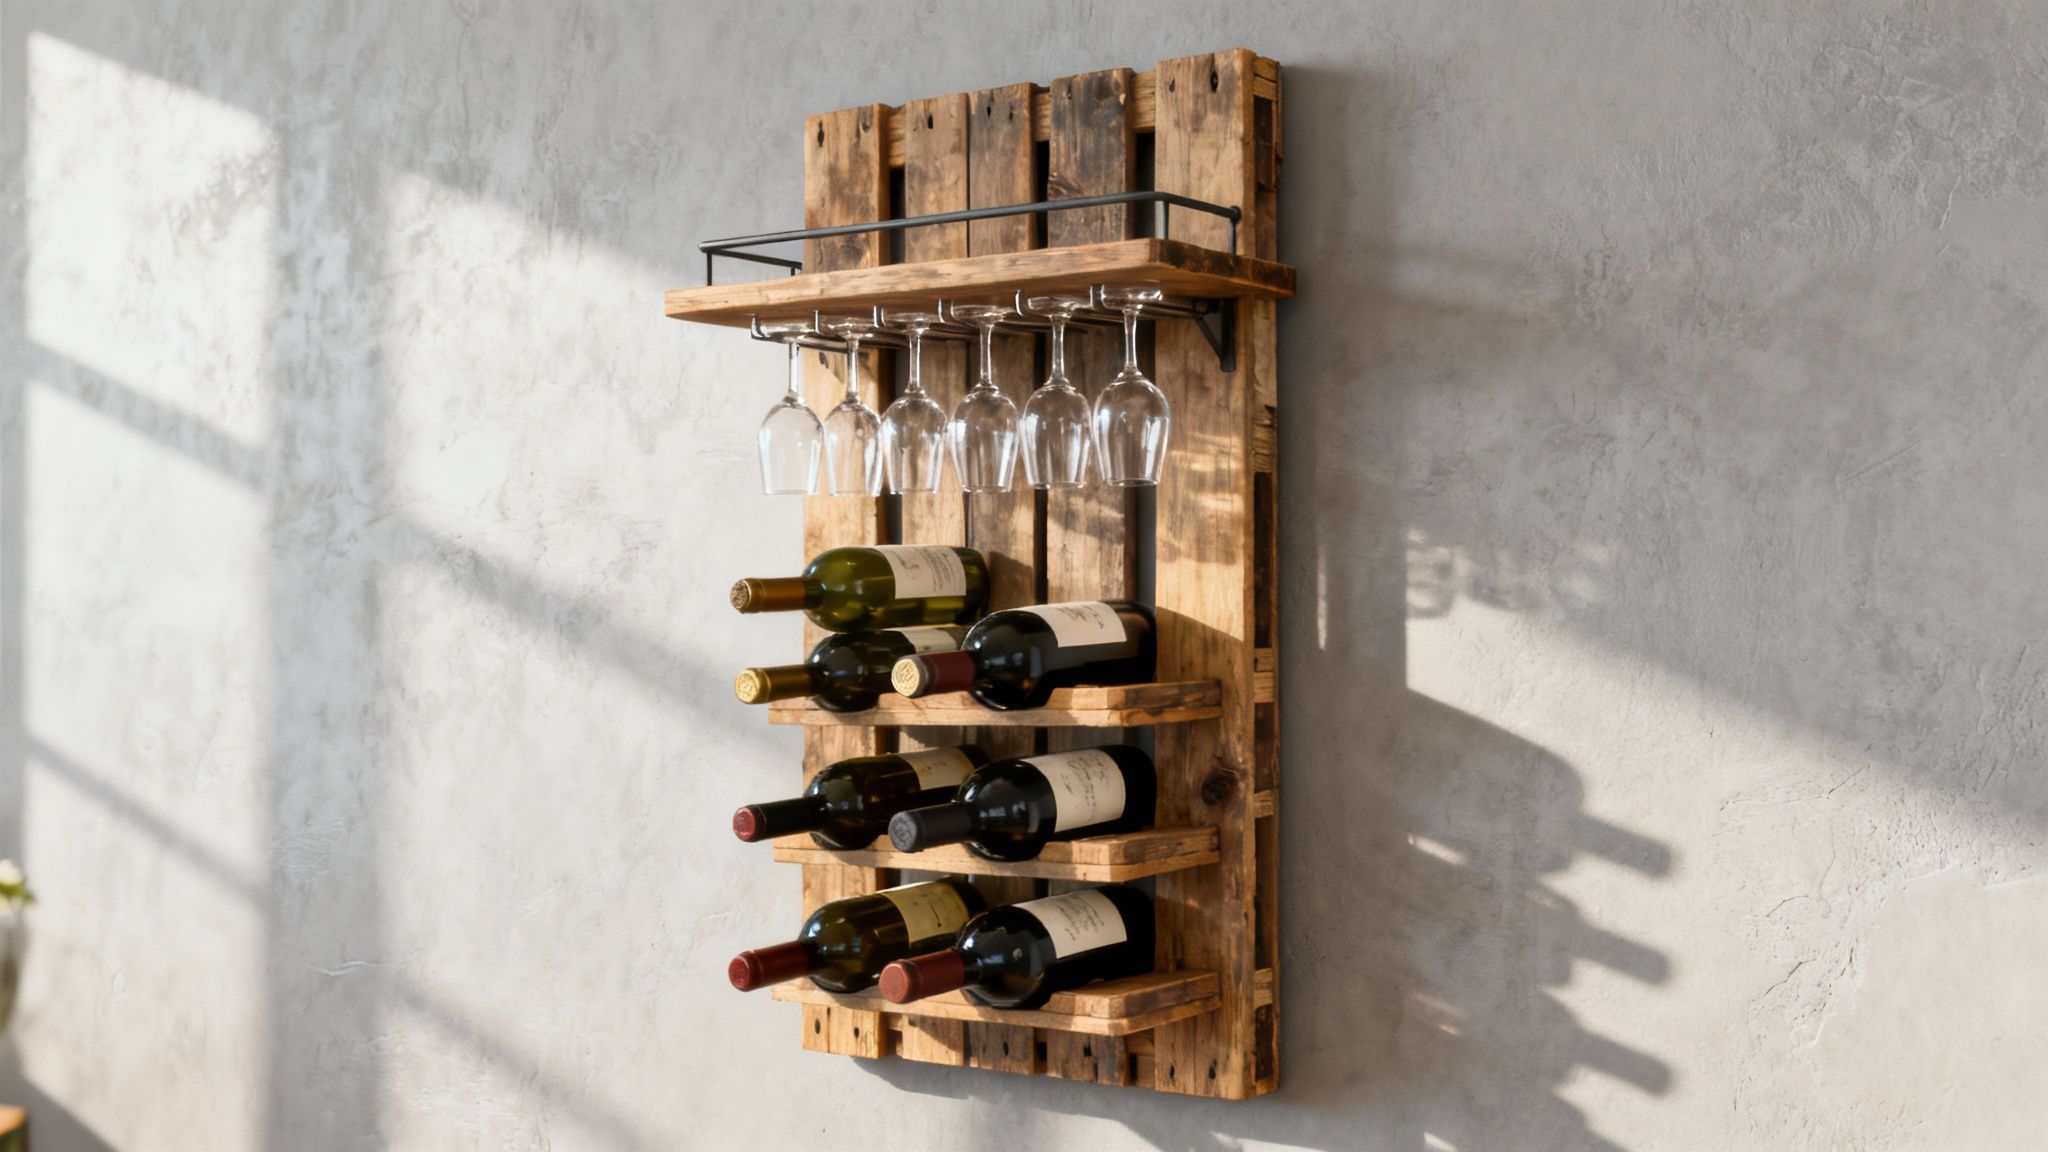
This project is ideal for wine enthusiasts who want a custom storage solution without a hefty price tag. You can stain the wood in deep, rich colours reminiscent of wine barrels or paint it to match your home's decor. The design's versatility is evident in high-end retail, where pieces like Pottery Barn's 'Holman Entertaining Shelves' echo the same functional, rustic aesthetic. Whether mounted vertically to save space or horizontally for a different visual effect, it transforms a simple pallet into a sophisticated statement piece.
How to Create Your Pallet Wine Rack
Careful construction and finishing are vital to create a wine rack that is both secure and elegant. Follow these steps for a professional-quality result.
- Choose the Right Pallet: Select a heat-treated ("HT") pallet with closer slat spacing. This ensures your wine bottles, which typically have a diameter of around 3 inches, will be held securely without slipping through.
- Sand and Prepare: Thoroughly sand every surface, paying special attention to the areas where bottles and labels will make contact. A smooth finish prevents scratches on your wine labels and reduces the risk of splinters.
- Mount Securely: This is a critical safety step. Use heavy-duty wall anchors and screws rated for at least 25 kg (50+ lbs) to mount your rack. Always locate and drill directly into wall studs to support the combined weight of the wood and a full load of wine.
- Apply a Protective Finish: Seal the wood with a clear polyurethane. This not only highlights the wood's natural beauty but also protects it from potential wine drips and spills, making it easy to clean.
6. Pallet Bookshelf
A pallet bookshelf is a wonderfully creative way to turn reclaimed wood into a unique and functional storage solution for your home. This project involves either using sections of a pallet mounted directly to the wall for a rustic floating shelf effect or completely disassembling pallets to construct a more traditional, freestanding bookcase. Its appeal, highlighted by DIY creators like Jen Woodhouse and the "I Like to Make Stuff" YouTube channel, lies in its versatility and the warm, library-chic aesthetic it imparts. The natural textures and tones of the wood create a one-of-a-kind piece perfect for a home office, living room, or even a child's reading nook.
This project is ideal for anyone wanting to add character-rich, bespoke shelving without a significant cost. You can build simple ledge-style shelves to display favourite novels or construct a more elaborate, floor-to-ceiling unit that makes a bold statement. Many designs, inspired by retailers like Anthropologie and even seen in public libraries, celebrate the imperfections of the wood. Whether you leave it raw or apply a stain, a pallet bookshelf is a fantastic way to showcase your books and treasured items.
How to Create Your Pallet Bookshelf
To build a sturdy and attractive bookshelf, careful planning and precise execution are essential. These steps will help you transform rough pallet wood into a beautiful piece of furniture.
- Select the Right Pallet: Your safety is paramount. Only use pallets stamped with "HT" (heat-treated). Steer clear of any marked "MB" (methyl bromide), as this chemical treatment is not safe for indoor furniture projects.
- Prepare the Wood: Disassemble the pallet carefully to salvage the boards. For a refined look, use a table saw to create straight, even cuts. Sand all surfaces thoroughly, starting with 80-grit sandpaper and finishing with 120-grit for a smooth touch.
- Assemble with Precision: When building your shelves, create a template to ensure consistent spacing between them. Always pre-drill holes before inserting screws to prevent splitting the wood. For shelves longer than 36 inches, add a centre support to prevent sagging.
- Protect Your Creation: Apply a wood conditioner before staining to ensure an even colour absorption. Finish with two or three coats of clear polyurethane to protect the wood and highlight its natural character. If you've built a tall unit, secure it to the wall with anti-tip hardware.
Once your bookshelf is complete, you can find inspiration on how to style bookshelves to perfectly curate your display.
7. Pallet Outdoor Bar or Serving Station
A pallet outdoor bar is a transformative project that brings a bespoke, resort-like feel to any garden or patio, making it one of the most rewarding things to make from pallets. This DIY build converts humble shipping pallets into a functional and stylish hub for entertaining guests. Its widespread appeal, heavily showcased across Pinterest's outdoor living boards and DIY blogs like Fix This Build That, comes from its impressive scale and practical utility, offering a dedicated space for mixing drinks and serving food.
This project is perfect for anyone who loves hosting backyard gatherings and wants a high-impact feature without the high cost of custom outdoor furniture. The design is incredibly versatile, allowing for simple serving stations or elaborate bars with built-in coolers and shelving. Successful examples, like those seen on HGTV's 'Outdoor Living' specials, often incorporate a sturdy countertop and even an overhang for bar-stool seating, creating a professional and welcoming entertainment space.
How to Create Your Pallet Outdoor Bar
Building a sturdy and long-lasting bar requires careful planning and execution. These key steps will help you craft a safe, functional, and beautiful addition to your outdoor area.
- Choose Suitable Pallets: Safety is paramount. Only use pallets marked "HT" (heat-treated) for your build. Steer clear of any marked with "MB" (methyl bromide), as the chemicals are not safe for a surface where food and drinks will be prepared.
- Establish a Solid Base: Before you start building, ensure you have a completely level foundation. A stable base is critical for the bar's safety and structural integrity, preventing it from wobbling or tipping over.
- Protect Against the Elements: Apply several coats of a high-quality marine-grade varnish or exterior paint. This crucial step seals the wood, protecting it from moisture, rot, and UV damage, which will significantly extend its lifespan.
- Use Durable Hardware: Opt for stainless steel screws, hinges, and other hardware. Standard metals will rust when exposed to rain and humidity, leading to stains and weakened joints over time.
For more inspiration on styling your new entertainment hub, explore these creative home bar decor ideas.
8. Pallet Wall Art and Accent Walls
Creating a pallet wood accent wall is a bold and transformative project, turning a plain surface into a stunning rustic centrepiece. This idea involves using dismantled pallet planks to cover a wall, adding immense texture, warmth, and character to any room. Its rise in popularity, heavily influenced by designers like Joanna Gaines and the broader reclaimed wood trend, is due to its high-impact visual appeal at a very low cost. The natural variation in wood tones, from weathered greys to rich browns, creates a dynamic and authentic feature.
This project is perfect for adding a rustic, industrial, or farmhouse aesthetic to living rooms, bedrooms, or even commercial spaces like cafes and boutique hotels. Beyond a full wall, you can apply the same technique to create smaller pieces of wall art or a distinctive headboard. The versatility of pallet wood allows for various patterns, from simple horizontal layouts to intricate herringbone or chevron designs, making it one of the most customisable things to make from pallets.
How to Create Your Pallet Accent Wall
Proper planning and preparation are crucial for achieving a professional and lasting finish. Follow these key steps to ensure your accent wall is a success.
- Select and Prepare the Wood: Safety is paramount. Only use heat-treated (HT) pallets and carefully dismantle them to get the longest, most usable planks. Allow the wood to acclimate inside your home for at least 48 hours to prevent warping after installation.
- Plan Your Layout: Before you begin, lay your planks on the floor to arrange the different tones and textures into a pleasing pattern. This is also the time to decide if you will install the wood directly onto the wall or onto a backer board for easier future removal.
- Install Methodically: Start from one corner and work your way across the wall. Use a brad nailer for a clean, nearly invisible fastening. Carefully measure and cut planks to fit around outlets and light switches for a seamless look.
- Finish for Durability: Once all the planks are installed, apply a coat of matte polyurethane. This step is essential as it seals the wood, prevents it from shedding dust, and preserves its natural, rustic appearance without adding unwanted gloss.
For more inspiration on creating striking wall features, you can find a wealth of inspiring gallery wall ideas to complement your new wooden backdrop.
9. Pallet Swing Bed or Daybed
A pallet swing bed or daybed is a truly aspirational project that transforms a basic shipping pallet into a dreamy, suspended lounging space. This item elevates the concept of pallet upcycling from simple furniture to a statement piece, creating an idyllic retreat for a porch, garden, or beneath a sturdy tree. Its charm, heavily featured in publications like Southern Living and inspired by the coastal aesthetic of places like Charleston, lies in combining rustic materials with a sense of gentle, floating relaxation. The basic design involves reinforcing one or two pallets and suspending them securely with heavy-duty rope or chains.
This project is perfect for those looking to create a unique outdoor feature that blends comfort with eye-catching design. Topped with a custom mattress or an abundance of plush cushions, it becomes an irresistible spot for reading or napping. While more complex than other things to make from pallets, the result is a functional piece of art reminiscent of high-end porch swings seen in luxury resorts like The Cloister at Sea Island or HGTV Dream Homes, offering a bespoke sanctuary without the significant cost.
How to Create Your Pallet Swing Bed
Safety and structural integrity are paramount for this project. Following these steps ensures your daybed is a secure and lasting addition to your outdoor living space.
- Prioritise Structural Safety: This is non-negotiable. The swing must be anchored directly into ceiling joists or a substantial tree limb. If you have any doubt about the load-bearing capacity of your structure, consult a structural engineer before proceeding.
- Choose Robust Materials: Use only heat-treated (HT) pallets in excellent condition. For suspension, select marine-grade rope or galvanised chain with a weight capacity of at least 225 kg (500 lbs). Secure it using heavy-duty eye bolts drilled into the joists.
- Prepare for Comfort and Durability: Sand every wooden surface meticulously, starting with a coarse grit and finishing with a fine one, to eliminate any risk of splinters. Apply several coats of a quality weatherproof sealant to protect the wood from the elements.
- Ensure Stability and Clearance: Stacking two pallets will create a more stable and substantial base. When installing, ensure the swing is at least 45-60 cm (18-24 inches) away from any walls to prevent collisions while swaying. Test the swing's weight capacity thoroughly before regular use.
10. Pallet Shoe Rack and Entryway Organiser
A pallet shoe rack and entryway organiser is a brilliantly functional storage solution that tackles one of the most common clutter hotspots in any home. This project transforms a simple pallet into an organised hub for shoes, coats, bags, and accessories in your entryway, mudroom, or closet. Its rise in popularity, championed by DIY blogs like The Handyman's Daughter and the broader home organisation movement popularised by Marie Kondo, is due to its customisable nature and the rustic charm it adds to a home’s first impression. The design can be as simple as a standing pallet with shoes tucked into the slats or as complex as a wall-mounted system with hooks and shelves.
This project is perfect for anyone needing to maximise storage in a tight space while adding a touch of bespoke style. The open, slatted design of a pallet is naturally suited for shoe storage, allowing for excellent air circulation that helps reduce moisture and odours. Successful implementations can be seen in various settings, from yoga studios using them for patron belongings to Airbnb properties offering a welcoming, organised entryway. Many designs take inspiration from high-end systems like Pottery Barn's 'Samantha Entryway System' but deliver it at a fraction of the cost, making it an accessible yet stylish option among things to make from pallets.
How to Create Your Pallet Shoe Rack and Entryway Organiser
To build a sturdy and attractive entryway organiser, careful planning and preparation are essential. These steps will guide you in creating a piece that is both practical and safe for daily use.
- Choose a Safe Pallet: Your first priority is safety. Always select a pallet with an "HT" stamp, indicating it has been heat-treated. Steer clear of any marked "MB" (methyl bromide), as this chemical treatment is not safe for indoor furniture.
- Prepare and Clean: Give the pallet a thorough cleaning with soap and water, then allow it to dry completely. Sand the entire surface, starting with 80-grit sandpaper to remove rough spots and splinters and finishing with 120-grit for a smooth touch.
- Customise Your Design: Decide on the orientation. A vertical setup saves floor space, while a horizontal one can double as a low bench. Add double hooks for coats and bags, placing some lower for children, and consider an upper shelf for hats or decorative items.
- Apply a Protective Finish: As the rack will hold wet or muddy shoes, protection is key. Apply several coats of a waterproof sealant or polyurethane to protect the wood from moisture damage and make it easier to clean.
For a deeper dive into creating custom storage solutions, you can find a wealth of inspiration from DIY entryway organiser tutorials and home décor communities online.
10 Pallet Project Comparison Guide
From Pallet to Perfection: Your Next DIY Adventure Awaits
We've journeyed through a landscape of creative possibilities, transforming humble wooden pallets into functional and stylish pieces for every corner of your home and garden. From the rustic charm of a pallet coffee table to the space-saving ingenuity of a vertical garden, each project showcases the incredible versatility of this reclaimed material. You’ve seen how simple slats of wood can be re-imagined into everything from a statement bed frame and a sophisticated wine rack to a complete outdoor sectional sofa perfect for summer entertaining.
The common thread weaving through all these ideas is the immense satisfaction that comes from creating something beautiful with your own hands. This is more than just budget-friendly furniture; it is a powerful exercise in sustainability and personal expression. By choosing to upcycle, you are not only diverting waste from landfill but also crafting items with a unique history and character that simply cannot be bought in a flat-pack box. These things to make from pallets become a testament to your creativity and resourcefulness.
Key Takeaways for Your Pallet Projects
Before you head out to find your first pallet, let’s reinforce the core principles that will ensure your project is a resounding success. Mastering these fundamentals is the key to moving from a basic DIY-er to a confident creator of bespoke home furnishings.
- Safety First, Always: The most critical step is sourcing the right pallet. Always look for the "HT" stamp, indicating it has been heat-treated, not chemically treated with MB (Methyl Bromide). Avoid any pallets that are stained, oily, or show signs of spills, as you don't know what they once carried.
- Preparation is Paramount: Do not underestimate the power of sanding. A thoroughly sanded surface is the difference between a rough, splinter-prone piece and a smooth, professional-looking one. Start with a coarse-grit sandpaper to remove imperfections and finish with a fine-grit for a polished feel.
- The Finish Makes the Piece: The final coat of paint, stain, or sealant is what protects your creation and integrates it into your décor. For indoor items, a simple wax or varnish might suffice. For anything destined for the garden, a durable outdoor-specific sealant is non-negotiable to protect against moisture and rot.
Your Actionable Next Steps
Feeling inspired? It’s time to transition from reading to doing. The journey from a discarded pallet to a piece of treasured furniture begins with a single, simple action. Here is your roadmap to getting started on your very first project.
- Select Your Project: Revisit the list and choose one project that genuinely excites you and fits your current skill level. A wine rack or bookshelf is a fantastic starting point for beginners, while a pallet bed or outdoor sofa offers a rewarding challenge for those more experienced.
- Source Your Materials: Begin your hunt for a clean, HT-stamped pallet. Check with local businesses like garden centres, hardware shops, or small independent retailers who may be happy to give them away for free.
- Gather Your Tools: Create a checklist of necessary tools and supplies. Besides the pallet, you’ll likely need a pry bar, hammer, drill, screws, sandpaper, and your chosen finishing products. Having everything organised beforehand makes the process much smoother.
- Embrace Personalisation: As you build, think about how you can make the project uniquely yours. Could you use a bold paint colour? Add industrial-style caster wheels to your coffee table? Stencil a pattern onto your wall art? This is your opportunity to let your personality shine through.
The potential locked within a simple wooden pallet is limited only by your imagination. Each plank and nail represents an opportunity to create, to learn, and to enhance your living space in a meaningful way. So, roll up your sleeves, embrace the process, and get ready to turn that humble pallet into your next masterpiece. Your perfect DIY adventure is waiting.